Textmaker viewer latest version 2010
Содержание:
4.15 Extending the editor’s functionality with scripts
- Scripts must be written in javascript (qtscript).
- Script files must have the .tms extension.
- Available functions :
- TM.text : returns all the text
- TM.cursorPosition : returns the current position of the cursor
- TM.selection : returns the selected text
- TM.selectionStart : returns the position of the selection start
- TM.selectionLength : returns the length of the selected text
- TM.selectRange(start,length) : puts the cursor at the start position from the beginning of the document, and then selects as much text as indicated by the length parameter.
- TM.insertText(string) : inserts string at the current position (and replace selected text by the string if some text is selected)
- Public methods of the QPlainTextEdit object are also available.
- to use TexWorks scripts, the TW.target prefix must be replaced by TM. .
- script files can be located everywhere (the last used directory will be stored in the texmaker configuration file).
4.3 Bibliographie
Lors de l’ouverture d’un document .tex, les fichiers .bib détectés sont automatiquement parcourus et les références bibliographiques sont ajoutées à l’auto-complétion. Les références bibliographiques peuvent être réinitialisées via l’option «Rafraichir Bibliographie» du menu «Edition».
Texmaker facilite la rédaction d’un fichier de bibliographie (au format standard .bib) grâce au menu «Bibliographie». Un clic sur un item de ce menu insère directement le code standard associé à ce style de bibliographie. Les commandes optionnelles signalées par «OPT» sont automatiquement effacées par la commande «Clean» du menu «Bibliographie» : il faut donc effacer le «OPT» pour les conserver.
4.9 Synopsis de la commande texmaker
texmaker fichier
Avec l’option «-master» , le document chargé sera automatiquement défini comme document «maître».
Avec l’option «-line xx» , Texmaker demandera s’il doit aller à la ligne xx après avoir chargé le document.
Avec l’option «-insert foo», une commande latex (foo) peut être insérée par un programme externe dans le document courant pendant que Texmaker est en cours d’exécution.
Avec l’option «-n» une autre instance de Texmaker est lancée (cassera la synchronisation avec les afficheurs pdf).
Avec l’option «-dpiscale x» la valeur x sera affecté à la variable d’environnement QT_SCALE_FACTOR avant que l’interface soit construite (même comportement qu’ajouter «export QT_SCALE_FACTOR=x» aux variables d’environnement). A utiliser pour ajuster l’affichage en fonction de son écran.
2.12 Insertion de formules mathématiques
Le passage en mode mathématique (en ligne) se fait avec le bouton «$$» de la barre d’outils «Math» ou grâce au raccourci-clavier Ctrl+Alt+M. Pour le mode hors-ligne, on peut utiliser la commande «$$…$$» du menu «Math» ou le raccourci-clavier Alt+Shift+M.
La barre d’outils mathématiques permet aussi d’insérer d’un seul clic les formes mathématiques les plus courantes (fraction, racine…).
Les panneaux de symboles mathématiques situés à gauche permettent d’insérer d’un clic le code LaTeX de près de 400 symboles, ainsi que les balises \left et \right (cliquer sur les boutons «symboles» de la vue structure pour cela).
Option supplémentaire : Un panneau «symboles favoris» (*) permet à l’utilisateur de créer son propre panneau de symboles.
- Pour ajouter un symbole dans le panneau «symboles favoris», il suffit de faire un clic-droit sur un symbole dans les autres panneaux de symboles et de sélectionner l’option «Ajouter aux favoris» dans le menu qui s’affiche.
- Pour supprimer un symbole du panneau «symboles favoris», il suffit de faire un clic-droit dessus et de sélectionner l’option «Retirer des favoris» dans le menu qui s’affiche.
Le menu «Math» permet aussi de définir le style du texte en mode mathématique (accents, styles de caractères,espacement)
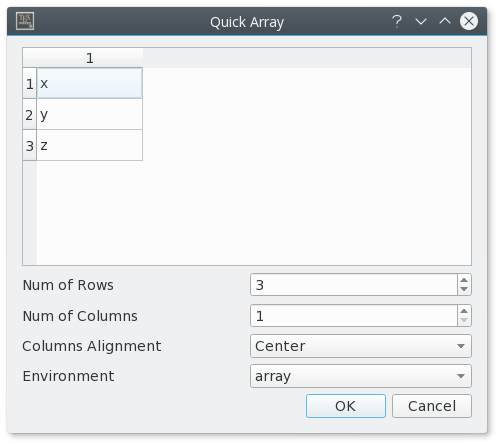
Pour les matrices, un assistant basé sur le même principe que celui pour les tableaux est disponible dans le menu «Assistants». Il permet en plus de fixer l’environnement (array, matrix, pmatrix…). Les cellules peuvent être complétées directement dans l’assistant.
Texmaker allows you to insert your own tags (shortcuts : Shift+F1…Shift+F10). These tags are defined with the «User — User Tags» menu.
Notes :
- If the code of the menu is «%environment», Texmaker will directly insert:
\begin{environment }
•
\end{environment }
and the cursor will jump directly to the «•» field. - You can also define an unlimited number of tags via the «User» panel in the «structure view» : just right-click on this panel to add or remove an item.
All theses tags can be included in the document by clicking on an item in the panel or directly with the keyboard trigger «:foo» + key right. - All the «@» characters in the code are automatically replaced by «•» place holders in the editor and the cursor will jump directly to the first «•» field (if some text has been selected in the editor before, the first «•» field will be replaced automatically by the selected text).
Note : @@ will be replaced by the @ character in the editor (and not by a double placeholder)
You can also launch your own commands (shortcuts : Alt+Shift+F1…Alt+Shift+F5). These commands are defined with the «User — User Commands» menu and can be launched via the toolbar («Run» button) .
1.2 Configurer les commandes associées à LaTeX
Pour pouvoir compiler les documents avec Texmaker, les chemins vers les commandes associées à LaTeX doivent être définis correctement.
Les commandes par défaut devraient fonctionner avec les distributions LaTeX standards, mais des changements peuvent quand même être nécessaires («Configurer Texmaker» -> «Commandes»). Pour modifier une commande, il suffit d’utiliser le bouton en fin de ligne et de sélectionner le programme correspondant avec le sélecteur de fichiers : Texmaker adaptera automatiquement la syntaxe (les modifications manuelles sont déconseillées).
Le caractére % représente le nom du fichier courant (sans l’extension — représente la document maitre en mode «maître») et le caractére @ sera automatiquement remplacé par le numéro de la ligne courante dans l’éditeur.
Paramètre supplémentaire : # sera remplacé par le nom du fichier courant sans extension (y compris dans le mode «maître») et ! sera remplacé par le répertoire courant.
Remaque : si les caractères %, !, # et @ sont nécessaires pour une commande, il suffit d’utiliser à la place %%, !!, ## et @@. Ces expressions seront remplacés par %, !, # et @ avant de lancer la commande.

Описание
SoftMaker Office — это разработка немецкой компании SoftwareGmbH, которая предложила пользователям альтернативный мультиплатформенный офисный продукт. С ним можно работать как на стационарном компьютере, так и на различных гаджетах (смартфонах, планшетах). Утилита позволяет создавать яркие презентации анимационного характера, работать с формулами и текстами, решать ежедневные задачи. Все необходимое для этого имеется в этом офисном пакете и вам надо лишь скачать SoftMaker Office для Windows, чтобы получить аналог платных приложений, при этом не платя ни копейки.
Несмотря на то, что на рынке наблюдается засилье монополистов, все еще выпускаются программы, которые готовы им бросить вызов
И для многих пользователей немаловажное значение играет цена таких продуктов. Особенно это актуально для тех, кому не важны уникальные функции, а нужна просто стабильно работающая программа, которая поддерживает популярные форматы
Именно такой и является SoftMaker Office.
2.12 Inserting math formulae
You can toggle in the «in-line math» environment with the «$$» button in the toolbar (shortcut : Ctrl+Alt+M) or with the «Math» menu. The shortcut for the «display math» environment is : Alt+Shift+M. The «Math» toolbar allows you to insert the most currents mathematical forms (frac, sqrt…)
With the «symbols panels» in the structure view, you can insert the code of 400 mathematical symbols and the \left and \right tags..(just click on the «symbols» buttons in the structure view)
Additional option: A «favorites symbols» (*) panel allows you to define your own «symbols panel».
- To add a symbol to the «favorites symbols panel», just right-click on a symbol in the others «symbols panels» and select «Add to favorites» in the pop-up menu.
- To remove a symbol in the «favorites symbols panel», just right-click on it and select «Remove from favorites» in the pop-up menu.
You can also define the format of your mathematical text via the «Math» menu.For the «array» environments, a wizard (like the «Tabular» wizard) is available in the «Wizard» menu. With this wizard, you can select the environment : array, matrix, pmatrix…. The cells can be directly completed.
4.2 About documents separated in several files
Texmaker allows you to work onto documents separated in several files.
To include a TeX file into your document, just use the «\include{file}» command in the «LaTeX» menu. The file will appear in the «Structure View». With a click on his name, Texmaker will open it.
Then, you can define your «master document» with the «Options» menu. All the commands of the «Tools» menu will apply only to this document even when working on the «children» documents (you can even close the «master» document).
You can easily switch toggle between the master document and the current document via the corresponding button (just above the «Bold» button).Note : you can leave the «master» mode with the «Options» menu.
Достоинства и недостатки
При запуске программы прежде всего бросаются в глаза удобные кнопочки, которые очень похожи на те, которые представлены в Microsoft Office. И это неслучайно: данная компания настолько все продумала, что пока еще никому не удалось создать ничего лучше в этом плане. И все же есть ряд кнопок, которые выгодно отличают SoftMaker Office от других. Например, опция «подстроить отступы под размер окна» позволяет масштабировать текст и кнопки таким образом, чтобы они всегда были видны, что очень актуально для пользователей, которые используют программу на гаджетах.
Так же при сохранении документов имеется возможность «Быстрого выбора» директивы для сохранения.
При установке программа потребует от вас регистрацию на сайте. Там надо указать свой адрес электронной почты, на которую придет пароль для запуска программы. Данный нюанс не всем пользователям по душе и они его относят к минусам.
4.2 Documents scindés en plusieurs fichiers
Texmaker permet aussi de travailler sur un document composé de plusieurs fichiers.
Pour inclure un fichier .tex dans son document, il suffit d’utiliser la commande «\include{file}» du menu «LaTeX». Une boîte de dialogue permet alors de sélectionner le fichier à inclure. Ce fichier apparaît alors à la fin de la vue «Structure». Un clic sur son nom permet de l’ouvrir automatiquement.
Il est conseillé alors de déclarer le document «racine» comme «document maître» à l’aide du menu «Options». Dès lors, toute compilation ne se fera plus à partir du document ouvert dans l’éditeur mais à partir du «document maître». On peut ainsi facilement travailler sur les documents «enfants» tout en compilant le document «racine» (qui peut même être fermé). Le menu «Options» permet aussi de retourner au mode «normal» (en désactivant la définition d’un document «maître»).
Un bouton spécial (juste au-dessus du bouton «Gras») permet de basculer d’un clic entre le document maître et le document courant.
3.1 Compiler son document
Le plus rapide pour compiler un document est d’utiliser la commande «Compilation rapide» (raccourci-clavier : F1). Cette commande, dont le comportement est à fixer dans la boîte de dialogue de configuration de Texmaker permet d’enchaîner plusieurs commandes à la suite afin de passer directement du document LaTeX à la visualisation du fichier dvi, postscript ou pdf.
Pour lancer une commande à partir de la barre d’outils, il suffit d’abord de sélectionner la commande, puis de cliquer sur le bouton «Exécuter»
Sinon, on peut aussi lancer les commandes via le menu «Outils» (raccourcis-claviers : F2…F12).
Remarques :
- Tous les noms des documents doivent avoir une extension (en minuscule) et ne pas comporter d’espaces, sans quoi les commandes échoueront. De même, un fichier «sans nom» ne peut pas être compilé par Texmaker : il doit d’abord être enregistré.
- Si les chemins vers les outils LaTeX sont mal définis, des messages «Impossible de lancer la commande» apparaîtront.
- La commande «Nettoyer» (menu «Outils») permet d’effacer tous les fichiers générés par LaTeX (sauf le fichier postscript et pdf)
1.1 Configurer l’éditeur
Avant de compiler son premier document, il faut d’abord régler l’encodage utilisé par l’éditeur («Configurer Texmaker» -> «Editeur» -> «Encodage»). Il faut ensuite utiliser l’encodage correspondant dans le préambule des documents LaTeX (Exemple : \usepackage{inputenc}, si l’on utilise l’encodage «ISO-8859-1» pour l’éditeur).
Note : lors de l’ouverture d’un fichier, l’utilisateur est prévenu si le document ne peut pas être décodé correctement avec l’encodage par défaut. Le programme laisse alors la possibilité de charger le fichier avec un autre encodage (sans que cela ne modifie l’encodage par défaut).
4.10 Keyboard shortcuts
Defaults keyboard shorscuts (*:can be modified — «Configure Texmaker» -> «Editor») :
- «File» menu :
- New : Ctrl+N
- Open : Ctrl+O
- Save : Ctrl+S
- Close : Ctrl+W
- Exit : Ctrl+Q
- Restore previous session : Ctrl+Shift+F8
- «Edit» menu :
- Undo : Ctrl+Z
- Redo : Ctrl+Y
- Copy : Ctrl+C
- Cut : Ctrl+X
- Paste : Ctrl+V
- Select all : Ctrl+A
- Comment : Ctrl+T
- Uncomment : Ctrl+U
- Find : Ctrl+F
- Find next : Ctrl+M
- Replace : CTrl+R
- Goto line : Ctrl+G
- Check spelling (from cursor) : Ctrl+Shift+F7
- «Tools» menu :
- Quick build : F1
- Latex : F2
- View dvi : F3
- Dvi->PS : F4
- View PS : F5
- Pdflatex : F6
- View Pdf : F7
- PS->Pdf : F8
- Dvi->Pdf : F9
- View log : F10
- Bibtex : F11
- Make index : F12
- * «LaTeX» menu :
- * item : Ctrl+Shift+I
- * Italic : Ctrl+I
- * Slanted : Ctrl+Shift+S
- * Bold : Ctrl+O
- * Typewriter : Ctrl+Shift+T
- * Small caps : Ctrl+Shift+C
- * Emphasis : Ctrl+Shift+E
- * New line : Ctrl+Return
- * «Math» menu :
- * Inline math mode : Ctrl+Shift+M
- * Display math mode : Alt+Shift+M
- * Numbered equations : Ctrl+Shift+N
- * Subscript : Ctrl+Shift+D
- * Superscript : CTrl+Shift+U
- * Frac : Alt+Shift+F
- * Dfrac : Ctrl+Shift+F
- * Sqrt : Ctrl+Shift+Q
- * Left : Ctrl+Shift+L
- * Right : Ctrl+Shift+R
- «User» menu :
- User tags : Shift+F1…Shift+F10
- User commands : Shift+Alt+F1…Shift+Alt+F10
9. Установка программы «Texmaker»
Шаг 9.1
«The last, but not the least» – последний по порядку,
но не по значению, этап.
«Крутые» TeX-писатели могут пользоваться только «Блокнотом»
и средствами командной строки. Дай-то Бог дожить вам до такого уровня мастерства!
Но в начале большого пути начинающим пользователям MiKTeX лучше использовать
какую-нибудь программу для работы с tex-файлами. Программ-оболочек на свете
существует достаточно много. Я перепробовал несколько – буржуйских и русскоязычных,
бесплатных и не очень. И, в конце концов, у меня прижился «Texmaker» –
замечательная, на мой взгляд, программа, в том числе, и для начинающих. Кстати, бесплатная!
Спасибо вам, люди добрые!
Открываем в браузере родной сайт
«Texmaker«, и находим ссылку на последнюю версию программы.
Учитываем, что программа обновляется довольно шустро, так что версия «3.34» на скриншоте
всяко не совпадёт с последней версией.
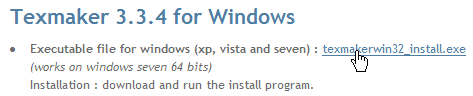
Выбираем для загрузки инсталлятор последней версии «Texmaker«.
Шаг 9.3
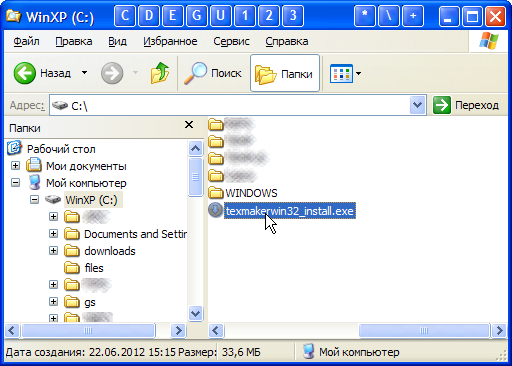
Сохраняем exe-файл инсталлятора.
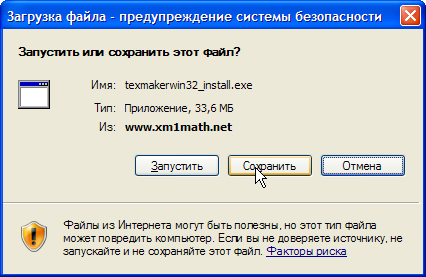
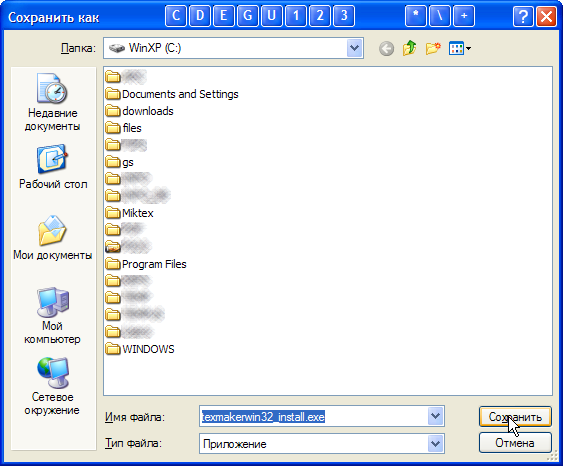
Выбираем место, куда будем закачивать exe-файл.
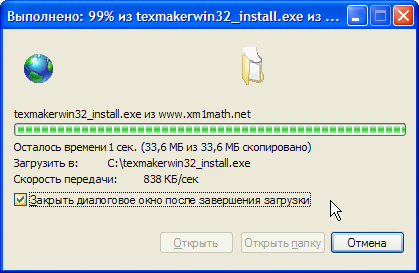
Загружаем инсталлятор программы «Texmaker 3.34«.
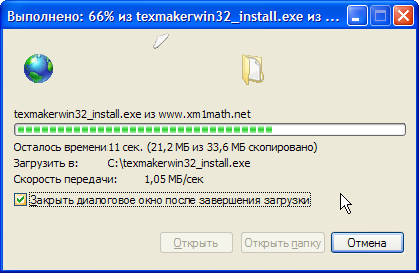
Завершаем загрузку exe-файла.
Шаг 9.4
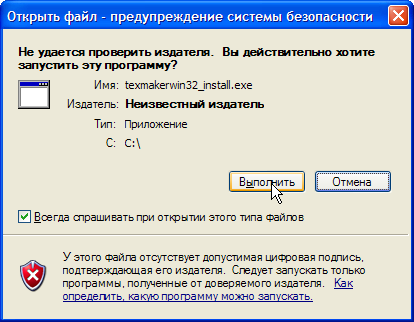
Начинаем установку программы, запуская «texmakerwin32_install.exe».
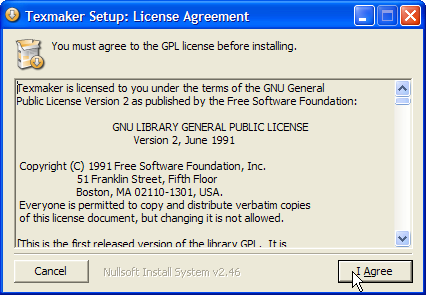
Нажимаем кнопку «Выполнить».
Не возражаем против условий лицензионного соглашения.
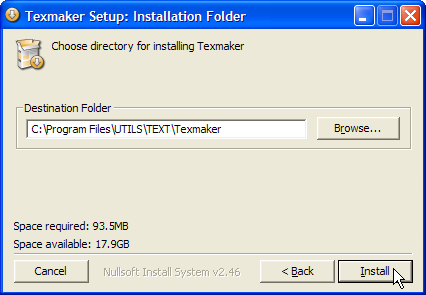
По умолчанию программа устанавливается в папку
«C:\Program Files\Texmaker«.
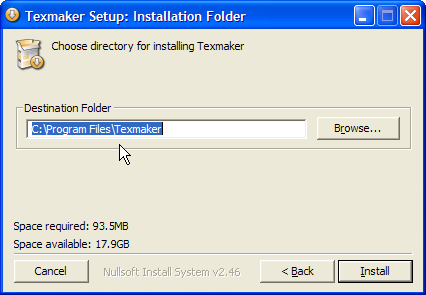
Устанавливаю программу в другую папку (опять же по желанию).
Запускаем процесс установки.
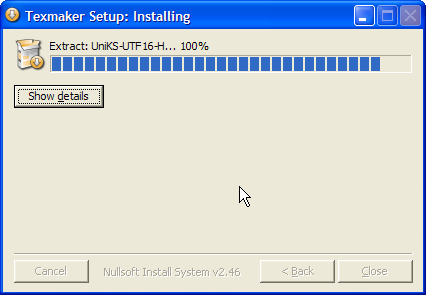
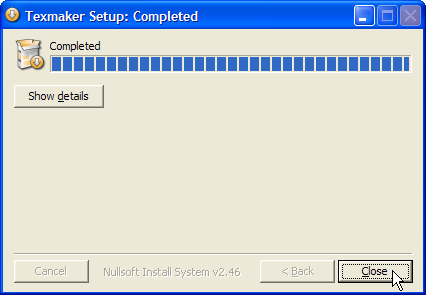
Завершаем установку программы «Texmaker 3.34«.
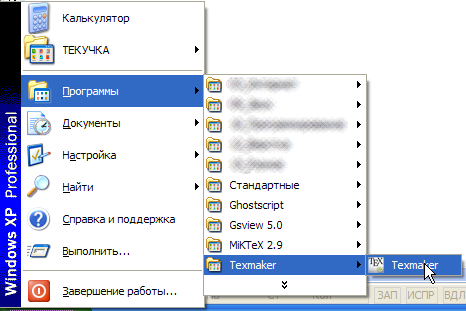
Запускаем программу «Texmaker 3.34«.
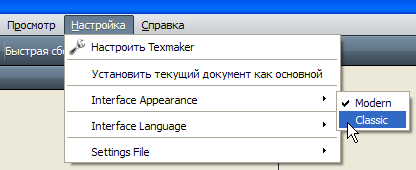
Изменяем интерфейс программы с «модерна» на «классику»
(по желанию).
Шаг 9.7
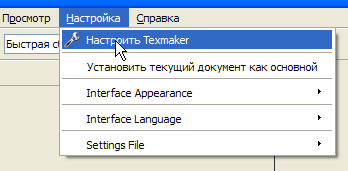
Начинаем настройку «Texmaker 3.34»
Выбираем пункт меню «Настроить Texmaker»
Если MiKTeX был установлен в папку «C:\Miktex\», то в текстовом
окне «Просмотр DVI» вписываем строку
«C:\Miktex\miktex\bin\yap.exe» %.dvi
Если программа «GSview» (см. Этап N 4) была установлена в папку
«C:\gs\gsview\», то в текстовом окне «Просмотр PS» вписываем строку
«C:\gs\gsview\gsview\gsview32.exe» %.ps

Мой опыт работы в «Texmaker» с использованием встроенного
(«Built-in Viewer») просмотрщика pdf-файлов оказался неудачным.
Просмотр больших pdf-файлов приводил к тому, что «Texmaker»
регулярно «заваливался». Может быть мне не повезло, или это «косяк»
самого «Texmaker» – выяснять не стал, а просто прописал в настройках
внешнюю программу «Foxit Reader» для просмотра формируемых pdf-файлов.
После чего все проблемы исчезли аки дым.

Если программа «Ghostscript» (см. Этап N 3) была установлена в папку
«C:\gs\gs\», то в текстовом окне «Ggostscript» вписываем строку
«C:\gs\gs\bin\gswin32c.exe»
В левой части панели «Настроить Texmaker» выбираем пункт меню
«Быстрая сборка»
и в качестве «Команды быстрой сборки» выбираем следующую комбинацию
«PdfLaTeX + View PDF».
Завершая процесс основной настройки «Texmaker«, нажимаем кнопку
«OK».
Вот и всё, господа аспиранты – девятый уровень пройден. Game over!
А дальше – уже сами, сами, сами…
Скажу напоследок, что вся описанная 9-этапная процедура установки
«MiKTeX 2.9» была неоднократно проверена на различных компьютерах
и ноутбуках с установленной ОС «Windows XP SP3».
На более свежих версиях «Windows» процедура не тестировалась.
Ну, так молодым исследователям и естествоиспытателям сам Бог велел всё это
проверить!
Успехов в работе над диссертацией!
Copyright 2012. ПИО ТУСУР, В.И. Карнышев
4.10 Raccourcis clavier
Raccourcis par défaut (*:modifiable — «Configurer Texmaker» -> «Editeur») :
- Menu «Fichier» :
- Nouveau : Ctrl+N
- Ouvrir : Ctrl+O
- Enregistrer : Ctrl+S
- Fermer : Ctrl+W
- Quitter : Ctrl+Q
- Restaurer session précédente : Ctrl+Shift+F8
- Menu «Editer» :
- Défaire : Ctrl+Z
- Refaire : Ctrl+Y
- Copier : Ctrl+C
- Couper : Ctrl+X
- Coller : Ctrl+V
- Sélectionner tout : Ctrl+A
- Commenter : Ctrl+T
- Décommenter : Ctrl+U
- Chercher à nouveau : Ctrl+M
- Remplacer : CTrl+R
- Aller à la ligne : Ctrl+G
- Vérifier orthographe (depuis le curseur) : Ctrl+Shift+F7
- Menu «Outils» :
- Quick build : F1
- Latex : F2
- View dvi : F3
- Dvi->PS : F4
- View PS : F5
- Pdflatex : F6
- View Pdf : F7
- PS->Pdf : F8
- Dvi->Pdf : F9
- View log : F10
- Bibtex : F11
- Make index : F12
- * Menu «LaTeX» :
- * item : Ctrl+Shift+I
- * Italic : Ctrl+I
- * Slanted : Ctrl+Shift+S
- * Bold : Ctrl+O
- * Typewriter : Ctrl+Shift+T
- * Small caps : Ctrl+Shift+C
- * Emphasis : Ctrl+Shift+E
- * New line : Ctrl+Return
- * Menu «Math» :
- * Inline math mode : Ctrl+Shift+M
- * Display math mode : Alt+Shift+M
- * Numbered equations : Ctrl+Shift+N
- * Subscript : Ctrl+Shift+D
- * Superscript : CTrl+Shift+U
- * Frac : Alt+Shift+F
- * Dfrac : Ctrl+Shift+F
- * Sqrt : Ctrl+Shift+Q
- * Left : Ctrl+Shift+L
- * Right : Ctrl+Shift+R
- Menu «Utilisateurs» :
- Balises utilisateurs : Shift+F1…Shift+F10
- Commandes utilisateurs : Shift+Alt+F1…Shift+Alt+F10
2.4 Browsing your document
The «Structure View» (left panel) lets you quickly reach any part of your document. All you need to do is to click on any item (label, section…) and you will be taken to the beginning of the corresponding area in the editor.
The «Structure View» is automatically updated while typing. You can also use the «Refresh Structure» («Edit» menu) command at any moment.
For each file, three bookmarks can be used to speed up navigation : just click on a line number to add or remove a bookmark. When you have already defined three bookmarks, you must remove one of them to add a new bookmark. To jump to the line corresponding to a bookmark in the editor, just click on the buttons in the status bar.
Сравнение альтернативных программ:
|
GIF to PDF Converter Software |
Artifact Manager |
FastReport.Net |
Affiliate Whiz by Freshwater Aquarium |
|
| Описание | Конвертируйте файлы GIF в формат PDF с огромным количеством дополнительных возможностей. | Скачать Artifact Manager, версия 1.1.74 | К вашим услугам интуитивная и подробная система отчета об ошибках для разработчиков | Создавайте профессиональные страницы акций для ваших партнеров |
| Рейтингу | ||||
| Загрузки | 407 | 14 | 189 | 123 |
| Цена | $ 14.9 | $ 99 | $ 299 | $ 0 |
| Размер файла | 1.22 MB | 0.41 MB | 41.93 MB | 1.28 MB |
|
Download |
Download |
Download |
Download |
Пользователи, которые скачивали TextMaker Viewer, также скачивали:
Мы рады посоветовать вам программы которые понравились другим пользователям TextMaker Viewer. Вот список программ, аналогичных TextMaker Viewer:
Майкрософт Ворд — Microsoft Word
16.1.6746.2048
Программное обеспечение текстовой обработки для учебы, работы или дома.
скачать
Бизнес программы
Рейтинг пользователей
Business Inventory Software
2.0.1.5
Обрабатывайте важные данные для налоговых и финансовых отчетов.
скачать
Финансовые программы
Рейтинг пользователей
Best Accounting Software
3.0.1.5
Отслеживайте информацию о деятельности вашей компании, собранную в одном месте.
скачать
Финансовые программы
Рейтинг пользователей
BREAKTRU PAYROLL 2009
6.1
Отслеживайте уплату по вашим счетам при помощи этого приложения
скачать
Финансовые программы
Рейтинг пользователей
4.8 «Forward/inverse search» avec Texmaker
Certains afficheurs dvi permettent d’afficher directement la page et la zone correspondante à une certaine ligne dans le fichier source LaTeX.
Pour utiliser cette caractéristique, il faut utiliser le caractère @ dans la ligne de commande correspondant à l’afficheur dvi («Configurer Texmaker» -> «Commandes»).
Exemples «Forward search» :
Pour lancer yap : «C:/Program Files/MiKTeX 2.9/miktex/bin/yap.exe» -1 -s @%.tex %.dvi
- Lancer texmaker à partir de yap : «C:\Program Files\Texmaker\texmaker.exe» «%f» -line %l (the program arguments : «%f» -line %l )
- Lancer texmaker à partir de xdvi : xdvi -editor «texmaker %f -line» %.dvi -sourceposition @:%.tex
Texmaker can’t compile yours documents if the paths to the LaTeX related commands are wrong.
The default settings should work with the recent and standard LaTeX distributions, but you should have to modify them («Configure Texmaker» -> «Commands»). To change a command, just click on the button at the end of the corresponding line and select the command in the file browser : texmaker will adapt automatically the syntax of the command.
The % character represents the name of the file without the extension (the master document in the «master» mode) and the @ character will be replaced by the current line number.
Additional parameter : # will be replaced by the current file name without extension (even in the «master» mode) and ! will be replaced by the current directory.
Remark : if the %, !, # and @ characters are required for a command, just use %%, !!, ## and @@. These expressions will be replaced by %, !, # and @ respectively before launching the command.
4.4 Balises et commandes personnelles
Texmaker permet à l’utilisateur d’enregistrer dix extraits de code LaTeX accessibles par le menu «Utilisateur — Balises utilisateur» et par les raccourcis-claviers (Shift+F1 à Shift+F10). Pour définir ces extraits, il faut lancer la commande «Editer balises utilisateur» dans ce même menu.
Remarques :
- Le fait d’entrer «%monenvironnement» dans le champ «code LaTeX» insérera le code suivant dans l’éditeur:
\begin{monenvironnement}
•
\end{monenvironnement}
et le curseur se positionnera automatiquement sur le champ «•». - Il est aussi possible de définir autant de balises que l’on veut à l’aide du panneau «utilisateur» de la vue «structure» : il suffit d’un clic-droit sur ce panneau pour ajouter ou supprimer une balise.
Ces balises peuvent être insérées dans le document en cliquant sur un item ou directement au clavier grâce au déclencheur clavier «:truc + touche flèche droite». - Tous les caractères «@» utilisés dans le code de la balise seront automatiquement remplacés par des marques «•» dans l’éditeur et le curseur se positionnera automatiquement sur le premier champ «•» (si du texte a été sélectionné avant dans l’éditeur, le premier champ «•» sera automatiquement remplacé par le texte sélectionné).
Note : @@ dans une balise sera remplacé par la caractère @ dans l’éditeur.
Il est aussi possible de définir des commandes personnelles via le menu «Utilisateur — Commandes utilisateurs». Un % représente le nom du fichier à traiter sans extension. Les commandes, une fois définies, peuvent-être lancées par les raccourcis-claviers Alt+Shift+F1…Alt+Shift+F5 . Elles peuvent être aussi lancées à partir de la barre d’outils (il suffit de sélectionner cette commande avant de cliquer sur le bouton «Exécuter»).
4.9 Synopsis of the texmaker command
texmaker file
With the «-master» option, the document will be automatically defined as a «master» document.
With the «-line xx» option, Texmaker will ask you if you want to jump to the xx line after loading the document.
With the «-insert foo» option, a latex command (foo) can be inserted by an external program to the current document while texmaker is running.
With the «-n» option a new instance of Texmaker is launched (will break synchronization with the pdf viewers).
With the «-dpiscale x» option the environment variable QT_SCALE_FACTOR will be set to x before building the GUI (same behavior than adding «export QT_SCALE_FACTOR=x» to the environment variables)
2.2 Préambule du document
Il y a plusieurs façons de rédiger le préambule de son document LaTeX.
La première consiste à utiliser la commande «Démarrage rapide» du menu «Assistants» :
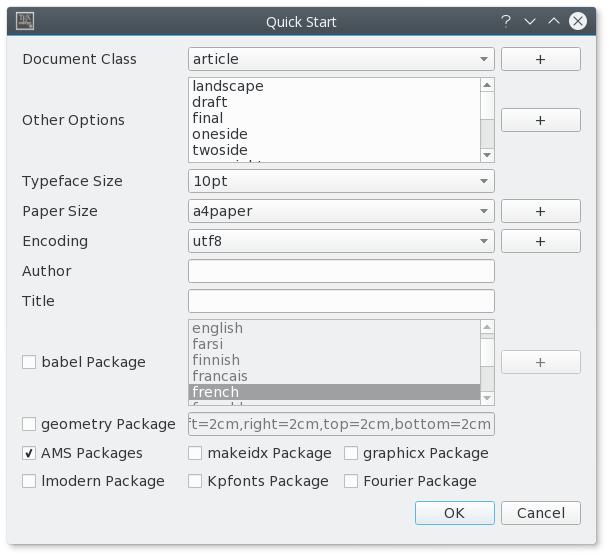
on peut y fixer les principales caractéristiques de son document (classe, format…). Les boutons «+» permettent de rajouter ses propres options. Tous ces réglages sont enregistrés : l’utilisateur les retrouvera à la prochaine utilisation de l’assistant.
On peut aussi utiliser un modèle de préambule que l’on a préalablement enregistré. Il suffit alors d’utiliser «Enregistrer sous» ou un «copier/coller» pour l’utiliser comme base de son nouveau document.
3.1 Compiling
The easiest way to compile a document is to use the «Quick Build» command . You can define the sequence of commands used by the «Quick Build» command via the «Configure Texmaker» dialog.
To launch a command from the toolbar : select first the command, then click on the «Run» button.
You can also launch each command one by one (shortcuts : F2…F12 — see the «Tools» menu). Note : the «Clean» command in the «Tools menu» allows you to erase the files (dvi, toc, aux…) generated by a LaTeX compilation (except the ps and pdf files).Warning : all yours files must have an extension and you can’t compile an «untitled» file or a file with a space in his name.
4.8 «Forward/Inverse search» with Texmaker
Some dvi viewers can jump to (and visually highlight) a position in the DVI file that corresponds to a certain line number in the (La)TeX source file.
To use this feature, you can use the @ character in the syntax of the dvi viewer command («Configure Texmaker» -> «Commands»).
Example («Forward search»):
To launch yap from texmaker : «C:/Program Files/MiKTeX 2.9/miktex/bin/yap.exe» -1 -s @%.tex %.dvi
- To launch texmaker from yap : «C:\Program Files\Texmaker\texmaker.exe» «%f» -line %l (the program arguments : «%f» -line %l )
- To launch texmaker from xdvi : xdvi -editor «texmaker %f -line» %.dvi -sourceposition @:%.tex
Texmaker facilite la navigation dans un long document LaTeX grâce à la vue structure située à gauche de l’interface :
Un simple clic sur un item permet d’atteindre la ligne correspondante dans l’éditeur. Cette vue structure est actualisée automatiquement lors de la frappe. L’utilisateur peut aussi utiliser la commande «Rafraîchir Structure» du menu «Edition» à tout moment.
Pour chaque fichier, l’utilisateur peut définir trois «signets» pour accelérer la navigation dans un document. Pour ajouter ou supprimer un «signet», il suffit de cliquer sur un numéro de ligne. Quand vous avez déja défini trois signets, il faut en supprimer un pour pouvoir en ajouter un nouveau. Pour atteindre la ligne correspondante à un signet, il suffit de cliquer sur les boutons «1,2,3» dans la barre d’état de Texmaker.


