Как пользоваться screen для управления терминалами linux и отсоединения процессов от терминала
Содержание:
- Managing Terminals Within Screen
- Black/purple screen after you boot Ubuntu for the first time Edit
- How Changing the Splash Screen Has Changed
- How It Works
- Want More Ubuntu Splash Screen Themes?
- Usage
- 1. SimpleScreenRecorder
- Теги
- Что и зачем хранит SCREEN в своей базе данных?
- Как пользоваться screen Linux
- Что это?
- На чем основаны рекомендации SCREEN?
- Using Byobu
Managing Terminals Within Screen
There are a number of commands that help you manage the terminal sessions you run within screen.
To copy text, you can use this sequence:
Ctrl-a [
This will give you a cursor that you can move with arrow keys or h,j,k,l keys (like vi). Move to where you want to start copying, and hit “Return” or “Enter”. Move to the end of where you’d like to copy and hit “Return” or “Enter” again. The text is then copied to your clipboard.
One thing to be aware of is that this is also screen’s mechanism for scrolling. If you need to see some text that is off the screen, you can hit “Ctrl-a [“ and then scroll up off of the screen.
We can paste text that we copied with the right bracket.
Ctrl-a ]
Another thing you might want to do is monitor programs that are executing in another screen window.
Let’s say that you’re compiling something in one window and you want to know when it’s completed. You can ask screen to monitor that window for silence with the “Ctrl-a _” sequence, which will tell you when no output has been generated for 30 seconds.
Let’s try it with a simpler example. Let’s have screen tell us when our window is finished pinging google 4 times.
ping –c 4 www.google.com
Ctrl-a _
The window is now being monitored for 30 sec. silence.
Now we can do work in another window and be alerted when the task in this window is complete.
Ctrl-a 1
Window 2: silence for 30 seconds
We can also do the opposite and be alerted when there is activity happening on a specific window. We accomplish this with the “Ctrl-a M” sequence.
sleep 20 && echo “output”
Ctrl-a M
Window 2 (bash) is now being monitored for all activity.
We will now be alerted when the command produces output.
Ctrl-a 1
Activity in window 2
Let’s say we are going to be doing some important changes and we want to have a log of all of the commands we run. We can log the session with:
Ctrl-a H
Creating logfile "screenlog.1".
Black/purple screen after you boot Ubuntu for the first time Edit
This usually happens because you have an Nvidia or AMD graphics card, or a laptop with Optimus or switchable/hybrid graphics, and Ubuntu does not have the proprietary drivers installed to allow it to work with these.
The solution is to boot Ubuntu once in mode (your screen may look weird) to bypass the black screen, download and install the drivers, and then reboot to fix it for ever.
- Start your computer, and press the Right Shift when booting up, to get the Grub menu. Use the ← ↑ → ↓ keys to navigate/highlight the entry you want (usually the first one).
- Press e to edit that entry, which will show you the details:
- Find the entry as shown above, use the ← ↑ → ↓ keys to get to it, and then press the End key to get to that line’s end (which may be on the next line!).
If you are running Ubuntu 12.04 or 12.10, and have a ATI/AMD graphics card, you have to follow the instructions here, otherwise you will run into this problem every time you restart your computer.
LUKS encryption Edit
In case you’ve installed Ubuntu with LUKS encryption / LVM option, it
could be that Ubuntu just asks you for your password — and you cannot
see it.
If you have a black screen, try pressing Alt+← and then Alt+→ to switch your tty, this may bring back the password query and turn backlight back on.
If you have a purple screen (maybe you need to set the -option
also?) and you have encrypted your complete Ubuntu installation, try to
just type your encryption/LUKS-password after waiting some seconds (or
minutes, just to be sure) and continue with a press on Enter. If this is successfull, you should see your Login-screen just a few seconds later.
- Try the Alternate Installer — this is a text based installer that might work better than the liveCD depending on your hardware.
If you do this, you may get a black screen before you even hit grub. A simple Ctrl+Alt+Del gets some users to a usable grub screen
- If you have an Nvidia Optimus card you should NOT install nvidia drivers, just use the built in driver, see here:
- After selecting boot options you have the opportunity to edit the boot flags manually using your keyboard. Replace with
to get an idea of what step your system is failing at. Using that
information search the forums or the internet for answers from the
community.
- If you still can’t install Ubuntu then unfortunately you’ve probably run into a hardware specific bug, please see here: How do I report a bug?
How Changing the Splash Screen Has Changed
Around the time of Ubuntu 10.04, tweaking the splash screen (that image that appears as the computer boots) meant editing the contents of /user/images/share/xsplash. However, in Ubuntu 16.04 LTS and later, this splash screen directory has moved.
Image credit: Linux Screenshots via Flickr
More recent versions of Ubuntu had the location as /lib/plymouth/themes. As of Ubuntu 16.04 LTS, that location has been moved, to /usr/share/plymouth/themes.
6 Big Reasons to Upgrade to Ubuntu 16.04
A new LTS release of Ubuntu means security and stability. Whether you’re upgrading or switching from Windows, let’s take a look at what’s new in Ubuntu 16.04 Xenial Xerus.
The Plymouth tool essentially manages the splash screen and can be used to set a new image.
Several years later, things have changed. We now have a handy app that helps to manage the current splash screen: Plymouth Themes.
How It Works
Blank or black screens generally indicate a failure feeding data to the Graphics Processing Unit (GPU) in your video card. This can happen for a bunch of different reasons as different processes run as your system boots up. You may notice flickers during boot — these are indications that different processes are starting up and interacting with the GPU.
Here is a typical sequence of phases your system goes through as it boots:
- bios screen
- Black with blinking cursor (short). Disk activity LEDs blink and flicker.
- Purple without cursor (long)
- Boot splash graphic (via plymouth)
- Black screen (short). Backlight may go off at this point.
- Maybe more plymouth
- Login screen. Sound (e.g. drums) plays
Here’s what’s going on under the hood during each of these steps:
- BIOS detects hard drive with a bootloader (grub) present and starts it
- grub selects a kernel and loads it
- If the kernel supports Mode Setting (KMS), it puts the video card into its preferred resolution using a frame buffer (vesafb). The framebuffer is initialized with a purple background.
- plymouth displays a bootsplash image.
- gdm is started, which instantiates a new X session for the login screen to replace the framebuffer’s graphics
- X attempts to put the card into one of its higher resolutions, such as the preferred resolution
- The login screen is drawn on the screen
Workaround A: Non-graphical Boot
You can disable the graphical bootscreen via:
set gfxpayload=text
See X/NonGraphicalBoot for additional ideas.
Workaround B: Disable Plymouth
If Plymouth crashes during boot, X *should* still boot up, just that you’ll be left looking at a black screen a lot longer than you’d like. However, if plymouth dies at just the right time it can leave the system stuck on a blank vt, and can’t recover. This is because with plymouth in initrd, it’s a bit racy.
To check this, in the grub menu edit the kernel line and remove ‘splash’ from the end of the line, and boot. If that solves the issue, you can remove it from your /boot/grub/menu.lst as a workaround.
Workaround C: Disable the VESA framebuffer from grub
The linux kernel uses the framebuffer for doing graphics prior to X starting up. For systems that support Kernel Mode Setting (KMS), this includes using the higher resolutions of the video card. The kernel uses a framebuffer driver for this, such as -vesafb. However this can misbehave sometimes (e.g. hardware-specific bugs).
You can disable vesafb in grub by passing it a nonsensical parameter. E.g.:
vesafb.nonsense=1
Want More Ubuntu Splash Screen Themes?
Various locations online provide Ubuntu-focused themes for your computer. GNOME-Look.org, for instance, has a great collection of themes, grouped by use. This includes a Plymouth Themes section. Alternatively, visit DeviantArt and search for «plymouth themes» and download the ones you like. They’re usually no more than 3MB.
Usually, themes feature an installation script. For example, I downloaded the ubuntu-vision theme from GNOME-Look.org to customize the splash screen.
The procedure was as follows:
- Download theme
- Extract to the Home directory
- Find the install script
- Open a terminal and run using ./install_script_name
- Select any options for the splash screen
Following this, you need to alter the filename and file path in the default.plymouth configuration file. This final step is crucial as it ensures the new theme is used. In the terminal, enter
Edit the two file paths for ImageDir and ScriptFile, ensuring they both point to the intended theme. Further, the ScriptFile should point to the correct .script file in the theme’s directory.
Save the file and exit (CTRL + X) then reboot your PC. Watch out for the new Ubuntu Splash screen!
Usage
Commands are entered pressing the «escape key» and then the key binding.
Some users find the default escape key inconvenient. The escape key can be changed to another key as described in .
Common Commands
- Displays commands and their defaults
- Enter to the command prompt of screen
- Window list
- opens window 0
- Rename the current window
- Sends to the current window
- Create a new window (with shell)
- Split current region horizontally into two regions
- Split current region vertically into two regions
- Switch the input focus to the next region
- Toggle between current and previous region
- Enter Copy Mode (use enter to select a range of text)
- Paste text
- Close all regions but the current one
- Close the current region
- Detach from the current screen session, and leave it running. Use to resume
Named sessions
To create a named session, run screen with the following command:
$ screen -S session_name
To (re)name an existing a session, run the following command while screen is running:
To print a list of pid.tty.host strings identifying your screen sessions:
$ screen -list
To attach to a named screen session, run this command:
$ screen -x session_name
or
$ screen -r session_name
Customizing Screen
You can modify the default settings for Screen according to your preference either through a personal file which contains commands to be executed at startup (e.g. ) or on the fly in command mode (e.g. ).
1. SimpleScreenRecorder
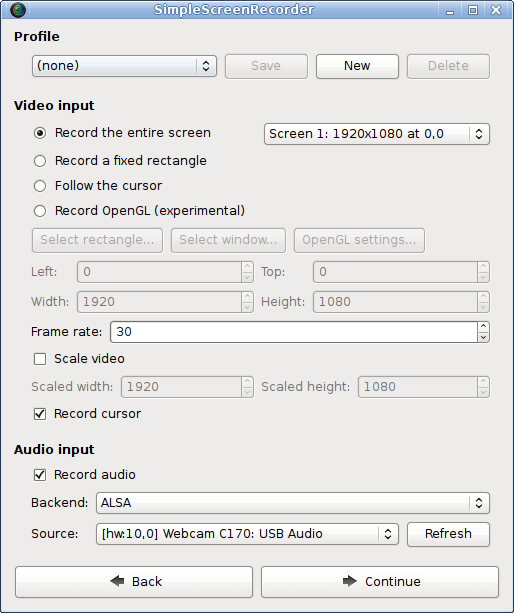
SimpleScreenRecorder — это приложение, которое позволяет записывать все, что происходит на экране вашего компьютера. Можно снимать на видео как работу программ, так и игры. Программа проста в использовании, но имеет достаточное количество функций.
Особенности SimpleScreenRecorder:
- Простой интерфейс на основе Qt;
- Можно записывать как весь экран, так и его часть;
- Запись приложений, использующих OpenGL;
- Хорошая аудио и видео синхронизация;
- Позволяет уменьшить частоту кадров видео для слабых машин;
- Поддержка паузы и восстановления записи;
- Показ статистики во время записи;
- Поддержка предварительного просмотра видео во время записи;
- Правильные настройки по умолчанию, обычно не нужно ничего менять.
Теги
Active Directory
adsl
apache
borland pascal
cacls
CryptoPro
DansGuardian
dhcp
dosbox
dsadd
ext2
ext2fsd
ext3
ext4
freebsd
freepascal
gnome
H.323
hp laserjet 1018
Hyper-V
iptables
Kaspersky Internet Security
kaspersky OpenSpace Security
kerio
Kerio Control
lazarus
likewise
likewise-open
linkd
Linux
Live-CD
mint
mkdir
mount
ms office
mysql
nat
NetPolice
nginx
novo-builder
php52-gd
phpmyadmin
pppoe
pxe
REJIK
sams
screen
SkyDNS
skype
splitcam
squid
tftp
turbo pascal
Ubuntu
vpn
Web Filter
wi-fi
Windows
windows 7
Windows Resource Kit
xcacls
xorg
xorg.conf
zakupki.gov.ru
Блокировщики
Брандмауэр Windows
Групповые политики
ИнтернетЦензор
Контент-фильтр
Ошибки
Реестр
Родительский контроль
баги
видеоконференции
Что и зачем хранит SCREEN в своей базе данных?
SCREEN не использует персональных данных для работы. Все данные обезличены. Хранятся следующие данные:
- ID пациента
- Статистические метаданные (тип программы-клиента, регион)
- История тестирования (все ответы на все вопросы)
- Все диагнозы, которые поступают из МИС или путем опросов пациентов через их личный кабинет.
Эти данные необходимы для проведения исследования по влиянию факторов риска на абсолютный риск рака основных локализаций. Это исследование на российских данных, которое многое может изменить в прогнозировании заболеваемости и смертности от рака в России, а также в итоге позволит сформулировать иной подход к определению критериев отбора контингента подлежащего скринингу рака именно в России. На сегодняшний день нет ни единого российского исследования по этой теме, а все показания к скринингу разработаны на исследованиях, которые проводились на других популяциях (Европа, США)
Как пользоваться screen Linux
Теперь давайте рассмотрим, как пользоваться screen Linux более подробно.
Пример 1. Необходимо отслеживать изменения файла в реальном времени. Для этого в одном окне будем вносить изменения в новый файл, а в другом — отображать файл командой tail с опцией -f:
При стирании содержимого показывается сообщение, что файл усечён, при этом этот текст в него, конечно, не записывается.
Пример 2. Необходимо отслеживать размер каталога в реальном времени. В одном окне записываем данные, в другом — отображаем, как изменяется размер домашнего каталога командой watch с задержкой в две секунды.
Что это?
Представь, что у тебя десяток удаленных машин, на каждой из которых поднят
SSH-сервер. Каждый день ты подключаешься к ним, чтобы просмотреть логи, оценить
работоспособность и загруженность систем. Пока выполняемые тобой задачи не
сложны и сводятся к простым действиям в консоли — все в порядке. Однако стоит
тебе выполнить сразу несколько действий, как начинаются проблемы. На первых
порах спасает комбинация <Ctrl+Z>, но она применима далеко не ко всем
приложениям, к тому же со временем ты просто запутаешься в списке фоновых задач,
перечисленных в выводе команды jobs. Ты можешь создать дополнительные
SSH-соединения в других эмуляторах терминала, но при управлении сразу
несколькими машинами это создаст большую путаницу. Что же делать?
Screen способен решить все эти проблемы за счет мультиплексирования терминала
между несколькими исполняемыми на удаленной машине процессами. Говоря простым
языком, Screen — это консольный менеджер окон, который создает на удаленном
конце SSH-соединения нечто вроде мультитабового эмулятора терминала. Ты
подключаешься к машине, запускаешь команду screen, которая вновь возвращает тебе
приглашение командной строки. Затем ты можешь запустить команду «less /var/log/messages»,
нажать <Ctrl+A C>, чтобы создать новое окно, запустить в нем команду top, в
следующем окне запустить irssi и т.д. В любой момент ты можешь нажать <Ctrl+A P>
для возвращения к открытому ранее окну. И все это в рамках одного
SSH-соединения.
Однако настоящая мощь Screen заключается в поддержке сессий. В любой момент
ты можешь нажать , чтобы отключиться от Screen и вновь запустить его с
ключом ‘r’, чтобы возобновить прерванную сессию со всеми открытыми окнами и не
измененным состоянием приложений
Вся соль в том, что сессия сохранятся на
машине-сервере, поэтому неважно, с какой машины она будет возобновлена. Ты
начинаешь сессию на работе, затем идешь домой и продолжаешь ее оттуда
Совсем не обязательно быть системным администратором, чтобы полюбить Screen.
Многие старожилы предпочитают использовать его для самых разных вещей, начиная
от удаленной проверки почты на домашнем компе с помощью mutt или alpine и
заканчивая использованием в качестве удобной консольной среды. Особенно ценным
он может оказаться для пользователей устаревших компов, на которых запуск
X-сервера сожрет добрую половину памяти, а тяжелые GTK- и QT-приложения — все
остальное. К этому же списку можно отнести и нетбуки с процессорами, работающими
на низких частотах, и маленькими, как почтовый конверт, экранами (кстати,
многотабовые тайловые (фреймовые) менеджеры, наподобие ratpoison, ion3 и dwm,
созданы под впечатлением Screen).
На чем основаны рекомендации SCREEN?
Рекомендации разработаны группой экспертов Фонда профилактики рака, НИИ Онкологии им. Н.Н. Петрова и одобрены Экспертным советом SCREEN, в который входят крупнейшие специалисты РФ. Ввиду полного отсутствия российских исследований мы вынуждены были опираться на рекомендации следующих организаций:
- WHO (Всемирная организация здравоохранения)
- IARC (Международное агентство по изучению рака)
- USPSTF (US Preventive Services Task Force, USA)
- NCCN (National Comprehensive Cancer Network, USA)
- NHS (National Health System, UK)
- SWOP (Erasmus MC, Netherland)
- Cancer Research UK
- CTFPHC (Canadian Task Force on Preventive Health Care)
Эксперты SCREEN изучили как сами рекомендации, так и исследования на которых они основаны и на их базе синтезировали алгоритмы выбора рекомендаций по обследованию, адаптированные для применения в России.
Алгоритмы SCREEN ежегодно пересматриваются и актуализируются в соответствии со всеми изменениями, которые произошли в области исследования показаний к скринингу рака. Однако для более точного определения показаний к выявлению бессимптомного рака необходимы собственные исследования. Уникальность системы SCREEN связана как раз с тем, что она собирает данные именно для таких исследований.
Using Byobu
A great enhancement for screen is a program called “byobu”. It acts as a wrapper for screen and provides an enhanced user experience. On Ubuntu, you can install it with:
sudo apt-get install byobu
Before we begin, we need to tell byobu to use screen as a backend. We can do this with the following command:
byobu-select-backend
Select the byobu backend:
  1. tmux
  2. screen

Choose 1-2 :
We can choose screen here to set it as the default terminal manager.
Now, instead of typing in “screen” to start a session, you can type “byobu”.
byobu
Welcome to Ubuntu 12.04 LTS (GNU/Linux 3.2.0-24-virtual i686)

 * Documentation:  https://help.ubuntu.com/

Welcome to the light, powerful, text window manager, Byobu.
You can toggle the launch of Byobu at login with:
  'byobu-disable' and 'byobu-enable'

For tips, tricks, and more information, see:
 * http://bit.ly/byobu-help

justin@Blank:~$


 u?  12.04  0:*                118! 3h55m 2.00 2.0GHz 496M6% 2013-07-01 18:19:21
Ctrl-a
Configure Byobu's ctrl-a behavior...

When you press ctrl-a in Byobu, do you want it to operate in:
    (1) Screen mode (GNU Screen's default escape sequence)
    (2) Emacs mode  (go to beginning of line)

Note that:
  - F12 also operates as an escape in Byobu
  - You can press F9 and choose your escape character
  - You can run 'byobu-ctrl-a' at any time to change your selection

Select :
byobu –S sessionname
byobu –ls
There are screens on:
	22961.new	(07/01/2013 06:42:52 PM)	(Detached)
	22281.byobu	(07/01/2013 06:37:18 PM)	(Detached)
2 Sockets in /var/run/screen/S-root.
byobu
Byobu sessions...

  1. screen: 22961.new (07/01/2013 06:42:52 PM) (Detached)
  2. screen: 22281.byobu (07/01/2013 06:37:18 PM) (Detached)
  3. Create a new Byobu session (screen)
  4. Run a shell without Byobu (/bin/bash)

Choose 1-4 :
You can select any of the current sessions, create a new byobu session, or even get a new shell without using byobu.
One option that might be useful on a cloud server you manage remotely is to have byobu start up automatically whenever you log into your session. That means that if you are ever disconnected from your session, your work won’t be lost, and you can simply re-connect to get right back to where you were before.
To enable byobu to automatically start with every login, type this into the terminal:
byobu-enable
The Byobu window manager will be launched automatically at each text login.

To disable this behavior later, just run:
  byobu-disable

Press  to continue...
As it says, if you ever want to turn this feature off again, simply type:
byobu-disable
It will no longer start automatically.
By Justin Ellingwood


