Qnap
Содержание:
Cloud storage
Cloud storage is offered in a variety of technologies and implemented in different ways. There are basically three types: file storage, object storage, and archival storage.
File storage is similar to regular file system in your computer, so you can manage your data in the cloud storage in a similar way. File-based cloud storage services tend to offer features not only data storage but also applications, like online editing and collaboration. Most of them are marketed as drives, like Google Drive, Amazon Drive, or Microsoft One Drive, and they tend to support only proprietary APIs. WebDAV is the most popular protocol supported by file-based cloud storage.
Object storage is designed for massive scalability and high availability. Every object is independent from other objects and there is no tree-like folder structure. You may think of objects as a huge number of files in single folder and there is no subfolder. Each object is identified using a key (a text string as a unique identifier), and people tend to use path-like keys to manage objects. For example, you may have two objects “/abc/object1” and “/abc/object2”, such that object storage client applications can present the two objects, “object1” and “object2” as two files in a folder, “/abc/”. In fact, there is nothing named as “/abc/” in the object storage.
Archival storage is an emerging cloud storage service. It is similar to object storage, but it is designed for storing infrequently accessed (cold) data and for lower costs, so it takes longer to retrieve an archived object, together with some extra limitations.
To overcome the varieties in cloud storage technologies and to provide consistent user experiences, Cloud Backup Sync App transforms your files and folders into various cloud storage technologies and manage your data in the cloud storage in a way that takes the most features of the cloud storage technologies.
Cloud Backup Sync App allows you to configure multiple accounts and storage spaces, each of which represents the cloud storage service and the credentials needed to access the cloud storage. When you create a backup and restore job, you can specify the storage space to be used for the job, instead of entering the account information for each job. You can change the account and storage space information in one place to make it effective for all related jobs. This simplifies your configuration process.
To learn more about the characteristics of each cloud storage service and how to create an account and storage space, please check the following information:
- Amazon S3
- Amazon Glacier
- Azure Storage
- Google Cloud Storage
- OpenStack Swift
- WebDAV
In most cases, you will need to have only one account for every job. However, you can use multiple accounts for better security and for separating accounts. If you want to store your data to different locations for risk mitigation or cost reduction, you can also have one account for each location. As the rate limit control is on a per-account basis, you can have different rate limit settings for the same cloud storage by applying different accounts for jobs.
Cloud Backup Sync also allows you to create a sync job to cloud storage. It supports OneDrive, Dropbox, Amazon Drive, Google Drive, Box, and Yandex.disk.
However, as cloud storage technologies quickly evolve the information provided here is only for your reference and may be outdated. Please consult your cloud storage vendor for detailed information.
Introduction
Overview
QNAP offers an easy-to-use, feature-rich, and secure cloud backup sync solution that protects your data by storing a copy of it in cloud storage, archives aged data to the cloud storage for long-term preservation and syncs data between local NAS and multiple cloud services. A variety of enterprise-class public cloud storage services are offered, including Microsoft Azure, Amazon S3, Amazon Glacier, Google Cloud Storage, Rackspace, IBM SoftLayer, and more. You can also use private cloud storage solutions that are compatible with S3, OpenStack Swift, and WebDAV. In addition, you can sync your data to Amazon Drive, OneDrive, Google Drive, Dropbox, Box and Yandex.disk.
For performance and security controls, using local network storage is the best choice. But for infrequently-accessed (cold) data, offloading it to public cloud storage can largely reduce your storage management efforts and minimize costs due to their pay-as-you-go pricing models.
The QNAP Cloud Backup Sync App is a plug-in App for the Hybrid Backup Sync App that lets you use every cloud storage through one interface. It provides excellent cloud storage gateway solutions to utilize cloud storage. You now have a simple and affordable disaster recovery plan, as well as a worry-free data archival solution for preserving your digital asset or compliance.
Feature highlights
- Supports manual and scheduled backup, restore, or sync with flexible options
- Supports one-way (upload / download) and two-way sync
- Supports data mirroring, copy, and move modes for one-way sync
- Supports full and incremental sync and backup
- Supports flexible file filtering using type, date, and size
- Supports SSL transfer encryption and client-side AES-256 encryption
- Supports file compression for cost saving and efficient data transfer
- Supports reserving deleted files in the cloud and configurable retention periods for backup
- Supports preserving advanced ACLs and extended attributes for backup
- Supports detecting sparse files for backup
- Supports cloud archival mode for backup
- Supports concurrent job execution and fast multi-threaded data transfer
- Supports per-account bandwidth throttling with configurable durations
- Supports restoring directly from the cloud for disaster recovery scenario
- Supports configurable network error recovery options
- Supports managing multiple cloud accounts
- Supports job status and statistics
- Supports job activity logging for tracing history of status and statistics
- Supports flexible selection for region, bucket, and folder as backup destinations
- Supports large file backup by S3 multi-part upload and OpenStack large objects
- Supports AWS S3 Server Side Encryption and Reduced Redundancy
- Supports special cloud regions: AWS China, AWS GovCloud, and Azure China
- Supports using S3 and OpenStack-compatible services as backup destination
- Supports backup to popular cloud storage: Amazon S3, Amazon Glacier, Google Cloud Storage, Microsoft Azure, OpenStack Swift, and WebDAV
- Supports sync to cloud storage: Amazon Drive, Dropbox, Google Drive, OneDrive, Box, and Yandex.disk
How to start
Carry out the following steps to start backing up your data to cloud storage:
- Install the Cloud Backup Sync App for your cloud storage from the QTS App Center.
- Go to the QTS main menu and open the Hybrid Backup Sync App.
- Create backup jobs in Hybrid Backup Sync App using your cloud storage credentials.
- Create restore jobs in Hybrid Backup Sync App either from backup jobs or from the cloud.
- Create sync jobs in Hybrid Backup Sync App with one-way or two-way sync.
- View the job list in the Hybrid Backup Sync App to know the job’s status.

To install the Cloud Backup Sync App on your NAS, sign into QTS as an administrator. Then go to the “App Center”, find the Cloud Backup Sync App and click “Add to QTS”. After downloading and installing the App, you can use all cloud service in Hybrid Backup Sync App.
Creazione di un processo di sincronizzazione
1. Fare clic su «Gestione dei processi di sincronizzazione» > «Crea processo».

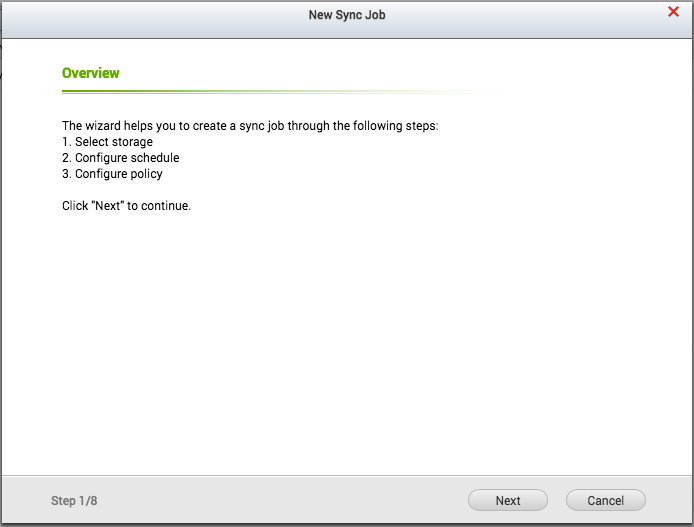
2. Fare clic su «Avanti».
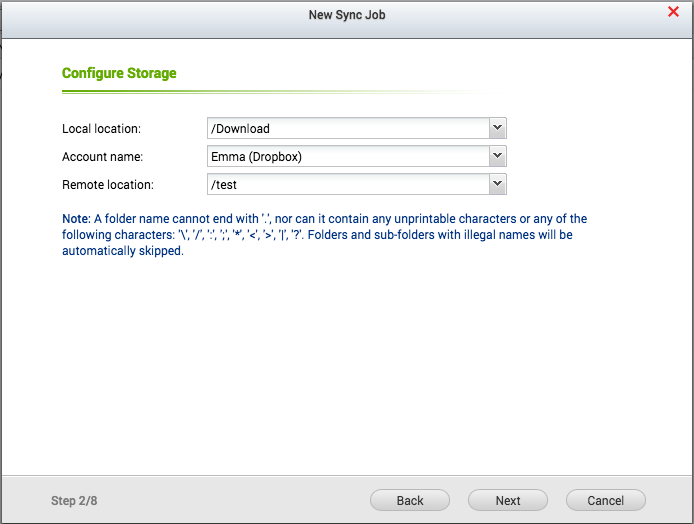
3. Selezionare «Posizione locale», «Nome account» e «Posizione remota» e poi fare clic su «Avanti».
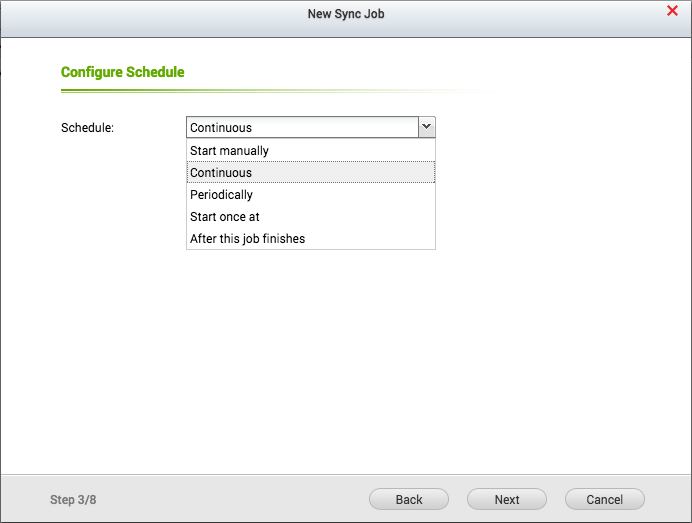
4. È possibile impostare la pianificazione «Avvia manualmente”, «Continuo», «Periodicamente», «Avvia una volta alle» e «Al termine di questo lavoro».
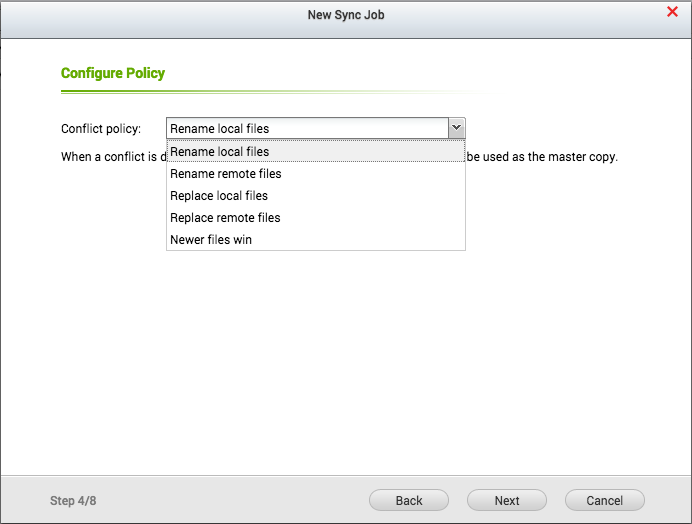
5. Impostare la politica di conflitto file e fare clic su «Avanti».
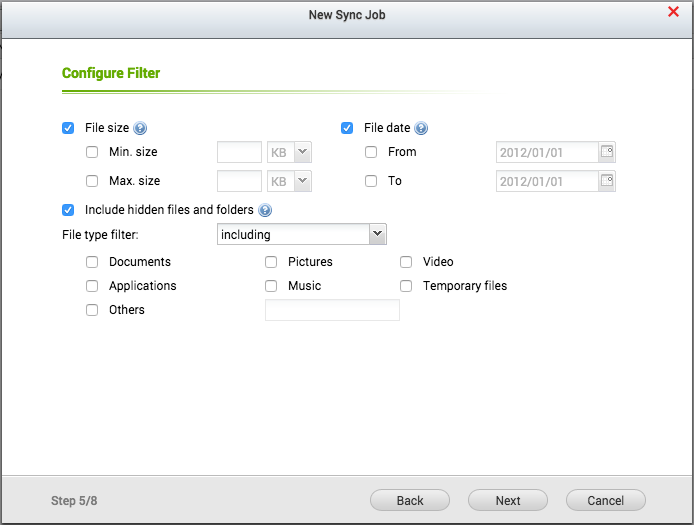
6. Impostare i filtri per dimensione file, data file, file/cartelle nascosti e tipi di file e fare clic su «Avanti».
7. Impostare altre opzioni, come «Timeout”, “Numero di tentativi», «Intervallo tra tentativi», «Numero massimo di file ignorati» ed «Elaborazione contemporanea di file», e poi fare clic su «Avanti».

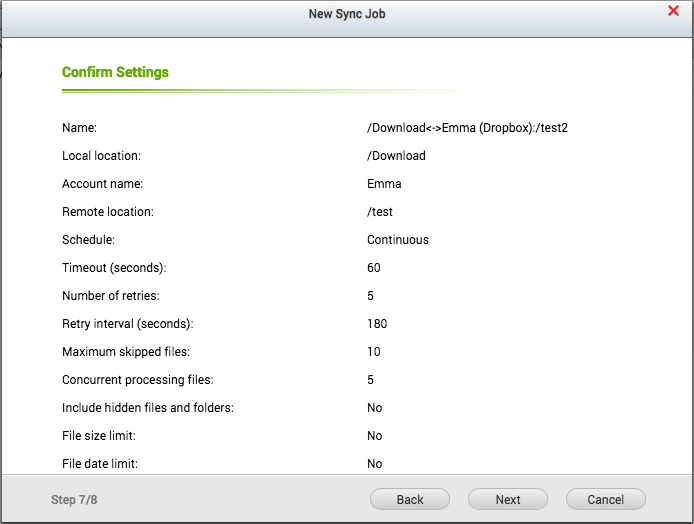
8. Prima di fare clic su «Avanti», confermare che le impostazioni siano corrette.
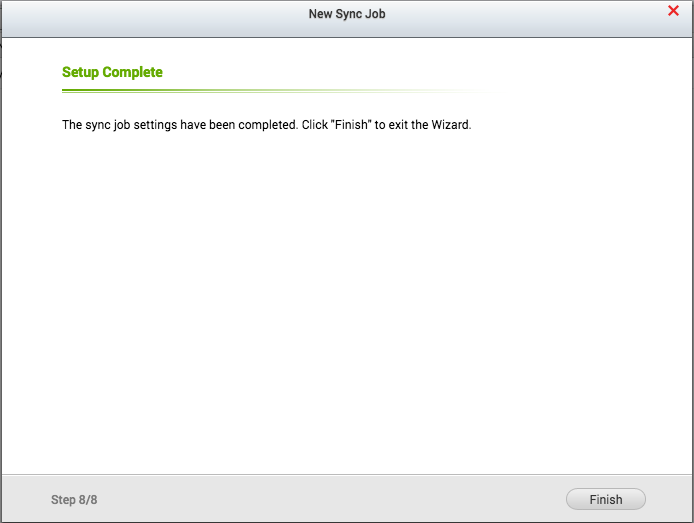
9. Fare clic su «Fine».
Miscellaneous
Transfer rate control
The Cloud Backup Sync App allows you to configure data transfer limits for each account. The maximum rate for uploading and downloading can be configured separately. You can also configure the time interval and the days of the week to apply the limits. For example, enable it only during office hours on working days to avoid saturating your Internet bandwidth and reducing the performance impact on regular Internet usage. It also helps to reduce the cost of your cloud services if you are offered a free quota of data access within a period of time.

Reporting issues
The Cloud Backup Sync App internally generates debug logs for facilitating troubleshooting. Please click on the “Help” button on the top-right corner of the App’s window. Click “Download Diagnostic Report” to download the debug log file for sending it to the QNAP Helpdesk with your problem details.
Cloud storage utilities
In addition to using the Cloud Backup App to access your data in the cloud storage, there are also many applications that can help you manage your data. Some are listed below for your reference:
- Cloudberry Lab (http://www.cloudberrylab.com/): S3, Glacier, Azure, Google Cloud, and OpenStack browser for Windows.
- Cyberduck (https://cyberduck.io/): S3, Azure, Google Cloud, OpenStack, WebDAV browser for Windows and Mac
- Duplicati (http://www.duplicati.com/): S3 and OpenStack backup client on Windows and Linux
- NetDrive (http://www.netdrive.net/): Mount WebDAV server as a disk drive on Windows.
- S3 Browser (http://s3browser.com/): S3 Windows client
- S3cmd (http://s3tools.org/): Command Line Client Software for S3 in Linux
- Cloud Explorer (https://github.com/rusher81572/cloudExplorer): An S3 browser for Windows, Mac, and Linux
- s3fs (https://code.google.com/p/s3fs/): A FUSE-based file system backed by S3. Mount a bucket as a local file system read/write.
Sync
Creating a sync job
The Cloud Backup Sync App allows you to create a sync job to sync data between local NAS and multiple cloud storage like Google Drive, Dropbox, Amazon Drive, OneDrive, Yandex.disk and Box. It also provides one-way (upload and download) and two-way synchronization.
The Cloud Backup Sync App helps you to create a sync job with the following steps:
- Click the “Sync” icon in the overview page to create a cloud sync job.
- Select one-way or two-way sync and click “Sync with the cloud”. If you select one-way sync, you also can choose upload or download.
- Select an existing cloud account or click the cloud service icon to create a new account to create the sync job.
Using Dropbox as an example, the Cloud Backup Sync App will open a new page to let you authenticate with Dropbox. Enter the login credentials of your Dropbox account and click “Sign in”.
Note: The sign-in window is controlled by cloud vendor. Different cloud services have different log in screens.
After entering the required entries and closing the dialog box, the account information will be tested. The testing includes (but is not limited to) the following items:
- Validate Server URL
- Validate account credentials
- Validate the account has enough access rights to carry out the actions required by sync jobs.
If authenticated successfully, your account will show at the above list. Then you can select this account and click “Next” to create a job.

- Select a cloud account and click “Next” to create a sync job. Enter the job name, source folder, destination folder, set schedule and other advanced settings to finish creating a sync job.
-
Schedule
Sync job provides five types of schedule like start manually, continuous, periodically, run once and after this job finishes. Every setting is same with backup jobs. -
Advanced Settings > Policy
Configure the following job policies:
(1) Client side encryption: You should first go to “Storage Space > Profile” and edit your cloud account to set client side encryption. Read the messages carefully before entering the encryption password, check “I understand” and click “OK” to finish this setting. Then, you can enable client-side encryption for a sync job, and the job will encrypt files before uploading them and decrypt the files after downloading them.
(2) File compression: this setting is same with backup jobs.
(3) Actions: The App provides three types of action (mirror, copy, and move) to let you choose how to sync your data to the cloud.
Mirror means your data at local and cloud are identical after synchronization, and extra files/folders at the destination will be deleted.
Copy will transfer all of the files from the source to destination. Enable “Only transfer updated files” to skip unmodified files. This setting also provides the “Rename/Replace/Skip” conflict policy. Before synchronization, if there are local and cloud files with the same name, Cloud Backup Sync will follow your conflict policy to handle these files.
Move will delete the files at source after synchronization. You can also set conflict policy as rename/replace/skip. Continuous jobs do not support this action.
If you create a two-way sync job, you only need to select the conflict policy.
-
Advanced Settings > Filter
The Cloud Backup Sync App provides various filtering options to help you only sync important data to speed up the sync job, reduce bandwidth usage, and save your cloud expenses. -
Advanced Settings > Options
These settings are the same with backup jobs. For “Maximum skipped files”, if you created a continuous job and skipped files are over this number, the job will change its status to “Warning”. If you created a scheduled job, this job will be stopped when skipped files exceed this number.
Editing a sync job
Change the settings of a sync job by clicking the “Edit” icon in the “All Jobs > Cloud Jobs” list. However, the changes will only be applied after the job is executed again.
Viewing a sync job
Examine detailed status and logs of a sync job by clicking the sync job name in the “All Jobs > Cloud Jobs” list. Similar to backup jobs, you can see a sync job’s status, events, transferred files, and history.
Create Sync Job
1. Click “Sync Job Management” > “Create Job”.
2. Click “Next”.
3. Select “Local location”, “Account name”, and “Remote location”, then click “Next”.
4. You can set “Start manually”, “Continuous”, “Periodically”, “Start once at”, and “After this job finishes” as a schedule.
5. Set the file conflict policy then click “Next”.
6. Set filters for file size, file date, hidden files/folders, and file types then click “Next”.
7. Set other options like “Timeout”, “Number of retries”, “Retry interval”, “Maximum skipped files”, and “Concurrent processing files”, then click “Next”.
8. Confirm these settings are correct before clicking “Next”.
9. Click “Finish”.


