Pxe boot to lan
Содержание:
- Filename syntax
- Introduction
- Начнем с Windows
- WARNING
- Добавляем параметры в меню PXE-сервера
- Подготовка файла ответов
- Known issues
- Common config no COM32
- Gentoo
- Options
- How Can I Make a Bootable CD With ISOLINUX?
- Distinct directory
- file list
- PXELINUX
- Notes
- Syslinux Modules by Firmware and Architecture
- Path resolution
- Сетевая установка
- Filename syntax
- Known issues
Filename syntax
PXELINUX supports the following special pathname conventions:
- ::filename
- Suppress the common filename prefix, i.e. passes the string «filename» unmodified to the server.
- IP address::filename
- (e.g. 192.168.2.3::filename)
- Suppress the common filename prefix, and send a request to an alternate TFTP server.
- Instead of an IP address, a DNS name can be used.
- It will be assumed to be fully qualified if it contains dots; otherwise the local domain as reported by the DHCP server (option 15) will be added.
The double colon symbol («::») was chosen because it is unlikely to
conflict with operating system usage.
However, if you happen to have an environment for which the special
treatment of «::» is a problem,
please contact the Syslinux mailing list.
PXELINUX also supports standard URL syntax.
Introduction
Since the early versions of AIO Boot, this tool has supported booting from the LAN. It supports you to do a lot of work such as installing OS, running tools to Ghost, managing partitions, backup and recovery.

You just need a computer to replace the other bootable devices like USB, HDD and DVD… Of course, clients need to have a local area network connection with the server and have network boot support. If you boot from USB, boot loader and operating systems will use the files on USB. If you boot from the LAN, the boot loader and operating systems will download the necessary files from the LAN. The advantage of network booting is that you will not need to attach boot devices to clients (except cables). If the data transfer rate in your LAN is slower than the read/write speed of boot devices such as USB, HDD or DVD, the speed is the downside of this method.
AIO Boot supports Windows installation from network boot. You can install Windows by integrating ISO and using the Windows Installer or booting into WinPE and installing Windows manually. Most Linux distributions like Ubuntu, Debian, Linux Mint, Arch Linux are also supported.
Начнем с Windows
На эту тему на просторах Сети можно найти довольно много статей. За основу я взял статью с Хабра «Установка Windows Server 2008 по сети с Linux PXE сервера. Кастомизация образа WinPE».
WARNING
Все дальнейшие действия, связанные с подготовкой Windows, выполняются в среде Windows.
Первым делом необходимо подготовить среду WinPE, с которой и будем запускать установки различных систем семейства Windows. Для этого нам потребуется пакет Windows AIK, скачать который можно бесплатно с официального сайта Microsoft.
Запуск средств развертывания Windows PE
После установки пакета Windows AIK открываем консоль «Командная строка средств развертывания». Скопируем WIM-образ и загрузчик и смонтируем его в систему:
Скрипт с меню WinPE запускается файлом . Для корректного отображения кириллицы надо сменить кодировку этого файла на CP866. Следующим шагом нужно поправить по необходимости файл скрипта.
Добавляем параметры в меню PXE-сервера
Меню готово. Как видно из параметров в скрипте, на каждом этапе подключается некая сетевая папка. На PXE-сервере, установка и запуск которого были описаны в предыдущей статье, через Samba нужно опубликовать папку, которая будет доступна только для чтения (иначе установщик может стремиться что-нибудь туда запихнуть или перезаписать).
Далее для автоустановок надо подготовить файлы ответов. Забегая вперед, скажу, что благодаря этим самым файлам можно добиться абсолютно любого результата, например реализовать автоустановку с разбивкой первого диска 40/60% с подключением к домену, и дальше все необходимое программное обеспечение можно уже доставить групповыми политиками домена (но это уже совсем другая история).
Меню подготовили, дальше нужно все запаковать назад в WIM-образ:
Полученный образ WinPE — winpe.wim копируем на PXE-сервер. Далее в меню загрузки PXE, созданного в первой статье, подключаем дочерний файл, в котором будет раздел windows.
Загрузка WIM-образов описана в первой статье. Поэтому привожу только секцию запуска:
Подготовка файла ответов
Начнем с Windows 7 Pro. Для подготовки файла ответов потребуется файл install.wim, который можно взять на установочном диске Windows 7 в папке source. Хватаем его, копируем в удобное доступное место. Далее запускаем Windows System Image Manager.
Вариант 1. Присоединись к сообществу «Xakep.ru», чтобы читать все материалы на сайте
Членство в сообществе в течение указанного срока откроет тебе доступ ко ВСЕМ материалам «Хакера», увеличит личную накопительную скидку и позволит накапливать профессиональный рейтинг Xakep Score!
Подробнее
Вариант 2. Открой один материал
Заинтересовала статья, но нет возможности стать членом клуба «Xakep.ru»? Тогда этот вариант для тебя!
Обрати внимание: этот способ подходит только для статей, опубликованных более двух месяцев назад.
Я уже участник «Xakep.ru»
Known issues
Requires a TFTP server with support for the «tsize» option.
The error recovery routine doesn’t work quite right. For now, it just does a hard reset — seems good enough.
We should probably call the UDP receive function in the keyboard entry loop, so that we answer ARP requests.
Boot sectors/disk images are not supported yet… They probably need auxilliary information (such as device) to work at all.
pxechain.com, as of PXELINUX 4.00, was broken. See Common Problems. See also pxechn.c32.
If you have additional problems, please contact the Syslinux mailing list.
Before you post something, please make sure you have checked that your
kernel files are not named using extensions that have special meanings:
.0 PXE bootstrap program (NBP) .bin "CD boot sector" .bs Boot sector .bss Boot sector, DOS superblock will be patched in .c32 COM32 image (32-bit COMBOOT) .cbt COMBOOT image (not runnable from DOS) .com COMBOOT image (runnable from DOS) .img Disk image |
Broken PXE stacks
Lots of PXE stacks, especially old ones,
have various problems of varying degrees of severity.
Please check out the Hardware Compatibility reference page for
possible workarounds.
Common config no COM32
In this setup, you either can not use any COM32 modules or must not attempt to execute the foreign-architecture COM32 modules.
This setup eliminates any use of (vesa)menu.c32.
Place the following files in the same location:
- pxelinux.0 together with ldlinux.c32 (BIOS); and,
- syslinux.efi (efi32/efi/syslinux.efi renamed uniquely, e.g. as syslnx32.efi or bootia32.efi) together with ldlinux.e32 (EFI IA32); and,
- syslinux.efi (efi64/efi/syslinux.efi renamed uniquely, e.g. as syslnx64.efi or bootx64.efi) together with ldlinux.e64 (EFI X64).
Example:
 default:
  DEFAULT mylabel
  LABEL mylabel
  KERNEL boot/vmlinuz
  INITRD boot/initrd
  APPEND myoptions
  SYSAPPEND bitmask
Instead of the KERNEL directive,
an alternative
could be used when appropriate.
Gentoo
- Download the latest gentoo minimal install CD from a mirror
- Extract the files isolinux/gentoo isolinux/gentoo.igz image.squashfs from the iso to a temporary folder
- Make a folder on the WDS server under $WDS-ROOT\Boot\arch\Linux called gentoo
- Copy the extracted gentoo file to the $WDS-ROOT\Boot\arch\Linux\gentoo folder on the WDS server
- Copy the extracted gentoo.igz and image.squashfs files to a temporary location on a linux machine (i.e. /root/tmp)
- In the /root/tmp location create a folder called gentoo and change into this directory
- mkdir /root/tmp/gentoo
- cd /root/tmp/gentoo
- Type the following command and press enter (this extracts all the files from the gentoo.igz file)
- Make the follwing folders (in the extracted folder)
- mkdir mnt
- mkdir mnt/cdrom
- Copy the image.squashfs to the new created mnt/cdrom folder
- Make a backup copy of the init file
- Edit the init file with the following modifications
    Change the line:
      -- if [ "${REAL_ROOT}" != "/dev/nfs" ] &&
    To:
      ++ if [ "${REAL_ROOT}" != "/dev/nfs" ] &&  && [ "${REAL_ROOT}" != "/" ]
    Change the line (under  # Check for a block device or /dev/nfs):
      -- elif  || [ "${REAL_ROOT}" = "/dev/nfs" ]
    To:
      ++ elif  || [ "${REAL_ROOT}" = "/dev/nfs" ] || [ "${REAL_ROOT}" = "/" ]
    Remove the line:
      -- cache_cd_contents
    Change the line:
      -- mount -t squashfs -o loop,ro ${NEW_ROOT}/mnt/cdrom/${LOOPEXT}${LOOP} ${NEW_ROOT}/mnt/livecd
    To:
      ++ mount -t squashfs -o loop,ro /mnt/cdrom/${LOOPEXT}${LOOP} ${NEW_ROOT}/mnt/livecd
- Compress everything back into a file again by this typing the following and press enter
- Copy the new gentoo.igz.new to the $WDS-ROOT\Boot\arch\Linux\gentoo folder on the WDS server and name it gentoo.igz
- Create a menu entry at the end of the $WDS-ROOT\Boot\arch\pxelinux.cfg\default file
 LABEL gentoo2008-x86
 MENU LABEL Deploy Gentoo 32 bit
 KERNEL /linux/gentoo/gentoo
 append root=/dev/ram0 init=/linuxrc dokeymap looptype=squashfs loop=/image.squashfs cdroot initrd=/linux/gentoo/gentoo.igz real_root=/ vga=791
 #--
 LABEL gentoo2008-x64
 MENU LABEL Deploy Gentoo amd64
 KERNEL /linux/gentoo/gentoo-amd64
 append root=/dev/ram0 init=/linuxrc dokeymap looptype=squashfs loop=/image.squashfs cdroot initrd=/linux/gentoo/gentoo-amd64.igz real_root=/ vga=791
Options
Option priority
Hardcoded «after-options» are applied after DHCP options (and override them)
while hardcoded «before-options» are applied prior to DHCP options.
The default behavior takes the lowest priority.
DHCP options
- Option 208 pxelinux.magic
- Earlier versions of PXELINUX required this option to be set to F1:00:74:7E (241.0.116.126) for PXELINUX to be able to recognize any special DHCP options whatsoever. As of PXELINUX 3.55, this option is deprecated and is no longer required.
- Option 209 pxelinux.configfile
- Specify the initial PXELINUX configuration file name, which may be qualified or unqualified.
- Option 210 pxelinux.pathprefix
- Specify the PXELINUX common path prefix, instead of deriving it from the boot file name. This almost certainly needs to end in whatever character the TFTP server OS uses as a pathname separator, e.g. slash (/) for Unix.
- Option 211 pxelinux.reboottime
- Specify, in seconds, the time to wait before reboot in the event of TFTP failure. «» (zero) means wait «forever» (in reality, it waits approximately 136 years).
Hardcoded options
The program «pxelinux-options»
can be used to hard-code DHCP options into the
«pxelinux.0» image file.
This is sometimes useful when the DHCP server is under different
administrative control.
Hardcoded options:
   6 => 'domain-name-servers',
  15 => 'domain-name',
  54 => 'next-server',
 209 => 'config-file',
 210 => 'path-prefix',
 211 => 'reboottime'
How Can I Make a Bootable CD With ISOLINUX?
- Download Syslinux
- Create a directory called «CD_root». This is the ISO image master file tree
- Create a directory called «isolinux» underneath the directory «CD_root»
- Copy «core/isolinux.bin» from the Syslinux archive
- For version 5.00 or newer, also copy «com32/elflink/ldlinux/ldlinux.c32» from the Syslinux archive
- Create «» (see example)
- Create directories «images» and «kernel» underneath the directory «CD_root»
- Copy any floppy images you want to boot into «images»
- Copy «memdisk/memdisk» from the Syslinux archive into «kernel»
- Use the following command to create your ISO image:
mkisofs -o output.iso \ -b isolinux/isolinux.bin -c isolinux/boot.cat \ -no-emul-boot -boot-load-size 4 -boot-info-table \ CD_root |
The file boot.cat will be automatically created.
Notes about building
ISOLINUX:
- only uses plain ISO 9660 filenames, i.e. it does not support Rock Ridge [], or Joliet filenames. It can still be used on a disc that uses Rock Ridge and/or Joliet extensions, of course. Under Linux, you can verify the plain filenames by mounting with the «» option of the mount command.
- supports long (level 2) ISO 9660 plain filenames, so if compatibility with short-names-only operating systems like MS-DOS is not an issue, you can use the «-l» or «» option of mkisofs to generate long (up to 31 characters) plain filenames.
- does not support discontiguous files, interleaved mode, or logical block and sector sizes other than 2048 bytes. This should normally not be a problem.
By default, ISOLINUX is built in two versions; one of them with extra debugging messages enabled.
If you are having problems with ISOLINUX,
please try out the debugging version (isolinux-debug.bin)
and report the results.
Isohybrid
Although disk storage devices are usually booted via SYSLINUX,
there is an isohybrid feature, which makes the ISO bootable from such devices
(e.g. USB stick), in addition to DVD.
Distinct directory
In this setup, each client’s architecture boots to a respective working directory containing its own configs and its own c32 modules.
File reuse can be achieved by one of several other techniques that may depend on the particular TFTP system’s capabilities (e.g. symlinks).
For example, BIOS clients will load «bios/pxelinux.0»,
EFI32 clients will load «efi32/syslinux.efi» and
EFI64 clients will load «efi64/syslinux.efi».
This setup allows all architectures to use their full capabilities.
Example:
 default:
  UI vesamenu.c32
  DEFAULT mylabel
  LABEL mylabel
  KERNEL vmlinuz
When booting with «/tftproot/bios/pxelinux.0«,
the
is «/tftproot/bios/«.
When booting with «/tftproot/efi32/syslinux.efi«,
the Current Working Directory is «/tftproot/efi32/«.
When booting with «/tftproot/efi64/syslinux.efi«,
the Current Working Directory is «/tftproot/efi64/«.
Distinct directory common kernel path
Note: The paths and file names used in this section are examples only, and are not to be interpreted verbatim.
When referencing a kernel file (e.g. vmlinuz), reference a common path.
For example:
- «::boot/vmlinuz» — TFTP path to current TFTP server starting in its root; or,
- «http://192.0.2.3/boot/vmlinuz» — using a system capable of HTTP transfer, provided by:
- pxelinux.0 atop gPXE/iPXE with HTTP support; or,
- lpxelinux.0; and/or,
- syslinux.efi.
Try to avoid using «» notation,
as it does not strip a directory but rather adds another part to the path that the TFTP server must then interpret,
which one hopes it would be effective (but it is often not).
Example:
 /tftproot/
          |_ boot/
          |      |_ vmlinuz
          |      |_ ...
          |
          |_ bios/
          |      |_ pxelinux.0
          |      |_ ldlinux.c32
          |      |_ default
          |      |_ (bios)*.c32
          |      |_ ...
          |
          |_ efi32/
          |       |_ boot/
          |       |      |_ vmlinuz
          |       |      |_ ...
          |       |
          |       |_ syslinux.efi
          |       |_ ldlinux.e32
          |       |_ default
          |       |_ (efi32)*.c32
          |       |_ ...
          |
          |_ efi64/
          |       |_ syslinux.efi
          |       |_ ldlinux.e64
          |       |_ default
          |       |_ (efi64)*.c32
          |       |_ ...
          |
          |_ ...
 default:
  UI vesamenu.c32
  DEFAULT mylabel
  LABEL mylabel
  KERNEL ::boot/vmlinuz
The double colon symbol («::«) is an absolute path to the tftproot.
See for other possible notations.
Distinct directory symlink path
Note: The paths and file names used in this section are examples only, and are not to be interpreted verbatim.
Presuming that the tftpd can resolve directory paths’ symlinks, depending perhaps on a chroot…
Example for BIOS clients:
When the «boot/vmlinuz» kernel file exists,
creating a symlink at «bios/boot/»
targeting «../boot» or «/tftproot/boot»
would allow the «boot/vmlinuz» reference
to be resolved to the «/tftproot/boot/vmlinuz» file
by the underlying system whose current working directory is «/tftproot/bios/«.
Some tftpds may also provide for a virtual path option that would work in a similar fashion.
Example:
 /tftproot/
          |_ boot/
          |      |_ vmlinuz
          |      |_ ...
          |
          |_ bios/
          |      |_ boot  -> /tftproot/boot/
          |      |_ pxelinux.0
          |      |_ ldlinux.c32
          |      |_ default
          |      |_ (bios)*.c32
          |      |_ ...
          |
          |_ efi32/
          |       |_ boot  -> /tftproot/boot/
          |       |_ syslinux.efi
          |       |_ ldlinux.e32
          |       |_ default
          |       |_ (efi32)*.c32
          |       |_ ...
          |
          |_ efi64/
          |       |_ boot  -> /tftproot/boot/
          |       |_ syslinux.efi
          |       |_ ldlinux.e64
          |       |_ default
          |       |_ (efi64)*.c32
          |       |_ ...
          |
          |_ ...
 default:
  UI vesamenu.c32
  DEFAULT mylabel
  LABEL mylabel
  KERNEL boot/vmlinuz
A KERNEL directive such as «KERNEL boot/vmlinuz»
in fact points to «::boot/vmlinuz» by means of the symlinks.
Distinct directory symlink file
Note: The paths and file names used in this section are examples only, and are not to be interpreted verbatim.
Example for BIOS clients:
When the «/tftproot/boot/vmlinuz» file exists,
creating a «vmlinuz» symlink
in the «/tftproot/bios/boot/» directory
targeting «../../boot/vmlinuz»
would be resolved to the «/tftproot/boot/vmlinuz» file.
Example:
 /tftproot/
          |_ boot/
          |      |_ vmlinuz
          |      |_ ...
          |
          |_ bios/
          |      |_ boot/
          |      |      |_ vmlinuz  -> /tftproot/boot/vmlinuz
          |      |      |_ ...
          |      |
          |      |_ pxelinux.0
          |      |_ ldlinux.c32
          |      |_ default
          |      |_ (bios)*.c32
          |      |_ ...
          |
          |_ efi32/
          |       |_ boot/
          |       |      |_ vmlinuz  -> /tftproot/boot/vmlinuz
          |       |      |_ ...
          |       |
          |       |_ syslinux.efi
          |       |_ ldlinux.e32
          |       |_ default
          |       |_ (efi32)*.c32
          |       |_ ...
          |
          |_ efi64/
          |       |_ boot/
          |       |      |_ vmlinuz  -> /tftproot/boot/vmlinuz
          |       |      |_ ...
          |       |
          |       |_ syslinux.efi
          |       |_ ldlinux.e64
          |       |_ default
          |       |_ (efi64)*.c32
          |       |_ ...
          |
          |_ ...
 default:
  UI vesamenu.c32
  DEFAULT mylabel
  LABEL mylabel
  KERNEL boot/vmlinuz
file list
This document mentions several files that are part of the official
Syslinux distribution archives published in kernel.org.
The paths mentioned in this document are in reference to such official archives.
The paths to the same files in your OS are not considered in this document.
The locations of the relevant files as found in the official
Syslinux distribution archives are here posted for convenience.
SYSLINUX (for BIOS) installers:
linux/syslinux
mtools/syslinux
extlinux/extlinux
win32/syslinux.exe
win64/syslinux64.exe
dos/syslinux.com
ISOLINUX:
core/isolinux.bin
com32/elflink/ldlinux/ldlinux.c32
Network booting (for BIOS):
core/pxelinux.0
core/lpxelinux.0
gpxe/gpxelinux.0
com32/elflink/ldlinux/ldlinux.c32
UEFI IA32:
efi32/efi/syslinux.efi
efi32/com32/elflink/ldlinux/ldlinux.e32
UEFI X64:
efi64/efi/syslinux.efi
efi64/com32/elflink/ldlinux/ldlinux.e64
PXELINUX
The following bootloader files for BIOS network clients
are included in the official Syslinux distribution archives:
- core/pxelinux.0
- Supports TFTP network booting.
- core/lpxelinux.0
- Supports TFTP/FTP/HTTP network booting.
- gpxe/gpxelinux.0
- A merge/mix of gpxe and pxelinux.0, supports several network protocols by means of network boot images (nbi).
In addition to the main bootloader file,
PXELINUX also needs at least a core module.
The location of the core module file inside the official
Syslinux distribution archives is
«com32/elflink/ldlinux/ldlinux.c32«.
The bootloader file shall be located in the relevant server,
where the network client fetches it.
Since version 5.00, also the core module named
«ldlinux.c32»
needs to be copied to the same directory as the bootloader file.
See PXELINUX.
For UEFI network booting, see the section of this document.
Notes
Error recovery
If the boot fails, PXELINUX (unlike SYSLINUX) will not wait forever;
rather, if it has not received any input for approximately five minutes
after displaying an error message, it will reset the machine.
This allows an unattended machine to recover in case it had bad enough
luck of trying to boot at the same time the TFTP server goes down.
Please check out the Hardware Compatibility reference page
to see if your PXE stacks need any special workarounds.
MTFTP
PXELINUX does not support MTFTP, and there are no plans of doing so.
It is of course possible to use MTFTP for the initial boot,
if you have such a setup.
MTFTP server setup is beyond the scope of this document.
Syslinux Modules by Firmware and Architecture
Starting from Syslinux 6.00, binary files included in official Syslinux releases are separated by Firmware and Architecture. There are respective binary files under respective bios, efi32, efi64 directories.
Note that only the ldlinux module changes its filename’s extension according to firmware and architecture. All other Syslinux modules remain as «*.c32«.
So now there are several Syslinux modules with the same filename. For example, there are «bios/com32/menu.c32«, «efi32/com32/menu.c32«, «efi64/com32/menu.c32«. Each set of modules is used under different circumstances and from different expected paths, so there is no conflict between them.
| LOADER | BIOS REQUIRES | EFI IA32 REQUIRES | EFI X64 REQUIRES |
|---|---|---|---|
| isolinux*.bin : | ldlinux.c32 | ||
| *pxelinux.0 : | ldlinux.c32 | ||
| ldlinux.* : | ldlinux.c32 | ||
| (efi ia32) syslinux.efi (or renamed) : | ldlinux.e32 | ||
| (efi x64) syslinux.efi (or renamed) : | ldlinux.e64 |
Path resolution
ISOLINUX resolves pathnames in the following way:
- A pathname consists of names separated by slashes, Unix-style.
- A leading slash means it searches from the root directory of the ISO9660 filesystem; otherwise the search is performed from the isolinux directory (think of this as the «current working directory»).
- The maximum length of any pathname is 255 characters.
Support for relative notation directory paths using dots (periods),
such as «.» and «..«,
was initially introduced in version 4.02 and improved in 4.06.
ISOLINUX will search for the config file directory in the order
/boot/isolinux, /isolinux, .
The first directory that exists is used,
even if it contains no files.
Therefore, please make sure that these directories do not exist
if you don’t want ISOLINUX to use them.
ISOLINUX will also search for the config file
in the respective SYSLINUX directories,
and will search for either
isolinux.cfg or syslinux.cfg files.
The «/isolinux/» directories
and the isolinux.cfg file will take precedence over their
respective syslinux alternatives when using ISOLINUX to boot.
In other words, «/syslinux/» and syslinux.cfg
are now generic terms and valid when booting with ISOLINUX.
See also «Working directory», «Configuration location and name»
and Syslinux configuration file.
Tip:
Since , locating the bootloader files under the
«/syslinux/» directory (instead of using the
«/isolinux/» directory) can simplify the procedure
to go from ISOLINUX to SYSLINUX
(e.g. to put the content of a bootable ISO image onto a SYSLINUX USB drive):
mkisofs -o output.iso \ -b syslinux/isolinux.bin -c syslinux/boot.cat \ -no-emul-boot -boot-load-size 4 -boot-info-table \ CD_root |
Сетевая установка
Существует два стандартных варианта решения этой задачи. Для установки операционных систем семейства Windows существуют всем известные WDS (Windows Deployment Services) и SMS (Microsoft System Management Server). У Unix-подобных систем с давних пор была возможность установки разнообразными методами, в том числе и по сети. Нет сомнения, что для развертывания и установки Windows систем WDS удобен и выполняет свои обязанности, но для инсталляции операционных систем семейства Unix он не очень подходит.
Для начала немного теории. Принцип сетевой установки очень прост. При включении компьютера управление передается ПЗУ сетевой карты. Обычно используется среда PXE (Pre-Execution Environment). После распаковки в оперативную память, она активирует сетевую карту и начинает посылать широковещательный запрос в сеть для нахождения сервера DHCP. При ответе DHCP, PXE запрашивает у него IP адрес, который необходимо присвоить сетевой карте, маску сети, IP адрес сервера TFTP, имя файла для загрузки и т.д. Далее, если ответы на вопросы получены при помощи встроенного TFTP-клиента, PXE обращается к указанному серверу с запросом на получение указанного в параметрах файла. Если файл найден и получен то управление передается на него. Всеми последующими действиями будет руководить именно он.
Широкое распространение получил проект Питера Анвина (Peter Anvin) под названием — Syslinux . Он имеет простые конфигурационные файлы и включен в поставку многих Linux дистрибутивов. На официальном сайте дается такое определение этому пакету: «SYSLINUX является загрузчиком для операционных системы Linux, который работает на MS-DOS/Windows FAT файловых системах. Он предназначен для простой загрузки и установки Linux. А также для создания спасательных и других специальных загрузочных конфигураций». В этот пакет входит PXELINUX, который является производной от SYSLINUX и используется для загрузки Linux с сетевого сервера. PXELINUX соответствует Intel PXE (Pre-Execution Environment) спецификации. Основой PXELINUX является файл «pxelinux.0» — это и есть загрузчик. Этот файл располагается в корне TFTP сервера. Его конфигурационные файлы размещаются в папке «/tftpboot/pxelinux.cfg/». После запуска на клиентской машине «pxelinux.0» скачивает с сервера и отображает файл «message». Это простой текстовый файл, в котором описаны доступные варианты загрузки. Затем он скачивает свой конфигурационный файл («/tftpboot/pxelinux.cfg/default») и переходит в режим ожидания ввода имени предоставленных конфигураций. Имя раздела пишется после метки label. В ответ на ввод имени варианта установки «pxelinux.0» начинает выполнять действия описанные в нем. Для создания простого текстового меню файл «/tftpboot/pxelinux.cfg/default» может выглядеть так:
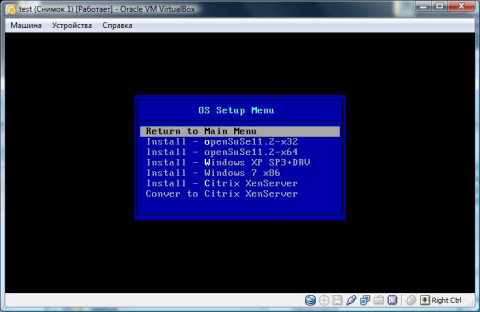
Так же возможно создание графического меню выбора операционных систем (рис.1-3).
Рисунок 1 Главное окно загрузочного меню
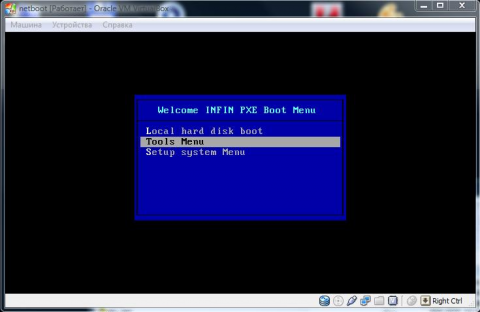
Рисунок 2 Меню «спасательных» систем и утилит
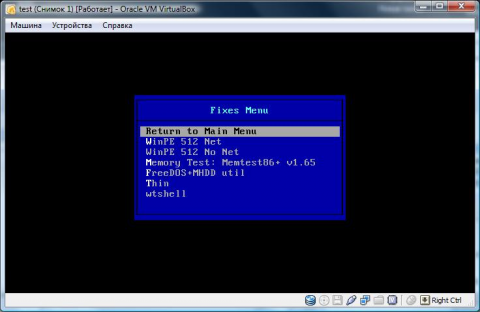
Рисунок 3 Меню установки ОС
Filename syntax
PXELINUX supports the following special pathname conventions:
- ::filename
- Suppress the common filename prefix, i.e. passes the string «filename» unmodified to the server.
- IP address::filename
- (e.g. 192.168.2.3::filename)
- Suppress the common filename prefix, and send a request to an alternate TFTP server.
- Instead of an IP address, a DNS name can be used.
- It will be assumed to be fully qualified if it contains dots; otherwise the local domain as reported by the DHCP server (option 15) will be added.
The double colon symbol («::») was chosen because it is unlikely to
conflict with operating system usage.
However, if you happen to have an environment for which the special
treatment of «::» is a problem,
please contact the Syslinux mailing list.
, PXELINUX also supports standard URL syntax.
Known issues
Requires a TFTP server with support for the «tsize» option.
The error recovery routine doesn’t work quite right. For now, it just does a hard reset — seems good enough.
We should probably call the UDP receive function in the keyboard entry loop, so that we answer ARP requests.
Boot sectors/disk images are not supported yet… They probably need auxilliary information (such as device) to work at all.
pxechain.com, as of PXELINUX 4.00, was broken. See Common Problems. See also pxechn.c32.
If you have additional problems, please contact the Syslinux mailing list.
Before you post something, please make sure you have checked that your
kernel files are not named using extensions that have special meanings:
 .0    PXE bootstrap program (NBP)
 .bin  "CD boot sector"
 .bs   Boot sector
 .bss  Boot sector, DOS superblock will be patched in
 .c32  COM32 image (32-bit COMBOOT)
 .cbt  COMBOOT image (not runnable from DOS)
 .com  COMBOOT image (runnable from DOS)
 .img  Disk image
Broken PXE stacks
Lots of PXE stacks, especially old ones,
have various problems of varying degrees of severity.
Please check out the Hardware Compatibility reference page for
possible workarounds.


