How to install and configure openldap server on ubuntu 16.04
Содержание:
Step 2 — Installing and Configuring the phpLDAPadmin Web Interface
Although it is very possible to administer LDAP through the command line, most users will find it easier to use a web interface. We’re going to install phpLDAPadmin, a PHP application which provides this functionality.
The Ubuntu repositories contain a phpLDAPadmin package. You can install it with :
This will install the application, enable the necessary Apache configurations, and reload Apache.
The web server is now configured to serve the application, but we need to make some additional changes. We need to configure phpLDAPadmin to use our domain, and to not autofill the LDAP login information.
Begin by opening the main configuration file with root privileges in your text editor:
Look for the line that starts with . In you can search for a string by typing , then the string, then . Your cursor will be placed on the correct line.
This line is a display name for your LDAP server, which the web interface uses for headers and messages about the server. Choose anything appropriate here:
/etc/phpldapadmin/config.php
Next, move down to the line. This config tells phpLDAPadmin what the root of the LDAP hierarchy is. This is based on the value we typed in when reconfiguring the package. In our example we selected and we need to translate this into LDAP syntax by putting each domain component (everything not a dot) into a notation:
/etc/phpldapadmin/config.php
Now find the login configuration line and comment it out with a at the beginning of the line:
/etc/phpldapadmin/config.php
This option pre-populates the admin login details in the web interface. This is information we shouldn’t share if our phpLDAPadmin page is publicly accessible.
The last thing that we need to adjust is a setting that controls the visibility of some phpLDAPadmin warning messages. By default the application will show quite a few warning messages about template files. These have no impact on our current use of the software. We can hide them by searching for the parameter, uncommenting the line that contains it, and setting it to true:
/etc/phpldapadmin/config.php
This is the last thing that we need to adjust. Save and close the file to finish. We don’t need to restart anything for the changes to take effect.
Next we’ll log into phpLDAPadmin.
Debugging and troubleshooting
Here are some tips to help troubleshoot sssd.
The debug level of sssd can be changed on-the-fly via , from the package:
Or change add it to the config file and restart sssd:
Either will yield more logs in and can help identify what is going on. The approach has the clear advantage of not having to restart the service.
Caching
Caching is useful to speed things up, but it can get in the way big time when troubleshooting. It’s useful to be able to remove the cache while chasing down a problem. This can also be done with the tool from the package.
You can either remove the whole cache:
Or just one element:
Or expire everything:
Accessing phpLDAPadmin Web Interface
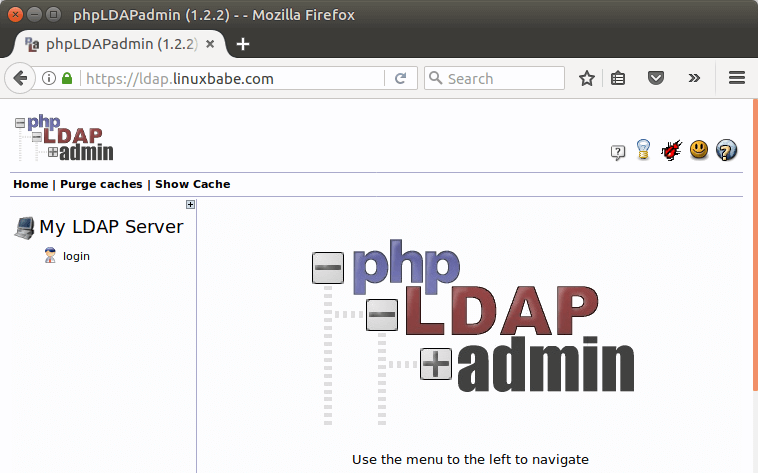
We can now test out the phpLDAPadmin tool with our web browser. When phpLDAPadmin first loads, it looks something like this.
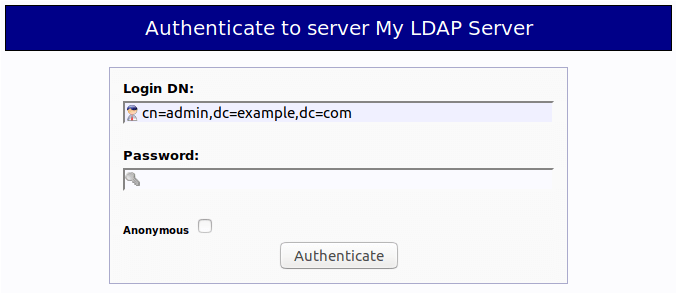
To log into our OpenLDAP server, click on the login link. You will see the login dialog box. The default login DN is . You may need to change . In my case, I need to change the login DN to .
The password is the admin password you set during the configuration of OpenLDAP server. Once you log into phpLDAPadmin, you can manage this directory server.

That’s it! I hope this tutorial helped you install and configure both OpenLDAP server and phpLDAPadmin on Ubuntu 16.04. In the next tutorial, we will see how to configure Ubuntu to authenticate user logins with OpenLDAP.
PAM setup with libpam-ldap
In order to globally enable LDAP authentication through PAM, configure /etc/pam_ldap.conf accordingly and edit the /etc/pam.d/common-* files so that they contain something like this:
/etc/pam.d/common-account:
account     required      pam_unix.so
account     sufficient    pam_succeed_if.so uid < 1000 quiet
account      pam_ldap.so
account     required      pam_permit.so
/etc/pam.d/common-auth:
auth    sufficient      pam_unix.so nullok_secure
auth    requisite       pam_succeed_if.so uid >= 1000 quiet
auth    sufficient      pam_ldap.so use_first_pass
auth    required        pam_deny.so
/etc/pam.d/common-password:
password    sufficient    pam_unix.so md5 obscure min=4 max=8 nullok try_first_pass
password    sufficient    pam_ldap.so
password    required      pam_deny.so
/etc/pam.d/common-session:
session     required      pam_limits.so
session     required      pam_unix.so
session     optional      pam_ldap.so
Note that there are numerous ways to configure PAM, depending on your particular situation and preference. The above only attempts to use pam_ldap if the userid is not below 1000 (i.e. normal user accounts).
4: Настройка шифрования StartTLS LDAP
Веб-интерфейс зашифрован, но внешние клиенты LDAP по-прежнему передают данные в виде простого текста.
Используйте SSL-сертификат Let’s Encrypt для защиты трафика.
Копирование сертификата
Поскольку демон slapd работает как пользователь openldap, а сертификат Let’s Encrypt принадлежит пользователю root, нужно внести несколько коррективов в настройки, чтобы демон slapd мог получить доступ к сертификату. Создайте короткий сценарий в /etc/ssl/, стандартном каталоге системы для хранения сертификатов и ключей SSL. Сценарий позволяет автоматизировать этот процесс, чтобы не повторять его вручную всякий раз, когда будут обновляться сертификаты Let’s Encrypt. Позже нужно будет добавить его в cron job.
Сначала откройте новый текстовый файл для сценария оболочки:
Вставьте в файл следующий код. В строке SITE=example.com укажите свой домен.
Этот сценарий открывает каталог сертификатов Let’s Encrypt, копирует файлы в /etc/ssl, а затем обновляет права на закрытые ключи, передавая группе ssl-cert право на чтение. Затем он перезапускает slapd, чтобы обновить сертификаты.
Сохраните и закройте файл.
Запустите сценарий:
Убедитесь, что сценарий работает. Для этого запросите список файлов /etc/ssl:
Вышеприведенная команда немного отличается от обычной. Раздел su -c ‘. . .’ переводит команду ls в корневую оболочку. В противном случае команда будет выполняться с привилегиями пользователя без доступа к sudo, и не сработает, потому этот пользователь не имеет права на чтение /etc/ssl/private.
Команда ls выведет данные о трех файлах. Проверьте привилегии и права собственности.
Теперь нужно настроить certbot.
Автоматизация certbot
Добавьте certbot в cron job, чтобы сценарий запускался автоматически после обновления сертификатов.
В таблице должна быть строка certbot renew. Добавьте в нее выделенные красным параметры.
15 3 * * * /usr/bin/certbot renew —quiet —renew-hook /usr/local/bin/renew.sh
Сохраните и закройте crontab.
Поддержка безопасных соединений slapd
Добавьте пользователя openldap в группу ssl-cert, чтобы демон slapd смог читать закрытые ключи.
Перезапустите slapd:
Затем нужно настроить slapd для использования этих сертификатов и ключей. Для этого добавьте изменения конфигурации в файл LDIF (это формат обмена данными LDAP) и загрузите их на сервер LDAP с помощью команды ldapmodify.
Откройте файл LDIF:
В пустой файл добавьте следующие строки.
Сохраните и закройте файл.
Примените новые параметры с помощью ldapmodify:
Не нужно перезагружать slapd для загрузки новых сертификатов, это происходит автоматически с помощью ldapmodify. Запустите команду ldapwhoami еще раз. На этот раз нужно указать правильное имя хоста и добавить параметр -ZZ для принудительного безопасного подключения:
При использовании безопасного соединения нужно указывать полное имя хоста, потому что имя хоста должно совпадать с именем в сертификате. Это предотвращает атаки man-in-the-middle, когда злоумышленник может перехватить ваше соединение и выдавать себя за ваш сервер.
Команда ldapwhoami должна вернуть anonymous без ошибок. Шифрование соединений LDAP успешно настроено.
Log into the phpLDAPadmin Web Interface
We have made the configuration changes we need to the phpLDAPadmin software. We can now begin to use it.
We can access the web interface by visiting our server’s domain name or public IP address followed by the alias we configured. In our case, this was :
<pre>
http://<span class=“highlight”>serverdomainnameorIP</span>/<span class=“highlight”>superldap</span>
</pre>
The first time you visit, you will probably see a warning about the site’s SSL certificate:
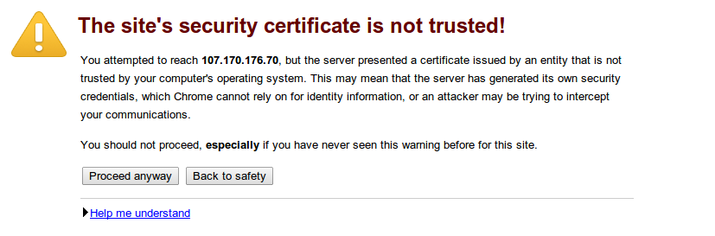
The warning is just here to let you know that the browser does not recognize the certificate authority that signed your certificate. Since we signed our own certificate, this is expected and not a problem.
Click the “Proceed anyway” button or whatever similar option your browser gives you.
Next, you will see the password prompt that you configured for Apache:
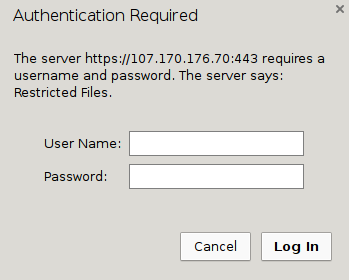
Fill in the account credentials you created with the command. You will see the main phpLDAPadmin landing page:
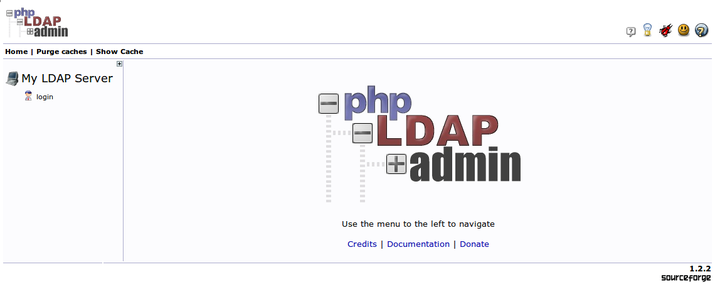
Click on the “login” link that you can see on the left-hand side of the page.
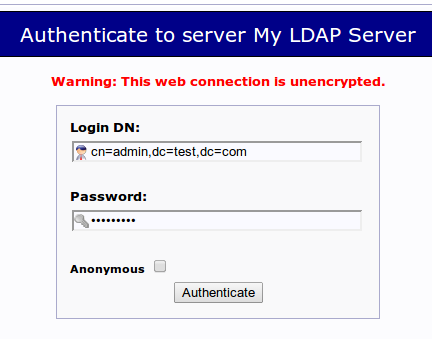
You will be taken to a login prompt. The login “DN” is like the username that you will be using. It contains the account name under “cn” and the domain name you selected for the server broken into “dc” sections as we described above.
It should be pre-populated with the correct value for the admin account if you configured phpLDAPadmin correctly. In our case, this looks like this:
For the password, enter the administrator password that you configured during the LDAP configuration.
You will be taken to the main interface:

Перенос данных с основного LDAP сервера на резервный
Переходим на основной LDAP сервер, останавливаем LDAP, делаем резервную копию данных и запускаем LDAP.
cd /etc/ldap
/etc/init.d/slapd stop
slapcat -v -l backup.ldif
/etc/init.d/slapd start
Переносим файл backup.ldif на backup сервер в папку /etc/ldap.
Переходим на backup сервер.
Останавливаем LDAP
/etc/init.d/slapd stop
Прежде чем восстановить резервную копию данных необходимо очистить всё содержимое папки /var/lib/ldap
rm -f /var/lib/ldap/*
Восстанавливаем резервную копию данных и выполняем переиндексацию
cd /etc/ldap
sudo -u openldap slapadd -v -c -l backup.ldif
sudo -u openldap slapindex -v
Запускаем LDAP
/etc/init.d/slapd start
Для проверки восстановленных данных можно выполнить поиск
ldapsearch -x -b ou=Users,dc=citramon,dc=donetsk,dc=ua "uid=*"
в данном случае должны отобразиться все пользователи, если в ответ получаем всех пользователей из основного LDAP сервера то всё ок, данные перенесены успешно.
Testing OpenLDAP Server
Now that OpenLDAP server is running and client configuration is done, run the following command to make test connections to the server.
ldapsearch -x
Output:
# extended LDIF
#
# LDAPv3
# base <dc=linuxbabe,dc=com> (default) with scope subtree
# filter: (objectclass=*)
# requesting: ALL
#

# linuxbabe.com
dn: dc=linuxbabe,dc=com
objectClass: top
objectClass: dcObject
objectClass: organization
o: LinuxBabe

# admin, linuxbabe.com
dn: cn=admin,dc=linuxbabe,dc=com
objectClass: simpleSecurityObject
objectClass: organizationalRole
cn: admin
description: LDAP administrator

# search result
search: 2
result: 0 Success

# numResponses: 3
# numEntries: 2
Result: 0 Success indicates that OpenLDAP server is working. If you get the following line, then it’s not working.
result: 32 No such object
Installing pam_ldap and nss_ldap
This procedure describes how to install the nss_ldap and pam_ldap binaries on Solaris 6 and Solaris 7. The binaries have been delivered as a tar file that extract into /opt/ldap.
1. Copy the tar file to the root directory and untar.
cp nss_ldap_solaris_6_7.tar /; tar -xvf nss_ldap_compiled.tar
2. Install openssl 0.9.8 on the system. You may get messages about conflicting files; ignore these and continue with the installation.
3. Copy /opt/ldap/lib/security/pam_ldap.so to /usr/lib/security/pam_ldap.so.
4. Create an appropriate symlink as follows:
cd /opt/ldap/lib/security; ln -s pam_ldap.so ./pam_ldap.so.1
5. For Solaris 7, save the version of pam_unix.so, and copy over the Solaris 6 version from /opt/ldap/lib/security/pam_unix.so.
cp /usr/lib/security/pam_unix.so /usr/lib/security/pam_unix.so.sol7
cp /opt/ldap/lib/security/pam_unix.so  /usr/lib/security/pam_unix.so
6. Check if the pam module can be loaded. That is, see if the dynamic linker can resolve all the dependencies by running ldd.
ldd /usr/lib/security/pam_ldap.so
7. Check that all the libraries can be found. The libraries under /usr/local/lib may not be found. To put them in the search path, create symbolic links. You may have to make the following links:
libssl.so.0.9.8 =>       /usr/lib/libssl.so.0.9.8
libcrypto.so.0.9.8 =>    /usr/lib/libcrypto.so.0.9.8
libgcc_s.so.1 =>         /usr/lib/libgcc_s.so.1
For example: ln -s /usr/local/lib/libssl.so.0.9.8 /usr/lib/libssl.so.0.9.8
For Solaris 7, the openssl libraries can be found in the /usr/local/lib/ssl directory.
8. Copy nss_ldap from /opt/ldap/lib/nss_ldap.so to /usr/lib/nss_ldap.so and then create the following link:
ln -s /usr/lib/nss_ldap.so /usr/lib/nss_ldap.so.1
9. Check if all dynamic libraries are resolved, as follows:
ldd /usr/lib/nss_ldap.so
10. Copy over nsswitch.conf and pam.conf (refer to ). These files are same as the ones used for Solaris 8+.
What is OpenLDAP
OpenLDAP is an open-source and fast directory server that provides network client with directory services. Client applications connect to OpenLDAP server using the Lightweight Directory Access Protocol (LDAP) to access organizational information stored on that server. Given the appropriate access, clients can search the directory, modify and manipulate records in the directory. OpenLDAP is efficient on both reading and modifying data in the directory.
OpenLDAP servers are most commonly used to provide centralized management of user accounts. For example, you can create an account in OpenLDAP and if it is connected with mail server, FTP server, Samba server, or any other server, you can use the account to log in to these servers without creating a new account for each server.
Installation
Install the slapd package answering the prompt to set an admin user password:
# apt-get update && apt-get install slapd ldap-utils
The ldap-utils package contains the following tools:
- ldapsearch – search for and display entries.
- ldapmodify – modify an entry.
- ldapadd – add a new entry.
- ldapdelete – remove and entry.
- ldapmodrdn – rename an entry.
- ldappasswd – change a password.
The latest version of slapd (v2.4.31 on Debian) only asks for an admin user password and none of the configuration details. To configure slapd, do:
# dpkg-reconfigure -p low slapd
Our answers:
- Omit OpenLDAP server configuration? No
- DNS domain name: top
- Organization name: top
- Administrator password: passwd
- Confirm password: passwd
- Database backend to use: HDB
- Do you want the database to be removed when slapd is purged? No
- Move old database? Yes
- Allow LDAPv2 protocol? No
Open and make sure the following line exists (feel free to listen on IPv6 if needed):
SLAPD_SERVICES="ldap://0.0.0.0:389/ ldaps://0.0.0.0:636/ ldapi:///"
Here’s how our looks like:
# grep -ve "^#" -ve "^$" /etc/default/slapd
SLAPD_CONF=
SLAPD_USER="openldap"
SLAPD_GROUP="openldap"
SLAPD_PIDFILE=
SLAPD_SERVICES="ldap://0.0.0.0:389/ ldaps://0.0.0.0:636/ ldapi:///"
SLAPD_SENTINEL_FILE=/etc/ldap/noslapd
SLAPD_OPTIONS=""
Check initial configuration:
# slapcat
dn: dc=top
objectClass: top
objectClass: dcObject
objectClass: organization
o: top
dc: top
structuralObjectClass: organization
entryUUID: 7953d532-d04f-1033-8bc6-e18a672615bb
creatorsName: cn=admin,dc=top
createTimestamp: 20140914113904Z
entryCSN: 20140914113904.377393Z#000000#000#000000
modifiersName: cn=admin,dc=top
modifyTimestamp: 20140914113904Z

dn: cn=admin,dc=top
objectClass: simpleSecurityObject
objectClass: organizationalRole
cn: admin
description: LDAP administrator
userPassword:: e1AAAAAAQnZSS3JOTnVBbGpmd0VTZ0l3MjVDays=
structuralObjectClass: organizationalRole
entryUUID: 796778b2-d04f-1033-8bc7-e18a672615bb
creatorsName: cn=admin,dc=top
createTimestamp: 20140914113904Z
entryCSN: 20140914113904.506110Z#000000#000#000000
modifiersName: cn=admin,dc=top
modifyTimestamp: 20140914113904Z
Create a new directory to store custom configuration files:
# mkdir /etc/ldap/ldifconfigs
# cd /etc/ldap/ldifconfigs
Backends
Overall concept
Historically the OpenLDAP server (slapd, the Standalone LDAP Daemon) architecture was
split between a frontend which handles network access and protocol processing, and a
backend which deals strictly with data storage. This split design was a feature of the
original University of Michigan code written in 1996 and carried on in all subsequent
OpenLDAP releases. The original code included one main database backend and two
experimental/demo backends. The architecture is modular and many
different backends are now available for interfacing to other technologies, not just
traditional databases.
Note: In older (1.x) releases, the terms «backend» and «database» were often used interchangeably.
To be precise, a «backend» is a class of storage interface, and a «database» is an instance of a
backend. The slapd server can use arbitrarily many backends at once, and can have arbitrarily
many instances of each backend (i.e., arbitrarily many databases) active at once.
Available backends
Currently 17 different backends are provided in the OpenLDAP distribution, and various
third parties are known to maintain other backends independently. The standard backends
are loosely organized into three different categories:
- Data storage backends – these actually store data
- back-bdb: the first transactional backend for OpenLDAP, built on Berkeley DB
- back-hdb: a variant of back-bdb that is fully hierarchical and supports subtree renames
- back-ldif: built on plain text LDIF files
- back-mdb: a transactional backend built on OpenLDAP’s Lightning Memory-Mapped Database (LMDB)
- back-ndb: a transactional backend built on MySQL’s NDB cluster engine
- Proxy backends – these act as gateways to other data storage systems
- back-ldap: simple proxy to other LDAP servers
- back-meta: proxy with meta-directory features
- back-passwd: uses a Unix system’s passwd and group data
- back-relay: internally redirects to other slapd backends
- back-sql: talks to arbitrary SQL databases
- Dynamic backends – these generate data on the fly
- back-config: slapd configuration via LDAP
- back-dnssrv: Locates LDAP servers via DNS
- back-monitor: slapd statistics via LDAP
- back-null: a sink/no-op backend, analogous to Unix /dev/null
- back-perl: invokes arbitrary perl modules in response to LDAP requests
- back-shell: invokes shell scripts for LDAP requests
- back-sock: forwards LDAP requests over IPC to arbitrary daemons
Some backends available in older OpenLDAP releases have been retired from use,
most notably back-ldbm which was inherited from the original UMich code, and
back-tcl which was similar to back-perl and back-shell.
Support for other backends will soon be withdrawn as well. back-ndb is deprecated now since the partnership with MySQL that led to its development was terminated by Oracle after Oracle acquired MySQL. back-bdb and back-hdb will be deprecated in favor of back-mdb soon since back-mdb is superior in all aspects of performance, reliability, and manageability.
In practice, backends like -perl, -shell, and -sock allow interfacing to any arbitrary programming language, thus providing limitless capabilities for customization and expansion. In effect the slapd server becomes an RPC engine with a compact,
well-defined and ubiquitous API.
Конфигурируем samba
Устанавливаем необходимые пакеты
apt-get install samba samba-doc
Идём в /etc/samba и делаем копию дефолтного конфига
cp smb.conf smb.conf.orig
Ниже приведу конфиг моей самбы:
        server string =
        workgroup = EXAMPLE
        netbios name = bdc
#=================================================================================
        passdb backend = ldapsam:ldap://localhost
        obey pam restrictions = no
        security = user
        encrypt passwords = true
        unix extensions  = no
#=================================================================================
        local master = yes
        os level = 250
        domain master = no
        preferred master = yes
        time server = yes
        admin users = admins
#=================================================================================
        log level = 1
        log file = /var/log/samba/workstations/%m.log
        max log size = 50
#=================================================================================
        socket options = SO_KEEPALIVE IPTOS_LOWDELAY TCP_NODELAY SO_RCVBUF=16384 SO_SNDBUF=16384
        getwd cache = yes
        read raw = yes
        write raw = yes
        max xmit = 65536
        wins support = yes
        wins proxy = yes
        dns proxy = no
        name resolve order = wins hosts bcast lmhosts
        wide links = yes
        hosts allow = 192.168. 127.0.0.1 127.0.1.1
        hosts deny = 0.0.0.0/0
        idmap uid = 10000-20000
        idmap gid = 10000-20000
#=================================================================================
        logon script = %U.cmd
        logon path =

        ldap suffix = dc=example,dc=com
        ldap user suffix = ou=Users
        ldap group suffix = ou=Groups
        ldap machine suffix = ou=Computers
        ldap idmap suffix = ou=Idmap
        ldap admin dn = cn=admin,dc=example,dc=com
        ldap ssl = start tls
        ldap passwd sync = yes
        ldap delete dn = no
        domain logons = yes

        invalid users = root
        load printers = no
        enhanced browsing = Yes
        remote announce = «IP PDC сервера»/EXAMPLE
#=================================================================================

        comment = Network logon service
        path = /etc/samba/netlogon
        writable = yes
        browseable = no
        guest ok = yes
#=========Шары описываем сами :)====================================================
Создаём необходимые каталоги, в моём случае это
mkdir /var/log/samba/workstations/
mkdir /etc/samba/netlogon/
Перезагружаем smbd
service smbd restart
Перезагружаем nmbd
service nmbd restart
Теперь samba необходимо указать пароль админа LDAP
smbpasswd -w secret
вместо secret поставьте ваш пароль.
Устанавливаем пароль админу samba такой же как на PDC
smbpasswd -a admins
Извлекаем SID домена EXAMPLE из главного контроллера домена
net rpc getsid
Добавляем BDC в домен EXAMPLE
net rpc join -S pdc -U admins%password
(здесь «pdc» это netbios name главного контроллера домена)
Проверяем как работает samba для этого получим список групп в домене
net groupmap list
ответом должно быть
Domain Admins (S-1-5-21-2302747472-2920907650-383109413-512) -> Domain Admins
Domain Users (S-1-5-21-2302747472-2920907650-383109413-513) -> Domain Users
Domain Guests (S-1-5-21-2302747472-2920907650-383109413-514) -> Domain Guests
Domain Computers (S-1-5-21-2302747472-2920907650-383109413-515) -> Domain Computers
Administrators (S-1-5-32-544) -> Administrators
Account Operators (S-1-5-32-548) -> Account Operators
Print Operators (S-1-5-32-550) -> Print Operators
Backup Operators (S-1-5-32-551) -> Backup Operators
Replicators (S-1-5-32-552) -> Replicators
...И все остальные группы из LDAP...
Дадим группе Domain Admins права администратора домена
для этого выполним следующее:
net rpc rights grant "Domain Admins" SeMachineAccountPrivilege SeTakeOwnershipPrivilege \
SeBackupPrivilege SeRestorePrivilege SeRemoteShutdownPrivilege SePrintOperatorPrivilege \
SeAddUsersPrivilege SeDiskOperatorPrivilege -Uadmins%password
Ответом должно быть Successfully granted rights.
Всё настройка samba окончена.


