How to install metasploitable3 on windows 10
Содержание:
- Metasploitable 2 enumeration and port scanning
- Host System
- Creating the Metasploitable 3 VM
- Installation
- Metasploitable 2 installation and configuration
- CVE Databases
- VSFTPD v2.3.4 vulnerabilities
- Building Metasploitable 3
- Flags
- Metasploit Unleashed Hardware Requirements
- Metasploitable 2 enumeration information
- Open-Vas vulnerability scanner
- Summary
- Prerequisites & Requirements
- Command Output
Metasploitable 2 enumeration and port scanning
In this part of the Metasploitable 2 enumeration tutorial we will be enumerating the running services, accounts and perform an open port scan. We will be using NMap to scan the virtual machine for open ports and we will be fingerprinting the connected services. In this tutorial we will only be focussing on enumerating the network side of the Metasploitable 2 machine. We will cover the web side in a different tutorial where we will be enumerating web applications and directories, performing SQL injection attacks and exploit the vulnerable web services.
I assume you have already installed the Metasploitable virtual machine from the previous tutorial and if it is not running by now it is time to fire it up now. When you login to the vulnerable host with msfadmin as username and password you can use the ifconfig command to determine its IP address. You can also use netdiscover on the Kali linux machine to scan a range of IP addresses for the target host. Use the following command on the terminal:
This command will return all live host on the given IP range, in this example it will be the 192.168.111.0/24 range which consists of IP 192.168.111.0 to 192.168.111.255. Of course you should scan the IP range your Metasploitable 2 VM installation is located on your own network.
Host System
- OS:
- Packer Version:
- Vagrant Version:
- VirtualBox Version:
In Windows Powershell
==> virtualbox-iso: Creating virtual machine…
==> virtualbox-iso: Creating hard drive…
==> virtualbox-iso: Attaching floppy disk…
==> virtualbox-iso: Creating forwarded port mapping for communicator (SSH, WinRM, etc) (host port 2350)
==> virtualbox-iso: Executing custom VBoxManage commands…
virtualbox-iso: Executing: modifyvm metasploitable3-win2k8 —memory 4096
virtualbox-iso: Executing: modifyvm metasploitable3-win2k8 —cpus 2
==> virtualbox-iso: Starting the virtual machine…
==> virtualbox-iso: Error starting VM: VBoxManage error: VBoxManage.exe: error: Could not launch a process for the machine ‘metasploitable3-win2k8’ (VERR_UNRESOLVED_ERROR)
==> virtualbox-iso: VBoxManage.exe: error: Details: code VBOX_E_IPRT_ERROR (0x80bb0005), component MachineWrap, interface IMachine, callee IUnknown
==> virtualbox-iso: VBoxManage.exe: error: Context: «LaunchVMProcess(a->session, sessionType.raw(), Bstr(strEnv).raw(), progress.asOutParam())» at line 600 of file VBoxManageMisc.cpp
==> virtualbox-iso: Deregistering and deleting VM…
==> virtualbox-iso: Deleting output directory…
Build ‘virtualbox-iso’ errored: Error starting VM: VBoxManage error: VBoxManage.exe: error: Could not launch a process for the machine ‘metasploitable3-win2k8’ (VERR_UNRESOLVED_ERROR)
VBoxManage.exe: error: Details: code VBOX_E_IPRT_ERROR (0x80bb0005), component MachineWrap, interface IMachine, callee IUnknown
VBoxManage.exe: error: Context: «LaunchVMProcess(a->session, sessionType.raw(), Bstr(strEnv).raw(), progress.asOutParam())» at line 600 of file VBoxManageMisc.cpp
==> Some builds didn’t complete successfully and had errors:
—> virtualbox-iso: Error starting VM: VBoxManage error: VBoxManage.exe: error: Could not launch a process for the machine ‘metasploitable3-win2k8’ (VERR_UNRESOLVED_ERROR)
VBoxManage.exe: error: Details: code VBOX_E_IPRT_ERROR (0x80bb0005), component MachineWrap, interface IMachine, callee IUnknown
VBoxManage.exe: error: Context: «LaunchVMProcess(a->session, sessionType.raw(), Bstr(strEnv).raw(), progress.asOutParam())» at line 600 of file VBoxManageMisc.cpp
==> Builds finished but no artifacts were created.
Error building the Vagrant box using Packer. Please check the output above for any error messages.
At C:\Users\Venkat Rohith\Documents\metasploitable3\build.ps1:150 char:10
-
- CategoryInfo : OperationStopped: (Error building …error messages.:String) [], RuntimeException
- FullyQualifiedErrorId : Error building the Vagrant box using Packer. Please check the output above for any error messages.

Creating the Metasploitable 3 VM
Now that we have all pre-requisites installed we can use Packer to setup the Virtual Machine in Virtualbox. Move the command line to the Metasploitable 3 location and run the following command from an elevated command line:

Building the Metasploitable 3 VM will take a while.
This command will take a while to complete because first it will download a Windows 2008 evaluation copy from the Microsoft website. When the download is finished, the script will continue to setup the virtual machine in Virtualbox and install Windows 2008 on the virtual machine. The entire process will take anywhere from 30-60 minutes. This depends on the configuration of your host machine and the speed of your internet connection. When the script is finished the output looks as following:

Metasploitable 3 build process finished without errors.
When the script is finished run the following command:
Note: Use 2 dashes for the name parameter here.

Metasploitable 3 added to the Vagrant environment.
Finally we have to run the one more command to have Vagrant execute the scripts that install the vulnerable software on the Windows server 2008 virtual machine. Run the following command and expect to wait another 15-30 minutes until completion:
This will conclude the installation of Metasploitable 3 and you should be able to start the VM within Virtualbox.
Metasploitable 3 installation errors with Vagrant
The Metasploitable 3 setup process is a bit tricky and prone to errors related to specific versions of the prerequisites. Most errors I faced while writing this tutorial were avoided by using the versions of Vagrant, Packer & Virtualbox mentioned earlier in this tutorial. Especially the latest version of Virtualbox resulted in many errors after issuing the vagrant up command.
During the installation of the vulnerable software you might get an error related to the virtual machine state: “The guest machine entered an invalid state while waiting for it to boot.”. When this happens reboot the virtual machine and run the vagrant up command again.
Another error that may occur during the installation of vulnerable software is the following: “chocolatey is not recognized as an internal or external command”. The error didn’t only apply to Chocolatey but also some other scripts. To get rid of this error I’ve added the following directory to the Path variable:
This will make all the scripts in this directory accessible without using a full path. Eventually I had to run the ‘Vagrant up’ command several times before it finished without errors.
Installation
I originally, did not want to cover installation as there are numerous posts floating around the internet covering it. However, I ran into a few issues along the way and hopefully what I learnt to assist others. Unlike Metasploitable 2, Metasploitable 3 must be built utilisng Packer and Vagrant and a provider of your choice (Virtual Box or VMWare). The requirements for Metasploitable 3 are listed on the github repository.
Inside a Ubuntu VM, I utilised Packer v1.0.0 and Vagrant 1.9.1 with Virtuable Box 5.2.8. Utilising the bash script in the Git repository I was able to successfully build Metasploitable 3. However, this was built for VirtualBox and exporting the VM to VMware did not work. I therefore needed to build it for VMWare as that is what I use day to day. I was unable to build for VMWare inside my Ubuntu VM. I was however able to successfully build the .box file utilising packer v1.2.2 and my installation of VMWare Workstation 14. I was unable to use Vagrant successfully as I also needed VMWare Fusion (which I do not have). However, with Packer v1.2.2 I was able to create a .box file with everything inside. I simply unzipped the .box file a few times to get the VMWare files and then imported that into VMWare Workstation.
Metasploitable 2 installation and configuration
First we need to download the Metasploitable 2 virtual machine which contains the vulnerable host machine we will be practicing on in the upcoming tutorials. Make sure you have sufficient resources on your host system for installing and running the virtual machine. You need to have at minimum 10 gigabytes of storage space and enough RAM for your host system, the Metasploitable host and Kali linux if you’re running Kali in a VM on the same host. The Metasploitable 2 download is available from Sourceforge using the following link:
After unzipping the downloaded ZIP file you need to open the virtual machine from VMWare Player:
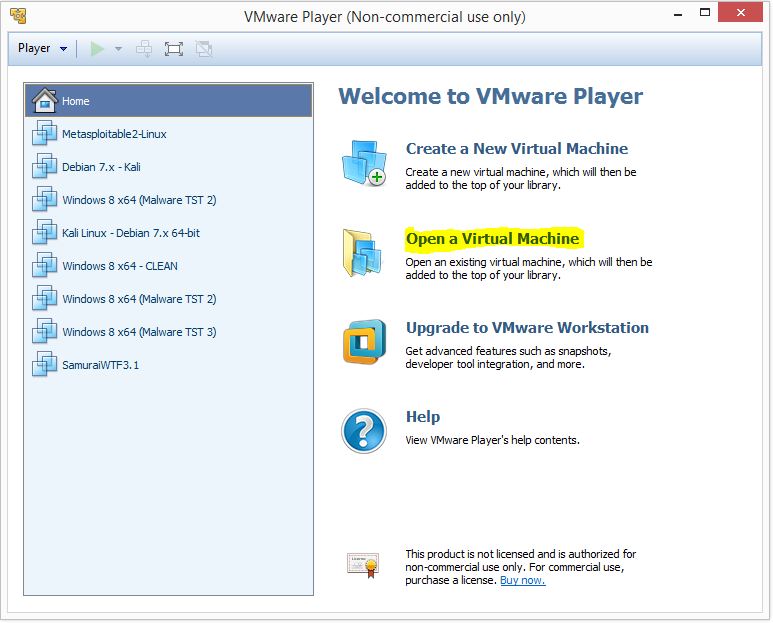
Browse to the folder where you have unzipped the Metasploitable 2 image and add it to your VM list by selecting the .vmx file. The new VM will appear in the list on the left side of the window and is named Metasploitable2-Linux. We do not need to change the Virtual Machine settings so we can start the VM right away by selecting the new VM and click “Play Virtual Machine”:
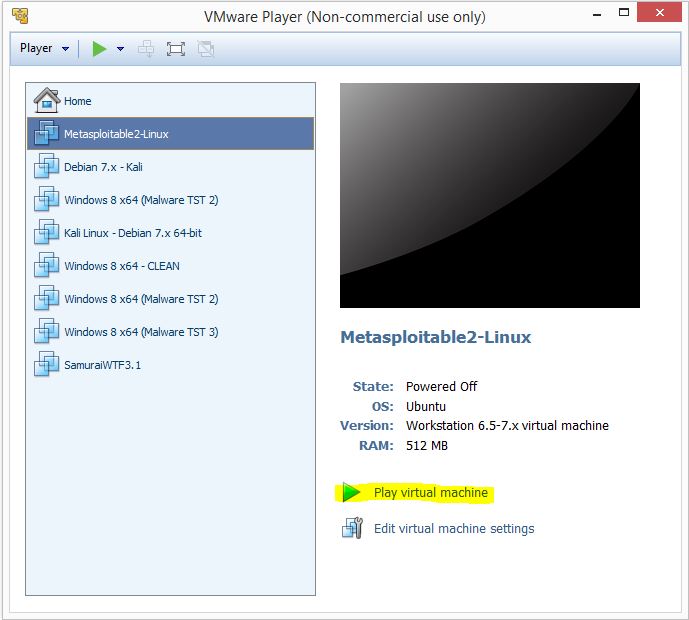
VMWare played might ask you if you have copied or moved the Virtual Machine, click the copied button to continue. Metasploitable 2 will configure itself and present you with a login screen as following:
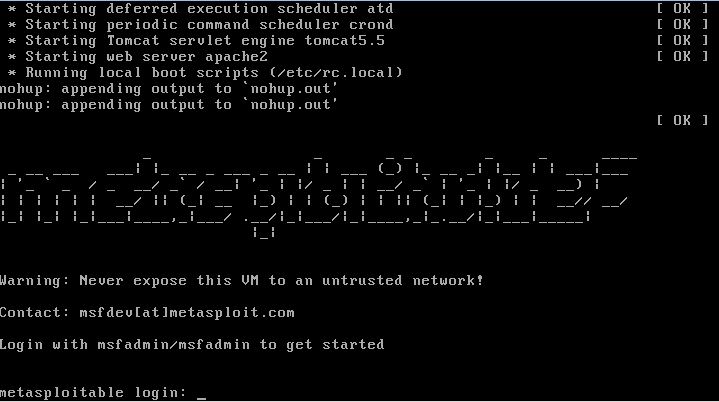
Login to the virtual machine by using the following credentials:
Username: msfadmin
Password: msfadmin
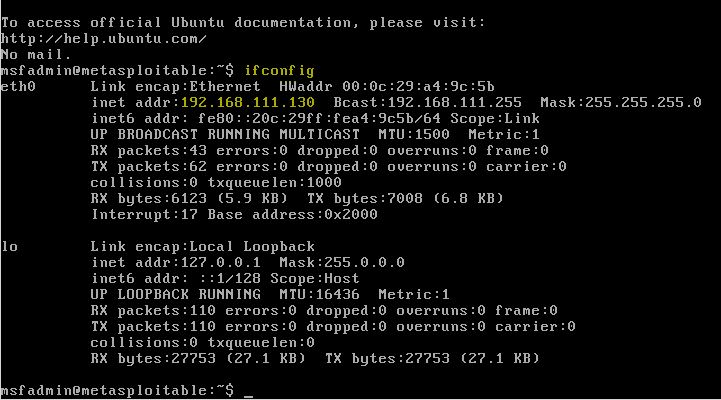
Now that our vulnerable Linux machine is running and we can type the ifconfig command to retrieve the IP address of the Metasploitable 2 virtual machine:
msfadmin@metasploitable:~$ ifconfig
The IP address will appear on the eth0 network adapter as following:
So far we are done with configuring the vulnerable virtual machine and we can switch back to Kali Linux to run some scans on the vulnerable host to determine open ports and running services.
If you are unfamiliar with the Metasploit command line interface and the MSFConsole at this point of the tutorial I recommend you to read the Metasploit basic commands tutorial first before proceeding.
Are you ready to exploit different vulnerabilities and root Metasploitable 2? Follow any of these tutorials:
CVE Databases
Another great source to search for vulnerabilities and information is the CVE database. The database can be searched using the following link:

CVE Mitre
When we run a search for the CVE 2010-2075 vulnerability we can find a list of sources with full disclosures reports and some more links to information which might help us to get a better understanding of the vulnerability and how to exploit it.
Another great source for vulnerability assessments is the CVE details website. We can search this database for specific software and services to determine if they contain any known vulnerabilities. When we run a search for Proftpd 1.3.1 we find a bug list of known vulnerabilities which apply to this specific version. Including some vulnerabilities with a severe risk rating with a low complexity:

Source: CVEdetails.com
VSFTPD v2.3.4 vulnerabilities
To determine the vulnerabilities in the VSFTPD v2.3.4 service we will consult several resources. When we search Google for known vulnerabilities for this service it comes up with a known backdoor that was introduced in a download of the software in version 2.3.4:
This means that only a part of the VSFTPD v2.3.4 installations will be vulnerable since the back door was added after the release and have been removed from the software a couple days later. Nevertheless it will be worth a try to see if the installation on the Metasploitable 2 machine is vulnerable. There is also a Metasploit module available to exploit this vulnerability which we will be looking at in the next Metasploit exploitation tutorial.
CVE: CVE-2011-02523
OSVDB: 73573
VSFTPD v2.3.4 Nmap script scan
We could be firing up Metasploit and see if the service running on the Metasploitable 2 machine is vulnerable but there is another way. To determine if the FTP service contains a backdoor without actually gaining a shell we can use an Nmap script. Nmap script ftp-vsftpd-backdoor tests the VSFTPD v2.3.4 installation for the backdoor. Let’s start Nmap and scan our target host using the following command:
And have a look at that, the Nmap script determined the running vsFTPd service to be vulnerable: More information about the Nmap script and additional script arguments can be found here: https://nmap.org/nsedoc/scripts/ftp-vsftpd-backdoor.html
Building Metasploitable 3
System Requirements:
- OS capable of running all of the required applications listed below
- VT-x/AMD-V Supported Processor recommended
- 65 GB Available space on drive
- 4.5 GB RAM
Requirements:
- Internet connection
To build automatically:
-
- On Linux/OSX run to build the Windows box or to build the Linux box. If /tmp is small, use to store temporary packer disk images under /var/tmp.
- On Windows, open powershell terminal and run to build the Windows box or to build the Linux box. If no option is passed to the script i.e. , then both the boxes are built.
- If both the boxes were successfully built, run to start both. To start any one VM, you can use:
- : to start the Linux box
- : to start the Windows box
- When this process completes, you should be able to open the VM within VirtualBox and login. The default credentials are U: and P: .
To build manually:
- Clone this repo and navigate to the main directory.
- Build the base VM image by running where is your preferred virtualization platform. Currently , , and providers are supported. This will take a while the first time you run it since it has to download the OS installation ISO.
- After the base Vagrant box is created you need to add it to your Vagrant environment. This can be done with the command .
- Use to install the reload vagrant provisioner if you haven’t already.
- To start the VM, run the command . This will start up the VM and run all of the installation and configuration scripts necessary to set everything up. This takes about 10 minutes.
- Once this process completes, you can open up the VM within VirtualBox and login. The default credentials are U: vagrant and P: vagrant.
Videos:
ub1404 Development and Modification
Using Vagrant and a lightweight Ubuntu 14.04 vagrant cloud box image, you can quickly set up and customize ub1404 Metasploitable3 for development or customization.
To do so, install Vagrant and a hypervisor such as VirtualBox. Then, visit the page and find a version that supports
your hypervisor. For instance, version is compatible with VirtualBox.
Install the vagrant virtualbox vbguest plugin:
Then, navigate to the directory in this repository. Examine the Vagrantfile there. Metasploitable ub1404 uses the vagrant provisioner.
To this Vagrantfile, add the metasploitable chef recipes that you desire — you can browse them in the folder. Or,
add or edit your own cookbook and/or recipes there.
From the directory, you can run to get a development virtual ub1404 instance. After the initial build and provision,
when you edit the chef runlist or when you edit a chef recipe, run from the same directory. For faster development, you can comment-out
recipes that you do not need to rerun — but even if they are all enabled, vagrant provisioning should not take longer one or two minutes.
Chef aims to be idempotent, so you can rerun this command often.
Consider taking a snapshot (e.g., ) before modifying recipes, so that you can always return to an initial state ().
If you want a totally fresh snapshot, you can do the initialization with , then take a snapshot, followed by .
Flags
There are a total of 15 flags hidden inside of Metasploitable 3. Back in 2016 Rapid 7 held a Capture the Flag competition, however we have missed the boat so we are doing this for our own fun! The flags are based on a deck of cards and they are not just simply files sitting on the machine. The flags are obscured and hidden inside of files and some additional techniques are required to obtain the flags.
King of Diamonds
The King of Diamonds can be found two ways — By navigating with your browser to http://192.168.206.135:8585/wordpress/wp-content/uploads/2016/09/ and downloading the file. This is all because the WordPress uploads directory has directory listing available. Or, if you have a shell — navigate to C:\wamp\www\wordpress\wp-content\uploads\2016\09 and transfer the file.
Jack of Hearts
The Jack of Hearts is found in C:\Users\Public\Documents. The file is a .docx file. Simply unzip the file and navigate to the unzip word/media directory to get the .png file.

Seven of Spades
The Seven of Spades is located at C:\Users\Public\Documents. It is a .pdf file. To extract the flag you need to use pdfimages.

Ace of Hearts
The Ace of Hearts is found at C:\Users\Public\Pictures. It is a .jpg, however all the other flags are .png and also the .jpg flag doesn’t look like the rest. Using binwalk on the file, you will notice that there is a zip file hidden inside. I copied the file and added a .zip extension and then simply unzipped the file to reveal the flag.

Jack of Diamonds
The Jack of Diamonds is found at C:. When you inspect the file, you will notice that it is a 0 byte file. The flag is hidden inside an alternate data stream.

In order to view the alternate data stream use the following:
You will notice that it looks like base64. Pipe the alternate data stream into another file and then transfer that to your attacking machine. I added the extra ‘==’ to the end of the Base64 string and then decoded it into a png to reveal the flag.

Four of Clubs
The Four of Clubs is found in C:\Users\Public\Music. The file is a .wav, however using binwalk on the file reveals it to have a .png hidden inside. To extract the .png I simply used a tool called foremost to extract the image.

Ten of Diamonds
The Ten of Diamonds is found in C:\Users\Public\Pictures. The file a .png file, however it cannot be viewed. Looking at the file with binwalk we can see the compressed component of the image, however there is no PNG header. Opening the file in hexeditor I can see that the letters PNG have been replaced with MSF. I change these bytes to ‘50 4e 47’ which provides me with the PNG header. I save the file and view the flag.


Queen of Hearts
The Queen of Hearts flag is found by browsing the MySQL installation on port 3306. Using the username ‘root’ and no passowrd I was able to navigate through to find the database ‘cards’ and the table ‘queen_of_hearts’. The first entry in the table contacts base64 encoded text. I copied this to my attacking machine and decoded. However, there must be something wrong with the base64 string as the flag appears to be broken.

Three of Spades.
The Three of Spades is found in C:\Windows and is a .png file. However the file does not display. Further Work is needed to decode this flag. To Be Completed.
King of Clubs
The King of Clubs is found in C:\Windows\System32 and is a windows PE executable. This flag requires binary analysis to be conducted in order to decode the flag. To Be Completed.
Metasploit Unleashed Hardware Requirements
All of the values listed below are estimated or recommended. You can get away with less in some cases but be aware that performance will suffer, making for a less than ideal learning experience.
Hard Drive Space
You will need to have, at minimum, 10 gigabytes of available storage space on your host. Since we are using virtual machines with large file sizes, this means that we are unable to use a FAT32 partition since large files are not supported in that filesystem, so be sure to choose NTFS, ext3, or some other filesystem format. The recommended amount of space needed is 30 gigabytes.
If you decided to create clones or snapshots of your virtual machine(s) as you progress through the course, these will also take up valuable space on your system. Be vigilant and do not be afraid to reclaim space as needed.
Available Memory
Failing to provide enough memory to your host and guest operating systems will eventually lead to system failure and/or result in being unable to launch your virtual machine(s). You are going to require RAM for your host OS as well as the amount of RAM that you are dedicating for each virtual machine. Use the guide below to help in deciding the amount of RAM required for your situation.
- Linux “HOST” Minimal Memory Requirements
- 1 GB of system memory (RAM)
- Realistically 2 GB or more
- Kali “GUEST” Minimal Memory Requirements
- At least 1 GB of RAM (2 GB is recommended) // more never hurts!
- Realistically 2 GB or more with a SWAP file of equal value
- Metasploitable “GUEST” Minimal Memory Requirements
- (Optional) Per Windows “GUEST” Minimal Memory Requirements
- At least 256 MB of RAM (1 GB is recommended) // more never hurts!
- Realistically 1 GB or more with a page file of equal value
Processor
To ensure the best experience, we recommend a 64-bit quad-core CPU or better. The bare-minimum requirement for VMware Player is a 400MHz or faster processor (500MHz recommended) but these speeds are inadequate for the purposes of this course. The more horsepower you can throw at your lab, the better.
Internet Accessibility
Getting your lab set up will require downloading some large virtual machines so you will want to have a good high-speed connection to do so. If you choose to use “Bridged” networking for your virtual machines and there is no DHCP server on your network, you will have to assign static IP addresses to your guest VMs.
Metasploitable 2 enumeration information
Let’s start this vulnerability assessment by looking what we already know about the Metasploitable 2 machine from the previous enumeration phase.
- It is running Linux 2.6.9 – 2.6.33 as an operating system.
- The server name is METASPLOITABLE.
- There are 35 user accounts available.
- The msfadmin is the administrator account.
- There is no expiry date on the password of the msfadmin administrator account.
- We know which services are running, the versions of these services and on which port they are listening.
- There is a webserver and SQL server running on the Metasploitable machine.
From the Nmap service scan we got the following details about open ports and services:
| Service | Port | Status |
| Vsftpd 2.3.4 | 21 | Open |
| OpenSSH 4.7p1 Debian 8ubuntu 1 (protocol 2.0) | 22 | Open |
| Linux telnetd service | 23 | Open |
| Postfix smtpd | 25 | Open |
| ISC BIND 9.4.2 | 53 | Open |
| Apache httpd 2.2.8 Ubuntu DAV/2 | 80 | Open |
| A RPCbind service | 111 | Open |
| Samba smbd 3.X | 139 & 445 | Open |
| 3 r services | 512, 513 & 514 | Open |
| GNU Classpath grmiregistry | 1099 | Open |
| Metasploitable root shell | 1524 | Open |
| A NFS service | 2048 | Open |
| ProFTPD 1.3.1 | 2121 | Open |
| MySQL 5.0.51a-3ubuntu5 | 3306 | Open |
| PostgreSQL DB 8.3.0 – 8.3.7 | 5432 | Open |
| VNC protocol v1.3 | 5900 | Open |
| X11 service | 6000 | Open |
| Unreal ircd | 6667 | Open |
| Apache Jserv protocol 1.3 | 8009 | Open |
| Apache Tomcat/Coyote JSP engine 1.1 | 8180 | Open |
Many of these services contain known vulnerabilities which can be exploited. The following step is to find out which services are vulnerable and collect information about how they can be exploited. There are several sources which can be used to determine if a service is vulnerable or not. The most popular and knows sources are exploit-db from Offensive Security and the Open Source Vulnerability Database (OSVDB). We will also be looking at searchsploit, an offline exploit database included with Kali Linux. Searchsploit is a great offline source when performing a vulnerability assessment as it contains a lot of information about known vulnerabilities and exploit code.
Since this is a hacking tutorial to teach you how to perform a vulnerability assessment and not a Metasploitable 2 hacking walkthrough guide, we will only assess a few vulnerable services. The remaining vulnerable services on Metasploitable 2 can be used by you to practice on. If you get stuck at some part do not hesitate to contact us by using the comment function at the bottom of this tutorial. Let’s continue this tutorial and vulnerability assessment with assessing the first running service we’ve discovered in the last enumeration tutorial; Vsftpd 2.3.4.
Open-Vas vulnerability scanner
So far we’ve only used Nmap and manual techniques to discover known vulnerabilities for our vulnerability assessment. There are other ways to rigorously test a host for vulnerabilities using highly automated vulnerability scanners such as Open-Vas and Nessus. Please be aware that using these scanners will generate a lot of traffic and may even DOS a target. Also use these type of scanner on hosts you physically own yourself or with a written permission to scan as it may be illegal to do otherwise.
It is beyond the scope of this tutorial to go into details about the installation process of Open-Vas. Follow this Open-Vas installation tutorial to install OpenVAS on Kali Linux. If you have problems installing Open-vas or running it, drop a comment below this tutorial and we’ll try to help you out as soon as possible.
After we’ve ran the Open-Vas vulnerability scanner, which may take a long time to complete, we’ve can have a look at the results below:
 The results have been sorted on severity and as you can see Open-Vas has detected a lot of severe vulnerabilities. It is wise to use multiple vulnerability scanners in order to rule out false positives which may occur frequently during automatic vulnerability scanning.
Summary
So far our vulnerability assessment discovered a lot of vulnerabilities on the Metasploitable 2 machine for only 2 services using different techniques. Both the unreal ircd and proftpd services contain backdoors which can be easily exploited both manual and with Metasploit. We’ve also looked at the Open-Vas automatic vulnerability scanner and noticed a lot of severe vulnerabilities. In the next tutorial we will be exploiting the discovered vulnerabilities both manual and with Metasploit.
Want to learn how to exploit Metasploitable 2? Check out the VSFTPD exploitation tutorial now!
Also check out these 2 exploitation tutorials: Hacking Unreal IRCd 3.2.8.1 and Hacking dRuby RMI Server 1.8.
Thanks for reading this Metasploit Hacking Tutorial and please share it if you liked it!
Prerequisites & Requirements
Metasploitable3 needs to be built manually because it is based on Windows Server 2008, and as per the licensing specified by Windows, it is illegal to distribute any version of Windows in any form regardless of whether it is a VM image or an ISO file. As a result, you must install several virtualization management and deployment tools:
- Packer: https://www.packer.io/docs/install/index.html
- Vagrant: https://www.vagrantup.com/docs/installation/
- Vagrant Reload Plugin:
This specific walkthrough will be targeting the build and installation process with VirtualBox, which can be found here: https://www.virtualbox.org/wiki/Downloads. You can follow along with the various installation steps of the prerequisites in the video tutorial above. After installing the tools we can begin working the build Powershell script.
Command Output
Bringing machine ‘default’ up with ‘virtualbox’ provider…
==> default: Box ‘metasploitable3′ could not be found. Attempting to find and install…
default: Box Provider: virtualbox
default: Box Version: >= 0
C:/HashiCorp/Vagrant/embedded/lib/ruby/2.2.0/uri/rfc3986_parser.rb:66:in parse’
from C:/HashiCorp/Vagrant/embedded/lib/ruby/2.2.0/uri/common.rb:226:in metadataurl?’
from C:/HashiCorp/Vagrant/embedded/gems/gems/vagrant-1.9.2/lib/vagrant/action/builtin/box_add.rb:81:in map’
from C:/HashiCorp/Vagrant/embedded/gems/gems/vagrant-1.9.2/lib/vagrant/action/builtin/box_add.rb:79:in call’
from C:/HashiCorp/Vagrant/embedded/gems/gems/vagrant-1.9.2/lib/vagrant/action/builder.rb:116:in block in run’
from C:/HashiCorp/Vagrant/embedded/gems/gems/vagrant-1.9.2/lib/vagrant/util/busy.rb:19:in run’
from C:/HashiCorp/Vagrant/embedded/gems/gems/vagrant-1.9.2/lib/vagrant/action/builtin/handle_box.rb:82:in block
in call’
from C:/HashiCorp/Vagrant/embedded/gems/gems/vagrant-1.9.2/lib/vagrant/action/builtin/handle_box.rb:36:in call’
from C:/HashiCorp/Vagrant/embedded/gems/gems/vagrant-1.9.2/lib/vagrant/action/warden.rb:34:in block in finalize
action’
from C:/HashiCorp/Vagrant/embedded/gems/gems/vagrant-1.9.2/lib/vagrant/action/warden.rb:34:in call’
from C:/HashiCorp/Vagrant/embedded/gems/gems/vagrant-1.9.2/lib/vagrant/action/builder.rb:116:in block in run’
from C:/HashiCorp/Vagrant/embedded/gems/gems/vagrant-1.9.2/lib/vagrant/util/busy.rb:19:in run’
from C:/HashiCorp/Vagrant/embedded/gems/gems/vagrant-1.9.2/lib/vagrant/action/builtin/call.rb:53:in call’
from C:/HashiCorp/Vagrant/embedded/gems/gems/vagrant-1.9.2/plugins/providers/virtualbox/action/check_virtualbox.r
b:17:in call’
from C:/HashiCorp/Vagrant/embedded/gems/gems/vagrant-1.9.2/lib/vagrant/action/builder.rb:116:in block in run’
from C:/HashiCorp/Vagrant/embedded/gems/gems/vagrant-1.9.2/lib/vagrant/util/busy.rb:19:in run’
from C:/HashiCorp/Vagrant/embedded/gems/gems/vagrant-1.9.2/lib/vagrant/machine.rb:225:in block in action’
from C:/HashiCorp/Vagrant/embedded/gems/gems/vagrant-1.9.2/lib/vagrant/environment.rb:567:in call’
from C:/HashiCorp/Vagrant/embedded/gems/gems/vagrant-1.9.2/lib/vagrant/machine.rb:186:in block (2 levels) in
run’
from C:/HashiCorp/Vagrant/embedded/gems/gems/logging-2.1.0/lib/logging/diagnostic_context.rb:450:in block in cre
ate_with_logging_context’


