Как установить linux на usb-флешку в 3 простых шага
Содержание:
Preparing the flash drive
Now that we have everything we need, it’s time to get started.
The first task is to create a couple of partitions on the flash drive.
WARNING: This process will erase all the data on your flash drive. Make sure any files you need are backed up.
To avoid confusion, you may want to unplug any other USB drives from your system. Now plug in the flash drive you want to use for your persistent USB stick and open up GParted. If GParted is not already installed on your system, open up a terminal window and install it with:
sudo apt-get install gparted
Select your USB drive from the device drop-down in the upper right corner.
If there are any existing partitions on your drive, right click on them and select Unmount, then right click again and select Delete Partition. Your drive should now be shown with only unallocated space.
Next, right click on the unpartitioned space and select New. Set the size of the new partition to 1500 MiB, set the File system to fat32 and click Add.
The next step is to create the persistent partition. Right click on the remaining unallocated space and select New. This time choose ext2 as the file system type and set the Label to casper-rw, then click Add.
Now you need to apply the changes to the flash drive. Go to Edit->Apply All Operations.
As long as you’re sure you picked the correct drive, click Apply at the warning pop-up.
The final task in GParted is to set the boot flag on your boot partition. Right click on the first partition and select Manage Flags. Mark the box next to boot and then click Close.
GParted Complete
5 Simple Steps
First things first: fire up the program. You’ll see 5 sub-windows, representing the five steps to making a Live USB key. The first is simple enough:
That’s right: you need to pick which key you want to boot Linux from. Once you’ve done this, pick the version of Linux you want to boot. If you’ve got an ISO or a CD handy you can use that, or you can pick from many downloadable distros:
Advertisement
If you select a distro from this list the program will take care of downloading the ISO for you:
So far, so good. If you want your key to keep downloaded programs and documents in place, you’re going to want persistence mode. This is step 3; simply scroll to leave room:
Advertisement
Step four is optional, but includes some handy tools:
Here you can choose to hide the created files on your key from being seen by Windows, useful if you plan to use your key for more than just booting Linux. You can optionally format the drive you’re writing to, and choose whether or not you want your Linux distro to be loadable in Windows.
Advertisement
Once you’re done you can click the lightning bolt in the fifth box to start the creation of your live CD. Congratulations; you’ve got yourself a bootable USB key.
How to use
AIO Boot is easy to use software, just install and then integrate. See more about how to use AIO Boot.
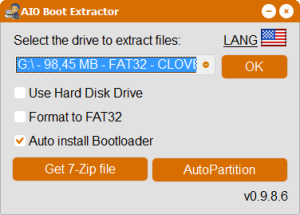
First, you need to install AIO Boot on USB or HDD. This tool includes software, bootloaders, modules and scripts. Just extract AIO Boot to a drive and then install Grub2 or Grub4dos. AIO Boot Extractor will help you do this, just select a drive, then click OK to start the installation.
This tool also provides options to help you format the selected drive to FAT32 before installation, and automatically install the boot loader. If you check the “Auto install Bootloader” box, Grub2 and Clover will be installed. You can also install Grub2, Clover and install Grub4dos, Syslinux, and Enoch Chameleon from the Bootloaders section of the AIOCreator.exe program. AIO Boot Extractor also supports repartition of removable disks such as USB and SDcards. It will delete all existing partitions on the disk and create new partitions as your choice, either using FAT32 only, or using both FAT32 and NTFS/exFAT.
Upon completion of the installation process, the AIO Boot Creator program will be run automatically. At the next time you just run AIOCreator.exe.
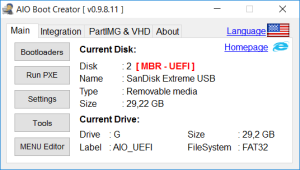
AIO Boot Creator supports the integration of multiple operating systems into a single USB drive. This is the most important feature of AIO Boot, you can integrate multiple versions of Windows, Linux, Android and Antivirus… It also supports you to create Windows VHD and partition image files (.PartIMG) for use with Partition Image Mapper. Partition Image Mapper is a solution to create bootable USB for FreeBSD, NetBSD, OpenBSD and macOS without losing the existing data on the USB drive.
Currently, AIO Boot Extractor and AIO Boot Creator only support Windows. If you are a Linux user, see the tutorial on how to Install Grub2 for AIO Boot and integrate WinPE 10 on Linux or use Grub2 File Manager.
CloneZilla Live (клонирование, резервирование, восстановление)
Особенности:
- Размер порядка 200Мб;
- Резервное копирование как на локальные устройства хранения и сетевые хранилища;
- Поддержка множества файловых систем;
- Возможность разбить и зашифровать полученный образ резервной копии;
- Низкие системные требования (x86, x86-64 микропроцессор, 192МБ+ ОЗУ).
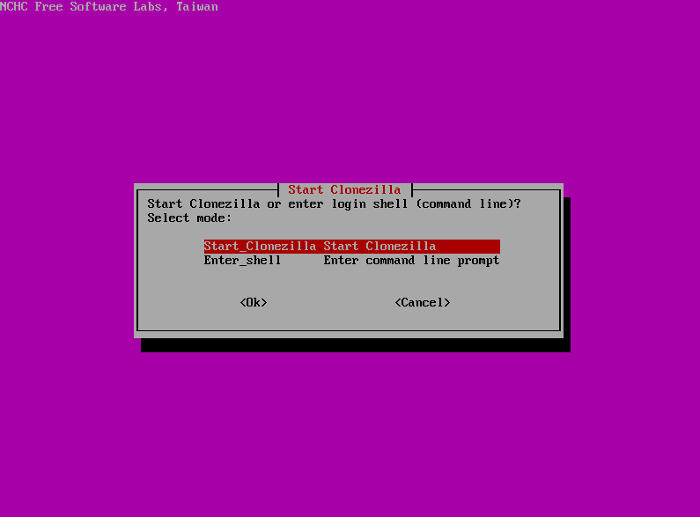
Программное обеспечение, которое позволяет производить клонировать диски, сохранять образы как дисков целиком со всей структурой, так и отдельных разделов на диске. На сайте можно скачать Live-образ с программой CloneZilla для записи на CD или флеш-накопитель, таким образом мы получаем мощный инструмент для резервирования и восстановления дисков с множественными возможностями.
Программа CloneZilla была разработана Стивеном Шиау в «Национальном центре высокопроизводительных вычислений». CloneZilla Live — это образ Linux вместе с программой для запуска со сменных носителей.
Программа поддерживает создание резервных копий и сохранение их данных на локальные устройства хранения или же на удаленные хранилища посредством передачи данных через протоколы SSH, Samba или NFS.
Возможно что, прочитав обзоры выше, у вас возник вопрос: так CloneZilla есть же в других дистрибутивах, зачем еще один отдельный для этой программы? — все просто, это очень полезная и самодостаточная программа, которая используется в нужное время и с большой ответственностью. К тому же в свежем образе Live-CD будет свежее ядро и ничего лишнего что бы могло помешать или испортить процесс резервирования или восстановления важных данных.
Сайт дистрибутива: http://www.clonezilla.org/
7. GParted Live
Жесткие диски разбиты на части, называемые разделами. Вы можете иметь разные разделы для различных целей. Например, на одном разделе у вас установлена система, на втором разделе вы храните фотографии, документы, видеозаписи и музыку, а третий раздел является подкачкой. В любом случае вам когда-нибудь нужно будет изменить их размер, объединить или же разбить.
Для операционной системы Linux имеется очень хорошая программа для управлением разделами — GParted. Но что, если вам нужно, например, изменить размер раздела, на котором у вас установлена система? Без размонтирования раздела это сделать не получится. Именно поэтому был создан Live дистрибутив GParted Live. Только будьте аккуратнее, пожалуйста. Любое неправильное действие может привести к большим проблемам.

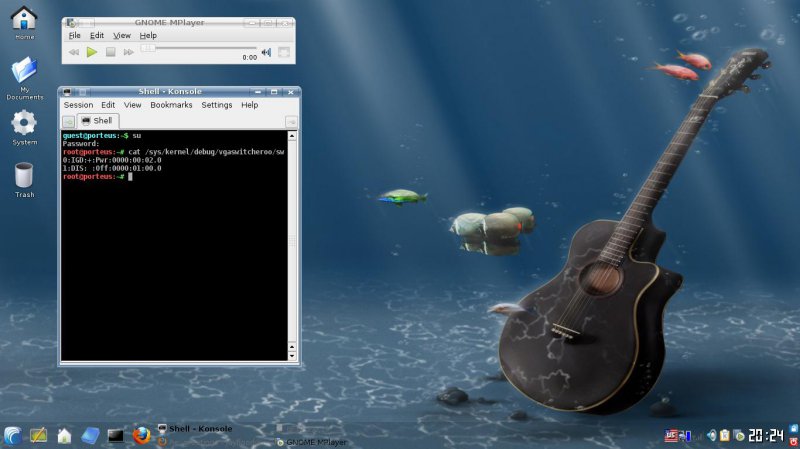
4. Porteus
Porteus является достаточно легким по весу Linux дистрибутивом (около 300 мегабайт). А особенностью данного дистрибутива является модульная структура. В отличие от большинства Linux дистрибутивов, которые работают с менеджером пакетов, Porteus использует заранее скомпилированные модули, которые могут быть быстро интегрированы в работающую систему.
После того, как работа с модулем завершена, вы можете его отключить, и модуль удалится из структуры каталогов. При помощи этой системы вы используете только то, что вам нужно. Вы можете загрузить модули, хранить и подключать их, когда это нужно.
Также стоит упомянуть, что Porteus хранится в сжатом виде, хотя декомпрессия происходит очень быстро. Еще в Porteus были переработаны сценарии загрузки, благодаря чему была увеличена скорость запуска и завершения работы, так что у вас есть задатки для идеального повседневного использования Linux в Live режиме.