How to install kde in windows
Содержание:
KDE Installer for Windows
You can use this installer to download and install the
various binary packages that you need to run KDE applications on MS Windows.
KDE is free and open source so you can build all the applications «from scratch» from their source code;
but as a convenience for others,
volunteers create these pre-compiled packages and make them available on the Internet.
Disclaimer These are early days for KDE4 on Windows,
some programs work better than others and some fail to run altogether.
You can also use the KDE Installer for Windows to install source code and the packages that you need to build KDE4 on Windows
(although if you are building KDE4 on Windows you may prefer to use the emerge system to build KDE and its requirements from latest source);
see Getting Started/Build/Windows.
Summary of Steps
- Run the installer, download and install what you need (see below).
- Try to run a KDE application from the windows start menu (see for KDE x.x.x Release entry)
Download needed packages
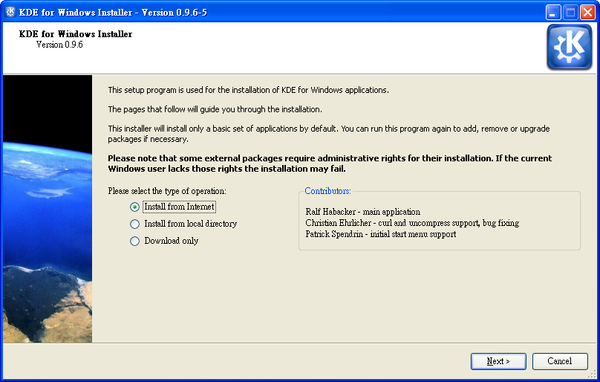
When you run KDE-installer for the first time, you’ll see the welcome screen. Since it’s your first launch leave the checkbox below unchecked.
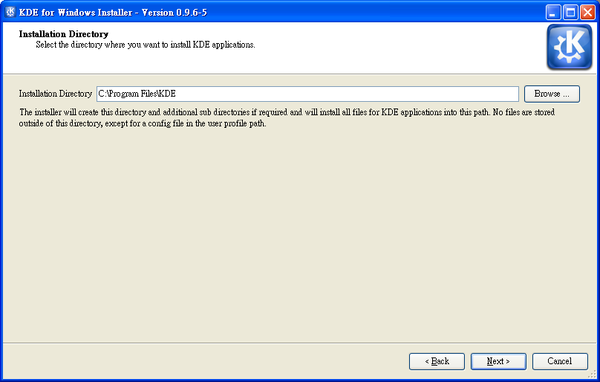
Proceed to the next screen, where you choose the KDE4 installation directory. It can be anything you prefer, e.g. C:\KDE4.
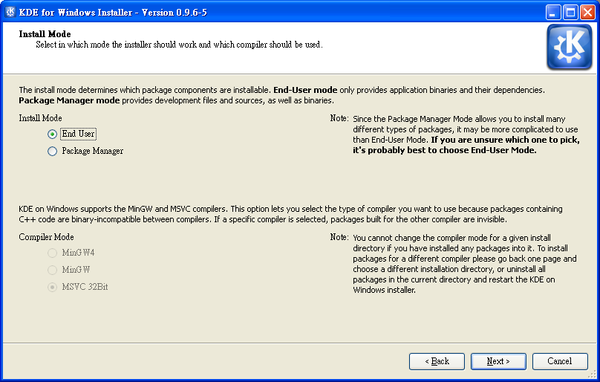
On the next screen, define who you are: End User or Developer. The End User installation installs only binary packages and libraries needed to run KDE application. Package Manager mode provides you also with the source code for all packages needed to build KDE from scratch. Then you need to decide what compiler to use — MinGW or MSVC.
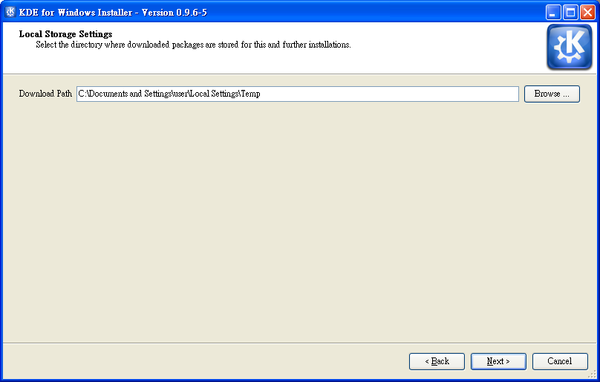
Proceed to the next screen and there choose the directory where all the downloaded packages will be stored. Let it be something like C:\KDE4-tmp or C:\KDE4-packages.
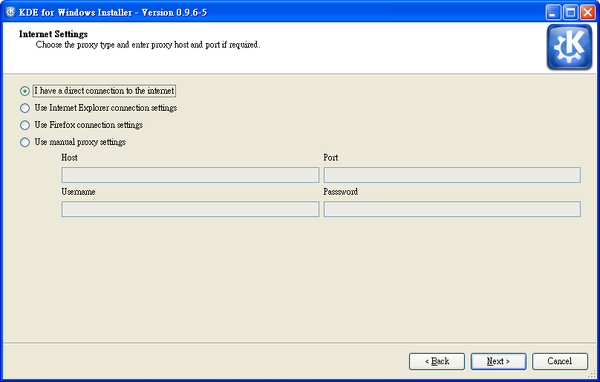
The next screen will ask you to choose your internet connection type, particularly whether or not you’re using a proxy. If you don’t use a proxy server, just click ‘Next’. If you are unsure of whether you’re using proxy or if you have web browser configured to work with it properly, choose the second or the third option, according to your favourite web-browser. If you’d like to set all the settings manually — choose the last option and go ahead.
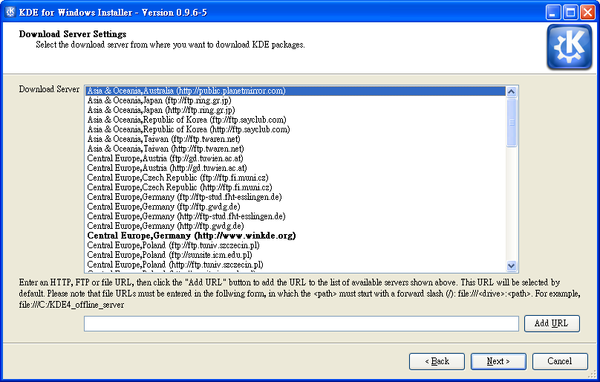
When you click the ‘Next’ button the (currently, rather short) list of available servers will be loaded and you could choose the one closest to you.
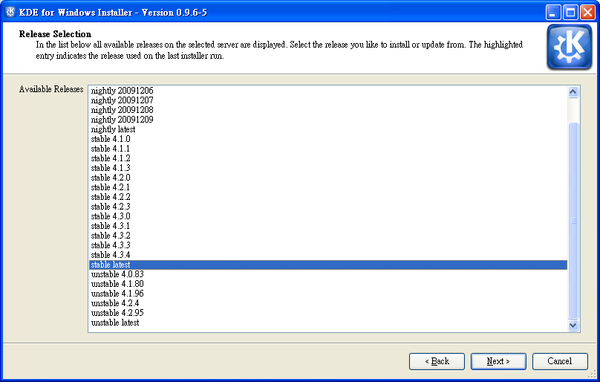
When you click ‘Next’, a list of available releases on the selected server will be shown. Depending on the server there may be stable and/or unstable release available. Some unstable releases may only be available from www.winkde.org because the kde mirrors provides only a limited range of unstable releases.

After selecting a release an a click on the ‘Next’ button, the list of all available packages will be loaded and processed, providing you with the list of package groups you can select for further installation. The short description next to each group of packages should make your choice easier. Select the packages you need. Proceed to the next screen.
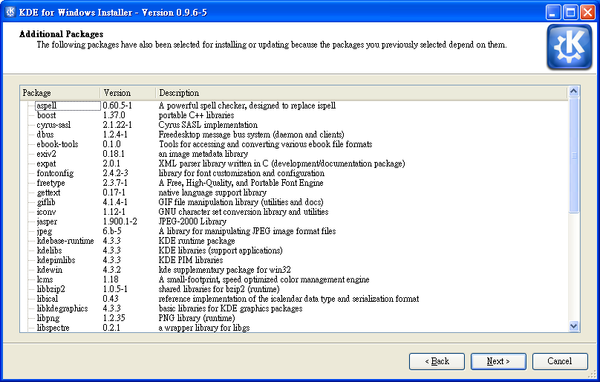
Here you can see all the required dependencies, or software necessary to support the choices you’ve made. Click ‘Next’ to download them all.
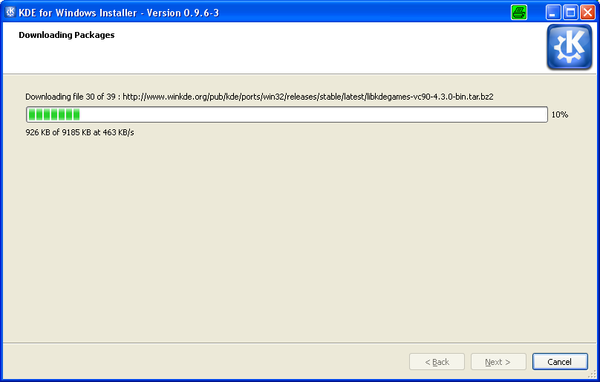
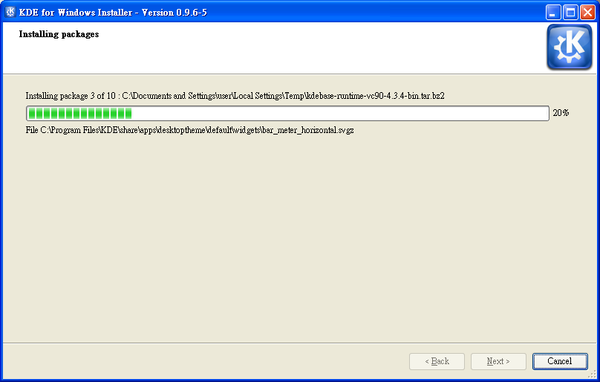
After all the packages are downloaded they’ll be unpacked and processed by the installer.
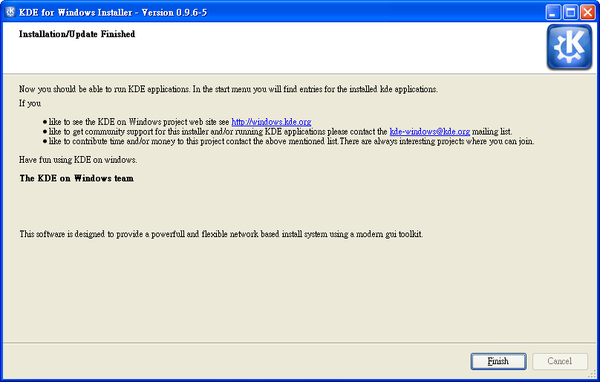
The final window will tell that your KDE installation for Windows is complete.
Additional software that you may want to install
In a few special cases applications included in the KDE on Windows Installer need additional software to be fully functional. You will have to install this, manually.
How I tried to delete QQmlApplicationEngine for less memory usage
Qml
Qml manages to separate UI and backend logic, one can adjust c++ code without breaking UI, or develop different front end without implementing same logic twice. As plasma mobile developers, we can utilize the flexibility of Qml and Kirigami framework. Making apps that look equally beautiful on mobile and desktop platform. However, the high memory usage is its major drawback. On a device like pinephone which only has 2 Gigs of ram, low memory consumption is crucial.
KClock
KClock is the default clock/alarm app for plasma mobile. It needs to run in background all time otherwise the we can’t ring alarm for you and you may wake up late. The problem is you’ll also want a front end UI to add/remove alarms. And that’s exactly the problem we faced.
On x86_64 platform, KClock consumes 48 MiB private memory and 95 MiB shared memory. While on ARM this would be lower but not too much. We decide that for an app that merely remember when to ring alarm, this is unacceptable. So at first, we skipped construction if you pass flag on launch. This effectly disables the UI creation and we managed to archieve 6.6 MiB memory usage.
But we’ll have to consruct UI when user decide that he/she/they would like to bring up the front end. And when the last window closed, the memory allocated for UI isn’t freed. You don’t want to lose 40 MiB of ram just to open clock once, do you? Naturally, we want to destroy the once last window closed.
So I connected the QApplication::lastWindowClosed signal to a lambda that calls . Now we have problems, not only the memory usage didn’t change, there is also possible crash on second launch. So what’s happening here?
To understand what’s going on, you’ll first learn how Qml works. Qml file is used to describe the parent/child relation between UI objects, when you call , the engine parses the qml file, constructs visual objects in JavaScript heap. Note that the JavaScript heap is not the c++ heap. It’s managed by engine or more specific, the which is a parent class of QQmlApplicationEngine. For some reasons, the JS engine does not free the heap when it’s being destroyed,
and will trys to reuse that JS heap next time it’s re-constructed. So if you destroy — re-create the JS engine, you’re walking on the eggshell. Fortunately, or rather unfortunately, KClock didn’t crash. So we thought our job is done and merged the changes at then. It’s not util I tried to use the same technic on KWeather that I found out the former method was wrong. KWeather crashes everytime I re-constuct the JS engine. And that’s because the KWeather trys to re-use the in
memory js cache.
So how you safely destroy the JS engine? The answer lies in Qt’s documentation. QJSEngine offers which runs JS gabarge collector. In our case, this will collect Qml components that has been destroyed or don’t have a parent. However, we can’t just simply call this function because our components are visual elements and the parent will keeps its children alive. That means we need to destroy the component explicitly.
The Qml follows Qt’s parent/children memory management model, once you destroyed the parent, its children are gone, too. The Qml comes in handy, set its property to empty string and the previously loaded components are destroyed. To sum the things up, in order to reclaim the memory from JS engine, one have to do the following things:
- connect signal to a function that sets Loader’s source to empty string
- once the loader’s source cleaned, call gabarge collector.
- destroy the Engine
- after the engine is destroyed, call to hand the memory from heap back to system
Due to how Qt’s signal/slot works, transform the above steps to actual code proves complicated and I ended up with some awkward code. But I did manage to delete the JS engine entirely.
The best way
You may wonder, why Qt doesn’t provide a way to destroy JS engine easily? Well, the truth is, is not designed to be deleted. When you find you have to use some “hacky” ways to do things in programming, often it’s your architecture is wrong.
Here I’m bundling two programs into one program, one daemon that keeps track of alarm, one that as an interface between user and the daemon. The best solution here is to develop two separate programs. And that’s exactly what I’m doing now. Since system reclaim all the memory from program on its exit, I don’t need to care about deleting the JS engine and all sorts of headache, system will do it for me.
Despite this means re-writing some code and generally more work for me, I’m happy with the learning experience and (hopeful) the result.
Custom environments
Desktop environments represent the simplest means of installing a complete graphical environment. However, users are free to build and customize their graphical environment in any number of ways if none of the popular desktop environments meet their requirements. Generally, building a custom environment involves selection of a suitable window manager, a and a number of applications (a minimalist selection usually includes a terminal emulator, , and text editor).
Other components usually provided by desktop environments are:
- Application launcher:
- Audio volume control:
- Clipboard manager
- Desktop compositor:
- Desktop wallpaper setter and desktop icon: and
- Display manager:
- Display power saving settings: Display Power Management Signaling
- Logout dialogue: Oblogout
- Mount tool:
- Notification daemon: Desktop notifications
- Polkit authentication agent:
- Screen locker:
- Default applications:
Use a different window manager
If the desktop environment has an article, see its Use a different window manager section, otherwise consult the official documentation.
Для этого можно использовать приложение «Ваш телефон»
Платформы:
- «Ваш телефон» для Windows 10
- «Диспетчер вашего телефона» для Android 7 и выше
«Ваш телефон» — фирменное приложение Microsoft, которое предназначено для того, чтобы связать свой смартфон под управлением операционной системы Android с компьютером на Windows. Разработчики программы утверждают, что она поможет получить мгновенный доступ ко всем ключевым функциям мобильного гаджета с ноутбука или десктопа, что оба устройства смогут отлично взаимодействовать друг с другом. Я не первый раз сталкиваюсь с данным приложением и могу с уверенностью заявить, что они не врут. Несмотря на мое скептическое отношение к Microsoft, признаю, что инструмент получился годным.
В тему: Как звонить и принимать звонки с Android на Windows
С помощью него можно полноценно использовать «Сообщения» с телефона на своем компьютере — когда-то фанаты экосистемы Apple кичились аналогичным приемом работы с iMessage, но это больше нельзя считать преимуществом связки iPhone и Mac. Через «Ваш телефон» можно полноценно принимать и отправлять сообщения даже с возможностью выбора конкретной SIM-карты, которую для этого нужно использовать. В них получится добавлять смайлики и мультимедийные файлы. Единственно, я так и не понял, как удалять их, если они не нужны. Судя по всему, эта возможность закрыта для удаленного использования.
Немаловажно, что с помощью данной программы, можно полноценно просматривать все фотографии, которые находятся на мобильном устройстве на большом экране компьютера. Отсюда их можно без проблем сохранять, копировать и так далее
Final thoughts
There are many reasons why you would want to install KDE on Windows. And I am confident that eventually the developers will manage to port the entire desktop experience onto Windows. At this point, I can’t see any reason to run the standard Windows desktop.
Give KDE on Windows a try. Even if you find only one application that you use regularly, it will be worth the effort.
TechRepublic’s Windows Vista Report newsletter, delivered every Friday, offers tips, news, and scuttlebutt on Vista development, as well as a look at new features in the latest version of the Windows OS. Automatically sign up today!
Настройка KDE Connect в KDE
В Ubuntu KDE Connect включён в официальные репозитории, начиная с версии 13.10, а в самом окружении KDE поставляется по умолчанию уже достаточно давно. Поэтому, если вы используете современный дистрибутив, устанавливать ничего не надо. Чтобы убедиться, что модуль KDE есть и работает, можете открыть параметры системы и ввести там в поиске Connect. Утилита выведет настройки KDE Connect:

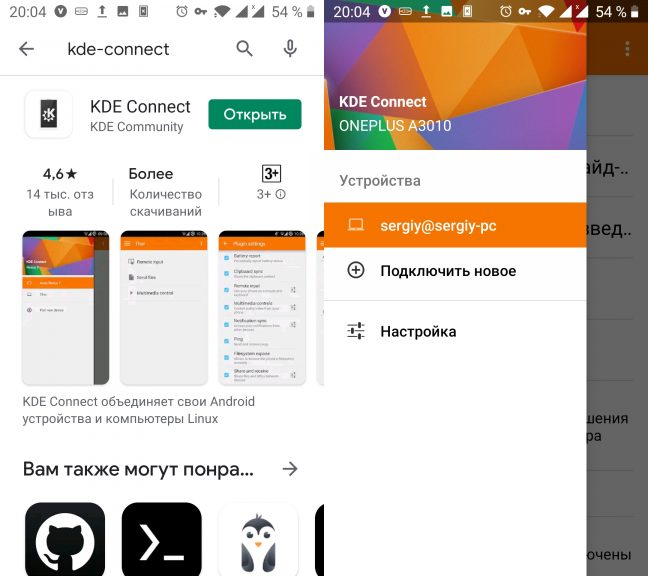
Выберите в приложении в меню Устройства -> Подключить новое. Затем выберите ваш компьютер в списке устройств и нажмите на кнопку Запросить сопряжение:
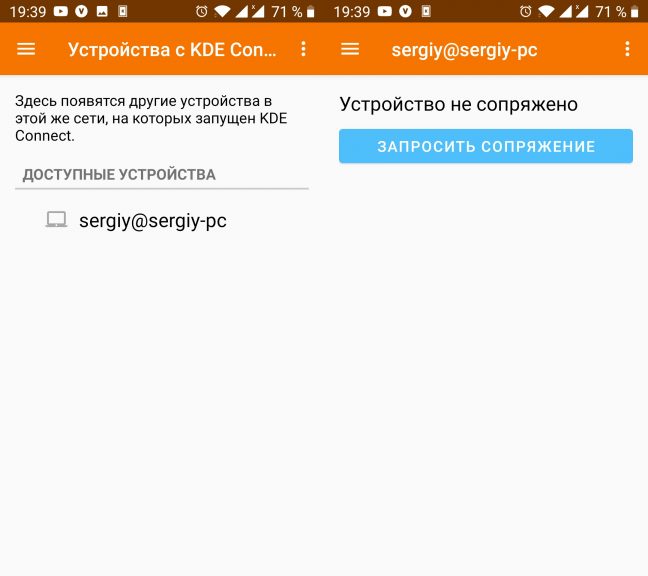
Сразу же после этого на компьютере появится запрос на подтверждение сопряжения. Нажмите кнопку Принять:

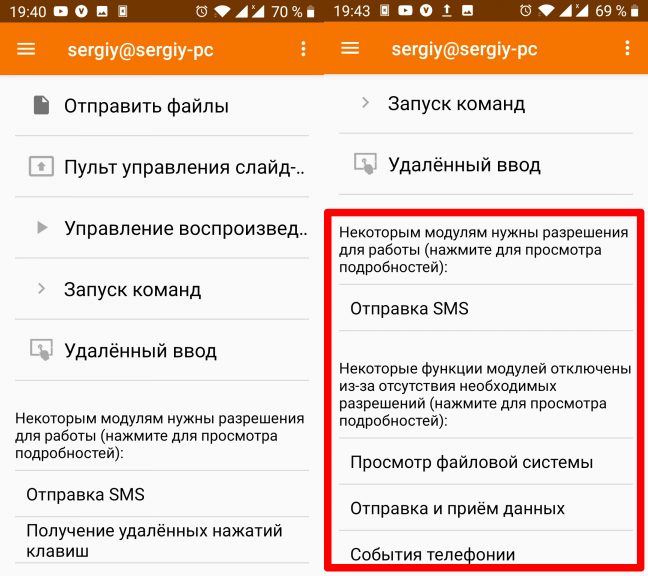
После этого на телефоне откроется меню управления компьютером. В верхней части окна находятся доступные действия, а немного ниже перечислены разрешения, которые следует дать приложению, чтобы оно имело доступ к файловой системе и другим функциям телефона, желательно сделать это перед настройкой:
А на компьютере, на панели задач, появится индикатор KDE Connect, с помощью которого можно обращаться к телефону, смотреть состояние его батареи и содержимое общих папок:

Прежде, чем вы сможете открыть общую папку, необходимо настроить её на телефоне. Для этого кликните по значку бутерброда в приложении и откройте Настройка модулей:
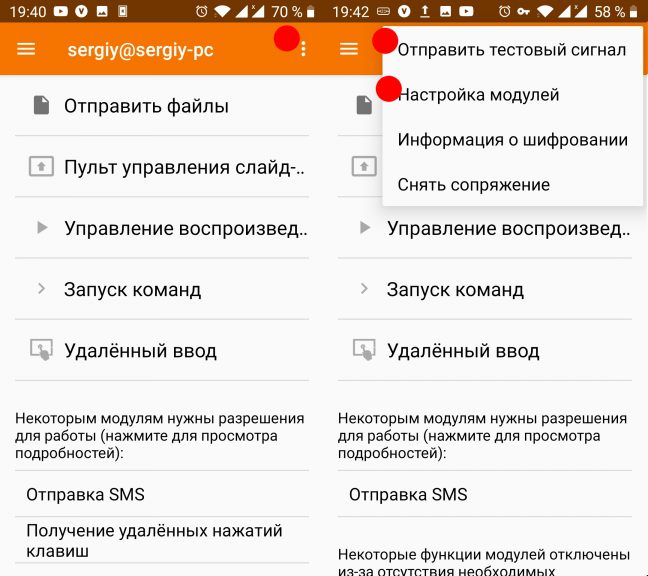
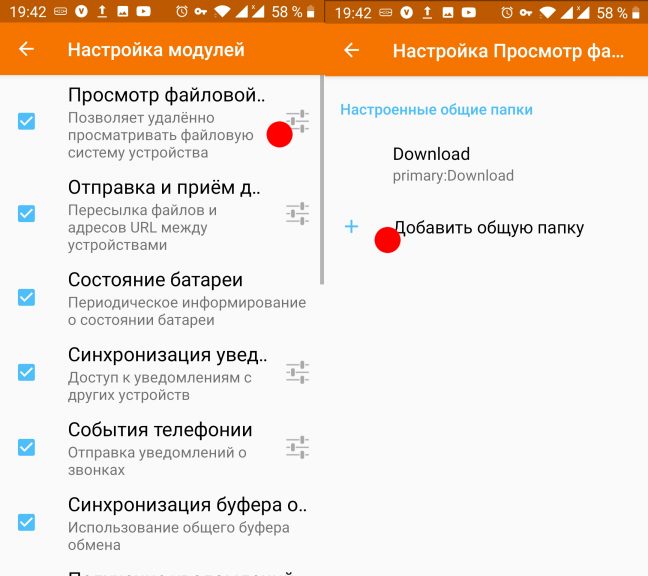
В этом же меню можно отправить тестовый сигнал на компьютер или отвязать телефон, а в открывшемся окне можно настроить возможности, которые будут доступны приложению. Откройте пункт Просмотр файловой системы, потом Добавить общую папку:
Перед вами откроется файловый менеджер Android, в котором надо будет выбрать нужную папку. Приложение запомнит её, и она будет доступна на компьютере. В данном случае в файловом менеджере Dolphin:

Выводы
Из этой статьи вы узнали, как выполняется настройка KDE Connect Ubuntu для KDE и настройка GSConnect в Gnome. Когда я впервые писал эту статью в далеком 2015 году, эта технология только появилась и ещё даже толком не работала. Я думал, что из этого может получиться что-то крутое, но не очень-то в это верил, так как большинство подобных проектов появляются и пропадают, не дав результата. Здесь же, спустя пять лет, мы видим отличный продукт, который облегчает жизнь обычных пользователей. Теперь не только любители Apple могут смотреть уведомления с телефона на компьютере, и это не может не радовать.


