Kali linux на android — linux deploy
Содержание:
- OnePlus 7 (T / Pro) image for Android 10
- NetHunter Components
- Custom Android Kernel
- Kali Linux chroot
- NetHunter Android Application
- Что внутри?
- NetHunter Kernel Builder
- Porting NetHunter to New Devices
- Getting Started
- Kernel Version
- Finding Kernel Sources
- Making a Test Kernel
- Установка полноценной системы на флешку на примере Kali Linux
- Подсказки
- Call for Applications
- Xiaomi Mi 9T image for Android 10
- Новый Android-магазин, посвященный бесплатным приложениям безопасности
- Run Magisk Manager to finish the rooting process
OnePlus 7 (T / Pro) image for Android 10
Our flagship device has received a new kernel for Android 10 based on the amazing work of the talented #tytydraco. The image supports the following models in the series:
- OnePlus 7
- OnePlus 7 Pro
- OnePlus 7T
- OnePlus 7T Pro
Please note that we do not currently recommend the OnePlus 7T and OnePlus 7T Pro until full TWRP recovery support is available. Our pick is the OnePlus 7 for its incredible price performance ratio.
The new image offers all the usual bells and whistles you can expect from NetHunter but also has some improvements over the Android 9 version, such as:
- Full support for USB multi-port adaptors (USB,HDMI, ethernet, pass-through charging, etc.)
- Full HID support
- The latest rtl88XXXu drivers from Kimocoder, adding injection support for:
- RTL8812AU
- RTL8814AU
- RTL8821AU
The image is available for download on our Kali NetHunter download page. Please note that Android 10 adds certain restrictions to the way storage access is handled. Please update the NetHunter app from the NetHunter store after flashing the image to enable the required access.
NetHunter Components
The NetHunter ROM overlay is composed of several parts that interact and rely on each other for proper operation. These parts include a custom Android Kernel, a Kali Linux Chroot, and a NetHunter Android App.
Custom Android Kernel
The custom kernel provides each device with unique features that are not available on stock kernels. All NetHunter kernels provide HID (keyboard to computer support), OTG wireless support, and CDROM emulation support. Also, most kernels also support external SDR/Bluetooth and “y-cable charging”, which allows you to charge your device while using an external device. If you are a power Android user, then you will benefit from the Multirom support in each kernel with the KEXEC patch. Finally, the kernel provides additional patches/fixes to eliminate problems that may be caused by adding external wireless devices.
Kali Linux chroot
The Kali Linux chroot is the heart of NetHunter and has specifically modified configuration files to work well with the Android eco-system. You are given two chroot options to download or install: minimal or full. The minimal chroot, which is a little over 100mb in size, is a barebones basic Kali OS with nothing installed and is great for developers or anyone looking to customize their installation. The full chroot is what most users will want to download and comes in around 600mb. The full chroot has everything needed to integrate with the Android application.
NetHunter Android Application
The NetHunter application provides a simple interface to manage the Kali Linux chroot and is a simple but powerful GUI. The Android application contains all the configuration files that are copied to the sdcard during the first run. It also acts as a bootup service and will run the services you select when the devices starts. Additionally, the Android application allows you to interact with some preselected applications more easily such as: MANA, MPC, VNC, DuckHunter, HID attacks, and much more. The latest version even includes a custom commands builder, allowing you to easily add/remove your favorite custom commands to NetHunter.
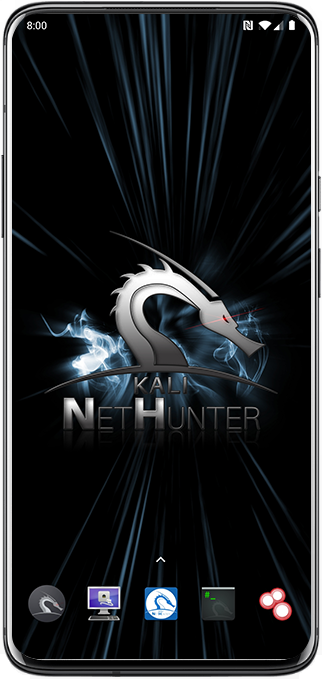
Что внутри?
Итак, вновь загрузился Android, и теперь у нас есть:
NetHunter Home — приложение-обвязка для запуска самых необходимых функций Kali NetHunter.
Дистрибутив Kali Linux в каталоге /data/local/kali-armhf/ (все операции запускаются в нем).
BusyBox и консольный редактор Nano.
Android VNC — простой VNC-клиент для доступа к рабочему столу Kali Linux.
BlueNMEA — приложение для отсылки текущих координат на другое устройство по Bluetooth или TCP (нужен для работы Kismet).
DriveDroid — приложение, позволяющее использовать смартфон в качестве Live USB.
Hacker’s Keyboard — всем известная полноразмерная Android-клавиатура.
RF Analyzer — приложение для работы с HackRF/RTL-SDR.
USB Keyboard — эмулятор USB-клавиатуры.
Набор конфигурационных файлов и обоев на карте памяти (в каталогах files и kali-nh).
Центральное место здесь занимают, конечно же, NetHunter Home и сам дистрибутив, причем первый — это просто обвязка для запуска тех или иных действий внутри дистрибутива через скрипт /system/bin/bootkali. NetHunter Home запускает его с тем или иным аргументом (например, start apache), а тот, в свою очередь, делает chroot в /data/local/kali-armhf/ и выполняет ряд команд в зависимости от переданного аргумента.
NetHunter Kernel Builder
We are providing three different editions of Kali NetHunter:
- Kali NetHunter rootless, which delivers over 85% of Kali NetHunter functionality to Android devices without the need to root the device or install a custom recovery
- Kali NetHunter light, which delivers over 95% of Kali NetHunter functionality to devices that are rooted and have a custom recovery but for which no NetHunter kernel exists (yet)
- Kali NetHunter, which delivers 100% but requires a rooted device with a custom recovery and a kernel that has been custom built for NetHunter
Building a custom kernel for NetHunter is not black magic but is does require experimentation, patience, resilience and a lot of time…
…or it used to.
We have created the NetHunter Kernel-Builder. A one stop shop to:
- Download and setup the toolchains required by your particular kernel
- Provide over ten different prebuilt toilchains to cater for everybody’s needs
- Create a NetHunter kernel config
- Patch the kernel with standard and device specific patches from a central repository
- Build the kernel
- Create anykernel zip to test the kernel (full functionality requires a NetHunter image or kernel package)
- Create a zip file to extract in the nethunter-installer folder to build nethunter images
We have been using the Kernel-Builder to build the kernels for all devices on this page and it saved us over 75% of the time it would have taken us in the past. We have added example config files that allows you to compile the kernels for the devices on this page and you can use them as a guide to build a kernel for your own device.
The Kernel-Builder is a great tool to simplify and automate and whilst it is also ideal to learn about Android kernel building, it requires skills to build kernels and it takes time to master those skills. The Kernel-Builder will help freeing that time by eliminating repetitive and redundant tasks and documentations.
On the topic of documentation; the documentation for the kernel builder is yet to be completed but we plan to finish that within 7 days of this blog post going up.
Please check out the kernel-builder repo and join us in our forums if you are interested in building NetHunter kernels. We’d love to have you on board.
Please join us in the forums or on IRC Freenode #NetHunter.
Download the brand new, mid-term release images for the Nexus 6P, Oneplus 7 series, and Xiaomi 9T here.
Porting NetHunter to New Devices
In order to port NetHunter to a new device, it’s important to understand how NetHunter is separated. NetHunter is divided by the rootfs (also known as the chroot but will be referred to here as rootfs) and the kernel. For the most part, the rootfs is not important to your Android device as it only contains Kali. The kernel is integral to getting things like Bluetooth, wireless USB, and HID keyboard (etc) working.
You also need a device with an unlocked bootloader, for flashing the kernel, and you must be able to get root on the device. Root is needed so we can write applications to system, such as busybox and bootkali, and execute commands that allow us to get Kali running.
tl;dr: If you are looking to port a device, it’s all about the kernel. Device must be unlockable/rootable.
Getting Started
Let’s assume that you’ve already followed the directions on the main docs page. You have all the dependencies met and you are ready to go. The first thing we want to do is build a test kernel.
Kernel Version
If your device is older, please check to make sure your kernel version is 3.4+ and above. With the switch to kali rolling we are starting to see errors inside chroot where the kernel is not able to support loading Kali.
Finding Kernel Sources
One of the reasons why Nexus was chosen is because all kernel sources are made available through Google’s own website. Finding sources can be easy or difficult depending on the manufacturer. A good resource is usually the XDA forums as someone else has probably already built a working kernel and they must provide the sources under GPL. Most kernel development pages on XDA must provide a link to their sources.
Making a Test Kernel
Assuming you don’t have a toolchain downloaded already, you can download it by running the following commands:
For older devices that are not 64 bit, use:
For 64 bit devices, use the appropriate toolchain:
Установка полноценной системы на флешку на примере Kali Linux
Наша инструкция о том, как установить Kali Linux на флешку, включает в себя несколько этапов, начиная с подготовки до непосредственно использования ОС.
Что касается подготовки, то для создания флеш-носителя с Kali Linux нужна флешка вместительностью не менее 4 Гб. Перед началом установки USB-накопитель должен быть отформатирован в системе FAT32. Желательно иметь накопитель USB 3.0 иначе установка будет длительной.
В этом Вам поможет наша инструкция по форматированию съемных носителей. Вам нужно будет выполнить все действия в рамках приведенной ниже инструкции, только вместо «NTFS» везде выбирать вариант «FAT32».
Урок: Как отформатировать флешку в NTFS
Также нужно подготовить сам образ с ОС Kali Linux. Скачать образ можно с официального сайта.
Дальше осталось установить Кали Линукс на флешку. Сделать это можно несколькими способами.
Способ 1: Rufus
Эта программа предназначена для создания загрузочных USB-носителей. Но она поможет приготовить на флешке полноценную ОС, которой можно пользоваться на имеющейся системе в компьютере. Данный способ предполагает следующие действия:
- Установите программу Rufus. Скачать ее можно на официальном сайте. Запустите ее на своем компьютере.
- В главном окне проверьте наличие галочки в строке «Создать загрузочный диск». Справа от кнопки «ISO Image» укажите путь к вашему ISO образу.
Нажмите клавишу «Старт». При появлении всплывающих окон нажмите «OK».
Вот и все, по окончании записи флешка готова.
Способ 2: Win32 Disk Imager
Эта программа позволяет развернуть образ операционной системы на флешке. Чтобы ею воспользоваться, сделайте вот что:
- Скачайте и установите программу Win32 Disk Imager. Запустите ее на своем компьютере.
В окне утилиты в поле «Image File» укажите путь к образу Кали Линукс. Правее, в строке «Device», выберете Вашу флешку.
Затем нажмите на кнопку «Write». Начнется запись дистрибутива на указанный накопитель. Если использовать USB 3.0, то процесс записи займет около 5 минут.
После установки программа создала на флешке 3 раздела.
Один раздел остался неразмеченным. Подготовьте его под «Persistence» раздел. Этот раздел предназначен для хранения всех изменений во время работы с флешкой Kali Linux.
Для создания раздела установите утилиту MiniTool Partition Wizard. Скачать ее можно на официальном сайте.
После скачивания и установки запустите программу. Правой кнопкой мыши щелкните по неразмеченному разделу и нажмите «Create». Появится сообщение Windows, нажмите « OK».
В новом окне установите данные следующим образом:
- в поле «Partition Label» поставьте имя «Persistеnce»;
- в поле «Create As» выберете тип «Primary»;
- в поле «File System» укажите «Ext3», этот тип системы нужен конкретно для Кали.
Нажмите «OK».
Для сохранения изменений нажмите в основном меню в верхнем левом углу кнопку «Apply», затем «Ок».
Вот и все, флешка с ОС Кали Линукс готова к использованию.
Способ 3: Universal USB Installer
Это простая и удобная утилита поможет создать дистрибутивы ОС Linux и Windows.
- Установите программу Universal USB Installer.Скачать ее лучше всего на официальном сайте.
- Откройте ее. Для правильного запуска программы выполните 4 шага:
- в поле «Step 1» выберите тип дистрибутива Linux «Kali Linux»;
- в поле «Step 2» укажите путь к вашему ISO – образу;
- в поле «Step 3» выберете вашу флешку и проверьте наличие галочки в поле «Format»;
- нажмите кнопку «Create».
По окончанию записи на флешке будет установлен Kali Linux Live.
-
Зайдите в консоль управления дисками Windows на вашем компьютере. Для этого перейдите по такому пути:
Флешка будет отображаться в таком виде, как показано на фото ниже.
Эта утилита заняла все пространство флешки и не оставила место под раздел «Persistence». Поэтому высвободите место под раздел с помощью утилиты MiniTool Partition. Для этого нажмите правой кнопкой по съемному накопителю и выберете пункт «Move/Resize». В нем сдвиньте ползунок немного влево, оставив самой системе Кали 3 Гб.
Далее повторите все действия по созданию persistence-раздела с помощью утилиты MiniTool Partition Wizard, описанной в предыдущем разделе.
Для работы с флешки достаточно загрузиться с нее.
Если Вам нужно создать носитель информации, предназначенный для установки Linux, воспользуйтесь нашими инструкциями по созданию загрузочной флешки и установке ОС.
Урок: Как создать загрузочную флешку с Ubuntu
Урок: Пошаговое руководство по установке Линукс с флешки
Опишите, что у вас не получилось.
Наши специалисты постараются ответить максимально быстро.
Подсказки
- Запуститеapt update && apt full-upgrade первым делом после установки. Если у вас достаточно свободного места для хранения, вы можете запустить apt install kali-linux-full.
- Firefox не будет работать на устройствах без рут-привилегий. Просто замените его на Chromium с помощью команд: apt remove firfox-esr apt install chromium Далее: ~ Найдите пункт «Chromium Web Browser» в меню приложения ~ Щелкните правой кнопкой мыши и выбирите «Редактровать приложение» ~ Измените «Command» на /usr/bin/chromuim —no-sandbox %U
- Все инструменты пентестинга должны работать, но некоторые могут иметь ограничения, например, metasploit работает, но не поддерживает базу данных.
- Нектороые утилиты, такие как «top», не будут работать на устройствах без рут.
- Пользователи без рут-привилегий все равно имеют рут-привилегии в chroot.
- Смартфоны Galaxy могут мешать пользователям без рут-привилегий использовать sudo. Просто используйте вместо sudo su -c.
- Регулярно выполняйте резервное копирование ваших rootfs, останавливая все nethunter-сессии и вводите следующее в termux: tar -cJf kali-arm64.tar.xz kali-arm64 && mv kali-arm64.tar.xz storage/downloads Это поместит резервную копию в вашу папку загрузки Android. Примечание: на старых устройствах измените «arm64» на «armhf»
- Присоединяйтесь к нам на наших форумах, чтобы обмениваться советами и идеями и быть частью сообщества, которое стремииться сделать NetHuner еще лучше.
Call for Applications
Если вы являетесь разработчиком приложений и хотите, чтобы ваше приложение было включено в NetHunter App Store, сообщите нам об этом через запрос на упаковку или на форумах.
Обратите внимание: мы принимаем двоичные APK-файлы, а также ссылки на git-репозитории, которые мы используем для самостоятельной сборки приложений. Сторонние APK-файлы предпочтительно подписаны первоначальным автором, в то время как приложения, созданные нами из исходного кода, созданы с использованием Gitlab CI и подписаны нами
Если вы хотите, чтобы мы включили приложение, автором которого вы не являетесь, сообщите нам об этом, и мы постараемся получить согласие авторов на его публикацию в нашем магазине.
Более подробную информацию о приложениях можно найти здесь.
Xiaomi Mi 9T image for Android 10
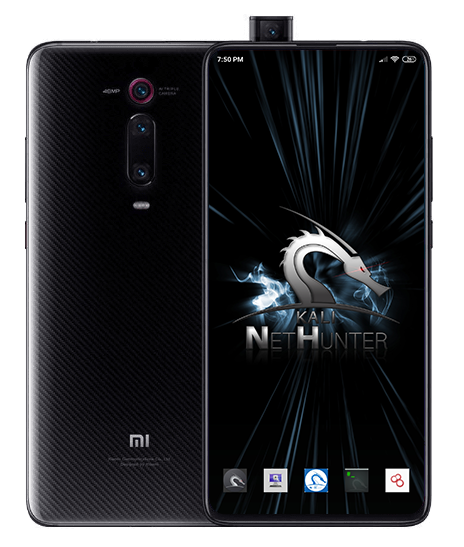
We are very excited to welcome our new favourite mid tier device. Sporting a Qualcomm SDM730 Snapdragon, 6GB RAM & 64GB /128GB it is a beast of a machine for under US$300! The miui interface is gorgeous especially when paired with the lawnchair 3 launcher but might not be everybody’s cup of tea. Luckily there are 3rd party ROMs available to suit everyone’s taste.
Just like its bigger brother, the OP7, this device includes all the bells and whistles:
- Full support for USB multi-port adaptors (USB,HDMI, ethernet, pass-through charging, etc.)
- Full HID support
- The latest rtl88XXXu drivers from Kimocoder, adding injection support for:
- RTL8812AU
- RTL8814AU
- RTL8821AU
Miui being a little bit eccentric, you might have to disable the “Privileged Extension” in the NetHunter store app under “Expert mode” if the store app fails to install applications. Other than that, this device is my personal favourite.
The image is available for download on our Kali NetHunter download page. Please note that Android 10 adds certain restrictions to the way storage access is handled. Please update the NetHunter app from the NetHunter store after flashing the image to enable the required access.
Новый Android-магазин, посвященный бесплатным приложениям безопасности
Первоначально предназначенный для удобного управления пакетами на устройствах NetHunter, мы вскоре поняли, что хранилище NetHunter также должно быть доступно для устройств, отличных от NetHunter. Итак, вот оно, доступное каждому, кто хочет получить лучшее из обоих миров:
- Простота использования и удобство Google Play Store
- Свобода, анонимность и конфиденциальность загружаемых приложений

Kali NetHunter App Store — это универсальный магазин приложений для Android, связанных с безопасностью. Это идеальная альтернатива магазину Google Play для любого устройства Android, будь то рутированный или нет, NetHunter или акции. Если вы ищете какое-либо приложение для обеспечения безопасности вашего Android-устройства, NetHunter Store станет его местом.
Магазин NetHunter работает на слегка модифицированной версии F-Droid, благодаря тяжелой работе сообщества F-Droid, в частности Питера Сервайло, чья помощь была неоценимой. В то время как F-Droid устанавливает своих клиентов с отключенной телеметрией и запрашивает согласие перед отправкой отчетов о сбоях, мы пошли еще дальше и удалили весь код — просто для того, чтобы наша конфиденциальность не могла быть нарушена случайно. Мы также расширили политику включения, чтобы разрешить использование собственных приложений в магазине.
Run Magisk Manager to finish the rooting process
Sometimes the magisk version shipped with an android image is not compatible with the latest version of the magisk manager which will require a little workaround.
If you are prompted with an error message that “Magisk Manager” is incompatible with the installed version of “Magisk”, downgrade the manager app, upgrade magisk via TWRP, and upgrade the manager app again like this:
* uninstall the existing Magisk Manager
* download Magisk Manager v6.1.0 from https://github.com/topjohnwu/Magisk/releases
* goto “security” settings and turn on “allow installation of apps from unkown sources”
* install magisk manager apk from the download folder
* open Magisk Manager, say “no” to update
* disable “Check Updates” in “Settings”
* exit Magisk Manager
* Download the latest version of “Magisk” (not “Magisk Manager”) from https://github.com/topjohnwu/Magisk/releases
* Continue with the installation of TWRP and install the new magisk version via TWRP when convenient. Once installed open the “Magisk Manager” app and follow the prompts to update the app
Note: Newer versions of Magisk seem to be breaking auto rotation. Let’s stick with the previous version for now.


