Как восстановить grub?
Содержание:
Notes and warnings
5.1. Using a separate partition for /boot
If you have a separate partition for /boot, the lines starting with root, kernel and initrd in /boot/grub/grub.conf must be modified as follows:
-
The line starting with root must indicate the partition for /boot, not the partition for .
-
The line starting with kernel must assume that the kernel (vmlinuz) is in , not in /boot. However, the command root in that line must indicate the partition for , not the partition for /boot.
-
The line starting with initrd must assume that the initial ramdisk (initrd or initramfs) is in , not in /boot.
Example:
The /boot partition is /dev/sda1, or hd(0,0). The partition is /dev/sda2, or hd(0,1). The file /boot/grub/grub.conf must indicate the following:
title CentOS 5.6 i686
  root (hd0,0)
  kernel /vmlinuz-2.6.18-238.19.1.el5.centos.plusPAE ro root=/dev/sda2
  initrd /initrd-2.6.18-238.19.1.el5.centos.plusPAE.img
5.2. Grub and ext4fs
Grub from CentOS 5 doesn’t work with ext4fs. More precisely, it can’t read the 256-byte inodes that ext4fs uses by default.
There are two possible solutions:
- Use Grub from CentOS 6, which works properly with ext4fs.
-
Create an ext4 file system with 128-byte inodes, by using the command mkfs.ext4 -I 128. This will mean that some capabilities of ext4fs won’t be available.
5.3. Using the Grub command line from the boot loader
Commands can be given to Grub from the boot loader itself. Type c at the boot menu, and then give Grub the same commands that would be in the /boot/grub/grub.conf configuration file.
This can be useful if there are mistakes in the configuration file.
Example:
grub> find /boot/grub/stage1
 (hd0,5)

grub> root (hd0,5)

grub> kernel /boot/vmlinuz-2.6.18-238.19.1.el5.centos.plusPAE ro root=/dev/sda6

grub> initrd /boot/initrd-2.6.18-238.19.1.el5.centos.plusPAE.img

grub> boot
You can also edit a line in /boot/grub/grub.conf from the Grub boot loader with the e command. For example, to boot Linux in single-user mode (runlevel 1), edit the line with the kernel command by adding 1 at the end. Then type b to boot.
5.4. Using Grub to boot a Windows partition
To boot a Windows partition using Grub, add a «stanza» similar to this one in /boot/grub/grub.conf:
Example:
title Windows
  rootnoverify (hd0,0)
  makeactive
  chainloader +1
Regression testing framework
It would be convenient to have a regression test framework to detect
regressions automatically and report them to the developers.
Dejagnu support could be integrated in the build system, so that different
tests can be performed. Some features could be tested right away by using
grub-fstest or grub-emu. Other tests could be performed using QEMU, etc. It
is up to the student to propose ideas to build an extensive testsuite.
In addition, a monitoring system could be developed (or adapted) to check
periodically that GRUB can build and pass the testsuite on the different
platforms it supports, reporting to the developers when a regression is found,
together with details on who caused it and when.
ATA (parallel and serial)
A commonly-found problem when using GRUB is that bugs in disk access
facilities provided by the BIOS prevent it from operating correctly. Often
this can be worked around, but sometimes it can’t.
GRUB already has a (parallel) ATA driver, although it is incomplete, and
currently only supports devices in legacy mode (such as the ones emulated by
QEMU). We need to extend it so that it can interact with our PCI bus driver
and support all kind of ATA drives.
Additionally, we need specific support for AHCI in order to use SATA
drives, since not all of them provide legacy compatibility with purely PATA
drivers.
Первые шаги
При первом сравнении GRUB со старым GRUB Legacy самым весомым различием оказывается измененная структура файлов конфигурации.
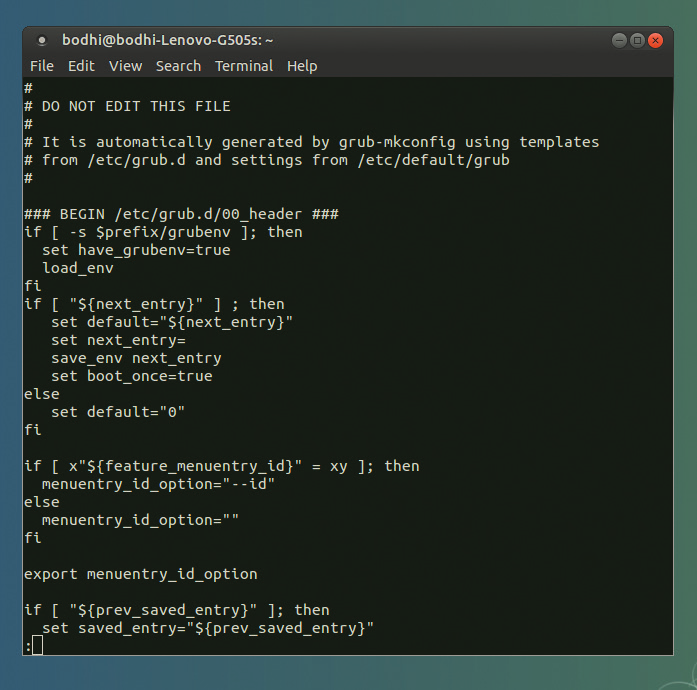
Настройка GRUB производится теперь принципиально иным способом — основным файлом конфигурации является «/boot/grub/grub.cfg«. Однако же, не торопитесь править его так, как привыкли это делать с «menu.lst» в GRUB Legacy. При внимательном прочтении мы видим в начале файла «grub.cfg» такие строки:
#
# DO NOT EDIT THIS FILE
#
# It is automatically generated by /usr/sbin/grub-mkconfig using templates
# from /etc/grub.d and settings from /etc/default/grub
#
И об этом нас предупреждают не просто так. Ведь «grub.cfg» генерируется автоматически с использованием нескольких скриптов. Поэтому после следующего обновления GRUB ваш «grub.cfg» будет создан заново, и все ваши правки будут утрачены.
Кроме файла «grub.cfg», отвечающего за загрузочное меню, имеются файл «/etc/default/grub» и папка «/etc/grub.d«. Рассмотрим их подробнее.
We are looking forward to seeing a very fancy menu implementation, which
supports animations, colorful effects, style sheets, etc. This work should be
based on the GRUB’s Video API, and should share as much code as possible with
the text-based menu interface.
This feature is really important for GRUB 2, because GRUB Legacy has been
patched by third parties frequently, as the official version never support a
graphical interface, but such an interface attracts more casual users. Support
for a fancy menu — even better than an unofficial patch for GRUB Legacy — would
attract more people to GRUB 2, thus this is critical in a long term to
accelerate the development.
Команды консоли GRUB
Чтобы попасть в консоль, нужно нажать клавишу C во время отображения меню загрузки.
ls
Довольно универсальная команда при использовании в чистом виде выдает список жестких дисков и разделов. Также она может быть использована как одноименная команда в Linux — для вывода содержимого папки. например:
ls /boot/grub
Еще одно полезное свойство комадны «ls» — она позволят получить информацию о любом разделе:
ls (hd0,5)
Команда сообщит нам тип файловой системы на разделе, метку раздела (если таковая имеется), UUID и дату последнего изменения данных на разделе (в формате UTC).
Данная команда выводит содержимое заданного файла, используется в формате:
cat /путь/имя_файла
linux
Аналог команды «kernel» в GRUB Legacy. Загружает указанное Linux-ядро:
linux файл_ядра опция1=значение опция2 опция3
Например, так:
linux /boot/vmlinuz-2.6.32-020632-generic root=/dev/sda5 single
initrd
Загружает указанный initrd-образ. Используется так:
initrd /boot/initrd.img-2.6.32-020632-generic
Обратите внимание, что версия initrd должна соответствовать версии загружаемого ядра!
chainloader
Передает управление загрузкой по цепочке другому загрузчику (загрузчик ищется на заданном в качестве root разделе). В общем случае требует указания файла для загрузки:
chainloader /путь/имя_файла
Для (загрузчика Windows) можно использовать:
chainloader +1
boot
root
При использовании без параметров сообщает, какой раздел сейчас используется в качестве корневого и тип файловой системы на этом разделе, также команда может быть использована для задания другого root-раздела. Раздел задается в «grub device» — формате »(hd*,*)«. например:
root (hd0,5)
После задания раздела команда сообщит новый root-раздел и тип файловой системы. Примечание: «root hd(*,*)» не всегда корректно срабатывает. более предпочтительным вариантом является «set root» (см. ниже)
set
Весьма универсальная команда для изменения различных параметров. Служит для задания значений переменных и используется в формате:
set переменная=значение
Наиболее необходимое ее применение — для задания root-раздела, например:
set root=(hd0,5)
Также с ее помощью можно, например, «на лету» изменить цвет текста в меню и консоли, что позволяет опробовать цветовую схему перед установкой ее в качестве основной. Для этого изменяем переменные «color_normal» — для обычного пункта (и текста в консоли) и «color_highlight» для выделенного пункта соответственно. Например, попробуем такой вариант:
set color_normal=magenta/green
set color_highlight=light-blue/black
search
Служит для поиска раздела по UUID, метке или заданному файлу. Имеет следующие ключи:
- -u (или –fs-uuid) — поиск раздела по UUID
- -l (или –label) — поиск по метке раздела
- -f (или –file) — поиск по указанному файлу
- -n (или –no-floppy) — не проверять флоппи-дисковод (чтоб не трещал)
- -s (или –set) — установить найденный раздел в качестве значения заданной переменной.
help
При использовании в чистом виде выведет список доступных команд. В формате:
help r
Выведет справку по всем командам, начинающимся на «r».
help search
Отобразит справку по команде «search»
background_image
Позволяет «на лету» изменить фоновое изображение. Используется в формате:
background_image /путь/имя_файла
Дает замечательную возможность посмотреть на выбранную картинку в действии, избегая лишних перезагрузок. В сочетании с заменой цветов через позволит довольно быстро подобрать подходящий вариант оформления.
Данная команда не заменит ваши настройки оформления, фон будет изменен лишь на текущий сеанс.
При использовании без параметров сбросит текущее фоновое изображение. Однако, заданные цвета останутся, так что если у вас черный цвет текста — на черном фоне вы его не увидите.
terminal_output.console
Позволяет переключиться на обычную черно-белую цветовую гамму. Весьма полезно при работе с консолью в том случае, если у вас установлено фоновое изображение. Картинка на фоне — это, конечно, красиво, но на некоторых участках фона может быть не виден текст.
Manual configuration of core image for early boot
If you require a special keymap or other complex steps that GRUB is not able to configure automatically in order to make available to the GRUB environment, you can generate a core image yourself. On UEFI systems, the core image is the file that is loaded by the firmware on boot. Building your own core image will allow you to embed any modules required for very early boot, as well as a configuration script to bootstrap GRUB.
Firstly, taking as an example a requirement for the keymap embedded in early-boot in order to enter a password for an encrypted on a UEFI system:
Determine from the generated file what modules are required in order to mount the crypted . For instance, under your you should see lines similar to:
insmod diskfilter cryptodisk luks gcry_rijndael gcry_rijndael gcry_sha256
insmod ext2
cryptomount -u 1234abcdef1234abcdef1234abcdef
set root='cryptouuid/1234abcdef1234abcdef1234abcdef'
Take note of all of those modules: they will need to be included in the core image. Now, create a tarball containing your keymap. This will be bundled in the core image as a memdisk:
# grub-kbdcomp -o dvorak.gkb dvorak
# tar cf memdisk.tar dvorak.gkb
Now create a configuration file to be used in the GRUB core image. This is in the same format as your regular grub config, but need contain only a few lines to find and load the main config file on the partition:
early-grub.cfg
set root=(memdisk)
set prefix=($root)/

terminal_input at_keyboard
keymap /dvorak.gkb

cryptomount -u 1234abcdef1234abcdef1234abcdef
set root='cryptouuid/1234abcdef1234abcdef1234abcdef'
set prefix=($root)/grub

configfile grub.cfg
Finally, generate the core image, listing all of the modules determined to be required in the generated , along with any modules used in the script. The example above needs , , , and .
# grub-mkimage -c early-grub.cfg -o grubx64.efi -O x86_64-efi -m memdisk.tar diskfilter cryptodisk luks gcry_rijndael gcry_sha256 ext2 memdisk tar at_keyboard keylayouts configfile
The generated EFI core image can now be used in the same way as the image that is generated automatically by : place it in your EFI partition and enable it with , or configure as appropriate for your system firmware.
Multiple entries
If you have multiple kernels installed, say linux and linux-lts, by default groups them in a submenu. If you do not like this behaviour you can go back to one single menu by adding the following line to :
GRUB_DISABLE_SUBMENU=y
Recall previous entry
GRUB can remember the last entry you booted from and use this as the default entry to boot from next time. This is useful if you have multiple kernels (i.e., the current Arch one and the LTS kernel as a fallback option) or operating systems. To do this, edit and change the value of :
GRUB_DEFAULT=saved
This ensures that GRUB will default to the saved entry. To enable saving the selected entry, add the following line to :
GRUB_SAVEDEFAULT=true
This will only work if /boot is not a btrfs, because grub cannot write to btrfs. But it will generate a misleading error message: «sparse file not allowed. Press any key to continue.».
Note: Manually added menu items, e.g. Windows in or , will need added.
To change the default selected entry, edit and change the value of :
Using menu titles :
GRUB_DEFAULT='Advanced options for Arch Linux>Arch Linux, with Linux linux'
Using numbers :
GRUB_DEFAULT="1>2"
Grub identifies entries in generated menu counted from zero. That means for the first entry which is the default value, for the second and so on. Main and submenu entries are separated
by a .
The example above boots the third entry from the main menu ‘Advanced options for Arch Linux’.
Boot non-default entry only once
The command is very helpful to boot another entry than the default only once. GRUB loads the entry passed in the first command line argument, when the system is rebooted the next time. Most importantly GRUB returns to loading the default entry for all future booting. Changing the configuration file or selecting an entry in the GRUB menu is not necessary.
Note: This requires in (and then regenerating ) or, in case of hand-made , the line .
GRUB 2 и UEFI
Машины с прошивками UEFI (т.е., практически все машины, продающиеся в течение нескольких последних лет) добавили новый уровень сложности в процесс диагностики проблем системного загрузчика GRUB 2. Несмотря на то, что процедура восстановления работоспособности системного загрузчика GRUB 2, установленного на машине с прошивкой UEFI, не значительно отличается от процедуры восстановления работоспособности этого же загрузчика на машине без прошивки UEFI, в новые версии прошивок вносятся различные изменения, которые являются причиной различных результатов процесса восстановления работоспособности системного загрузчика.
В системах на основе UEFI вам не придется устанавливать что-либо в основную загрузочную запись. Вместо этого вы должны будете установить загрузчик Linux с поддержкой EFI в системный раздел EFI (EFI System Partition, ESP) и выбрать данный загрузчик в качестве используемого по умолчанию с помощью такого инструмента, как efibootmgr в Linux или bcdedit в Windows.
На данный момент системный загрузчик GRUB 2 должен корректно устанавливаться в процессе установки любого из популярных дистрибутивов Linux, что позволяет последнему успешно сосуществовать с ОС Windows 8. Однако, в том случае, если вы получите в результате неработоспособный системный загрузчик, вы сможете восстановить работоспособность системы с помощью live-образа дистрибутива Linux. В процессе загрузки live-образа дистрибутива вам следует убедиться в том, что вы осуществляете загрузку в режиме UEFI. Меню загрузки компьютера должно содержать по два элемента для каждого из съемных носителей — для загрузки в обычном режиме и в режиме UEFI. Используйте последний режим для организации доступа к переменным EFI посредством файлов из директории /sys/firmware/efi/.
Из live-окружения следует смонтировать корневую файловую систему неудачно установленного дистрибутива таким образом, как описано в данном руководстве. Вам также придется смонтировать системный раздел EFI (ESP). Если предположить, что данному разделу соответствует файл устройства /dev/sda1, то вы можете смонтировать данный раздел с помощью следующей команды:
sudo mount /dev/sda1 /mnt/boot/efi
После этого необходимо загрузить модуль ядра efivars с помощью команды modprobe efivars перед созданием окружения chroot с корневой файловой системой неудачно установленного дистрибутива таким образом, как описано в данном руководстве.
Теперь в том случае, если вы используете дистрибутив Fedora, вы можете переустановить системный загрузчик с помощью следующей команды:
yum reinstall grub2-efi shim
После нее следует выполнить команду для генерации нового файла конфигурации системного загрузчика:
grub2-mkconfig -o /boot/grub2/grub.cfg
Пользователи дистрибутива Ubuntu могут выполнить эту же операцию с помощью команды:
apt-get install --reinstall grub-efi-amd64
После восстановления системного загрузчика следует выйти из окружения chroot, отмонтировать все смонтированные разделы жесткого диска и перезагрузить компьютер, перейдя в меню GRUB 2.
 Для деактивации сценария из директории /etc/grub.d вам нужно всего лишь убрать бит исполнения, с помощью команды, аналогичной команде chmod -x /etc/grub.d/20_memtest86+, которая позволяет убрать строку «Memory Test» из меню загрузки


