Команда sudo в linux
Содержание:
GUI text editors
This section discusses text editing applications for the Linux windowing system, X Windows, more commonly known as X11 or X.
If you are coming from Microsoft Windows, you are no doubt familiar with the classic Windows text editor, Notepad. Linux offers many similar programs, including NEdit, gedit, and geany. Each of these programs are free software, and they each provide roughly the same functionality. It’s up to you to decide which one feels best and has the best interface for you. All three of these programs support syntax highlighting, which helps with editing source code or documents written in a markup language such as HTML or CSS.
NEdit
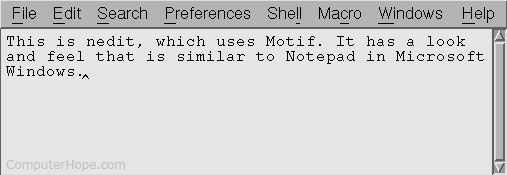
NEdit, which is short for the Nirvana Editor, is a straightforward text editor that is very similar to Notepad. It uses a Motif-style interface.
The NEdit homepage is located at https://sourceforge.net/projects/nedit/. If you are on a Debian or Ubuntu system, you can install NEdit with the following command:
sudo apt-get install nedit
For more information, see our NEdit information page.
Geany
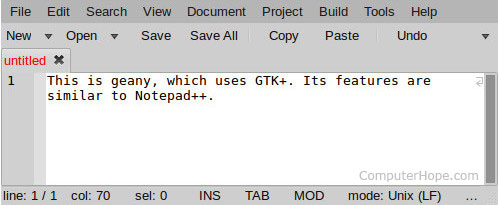
Geany is a text editor that is a lot like Notepad++ for Windows. It provides a tabbed interface for working with multiple open files at once and has nifty features like displaying line numbers in the margin. It uses the GTK+ interface toolkit.
The Geany homepage is located at http://www.geany.org/. On Debian and Ubuntu systems, you can install Geany by running the command:
sudo apt-get install geany
Gedit

Gedit is the default text editor of the GNOME desktop environment. It’s a great, text editor that can be used on about any Linux system.
The Gedit homepage is located at https://wiki.gnome.org/Apps/Gedit. On Debian and Ubuntu systems, Gedit can be installed by running the following command:
sudo apt-get install gedit
How to Start gEdit
On a distribution with the GNOME desktop environment, press the Super key (the key with the Windows logo on it, next to the ALT key). Then, type Edit into the search bar and select the Text Editor icon.
To open files in gEdit:
-
Open the Nautilus file manager.
-
Navigate to the folder that contains the file you want to open.
-
Right-click the file.
-
Select Open with text editor. If you don’t see this option, select Open with other application, then choose the Text editor option.
You can also edit files in gEdit from the command line. Open a terminal and type the following command:
To open a specific file, specify the filename after the gedit command, as follows:
ge
Run the gedit command as a background command so that the cursor returns to the terminal after you execute the command to open it. To run a program in the background, add the ampersand symbol, as follows:
Плагины
Плагины можно включить в Правка→Параметры→Модули.
Официально поддерживаемый разработчиками gedit набор плагинов содержится в пакете . Этот пакет по умолчанию не установлен в системе.
Список встроенных изначально плагинов:
| Плагин | Описание |
|---|---|
| Быстрое открытие | Быстрое открытие файлов |
| Внешние инструменты | Выполнить внешние команды и скрипты оболочки |
| Вставка времени и даты | Вставляет текущую дату и время в позиции курсора |
| Изменить регистр | Изменяет регистр выделенного текста |
| Консоль Python | Интерактивная консоль Python в нижней панели |
| Панель обозревателя файлов | Быстрый доступ к файлам из боковой панели |
| Проверка орфографии | Проверяет орфографию в текущем документе |
| Сортировка | Сортирует документ или выделенный текст |
| Статистика документа | Анализирует документ и определяет число слов, строк, символов и непробельных символов в нем |
| Строки режимов | Поддержка Emacs, Kate и Vim-стиля строк режимов для gedit |
| Фрагменты текста | Быстро вставляет часто используемые фрагменты текста |
| Плагин | Описание |
|---|---|
| Dashboard | Экспресс панель при открытии новой вкладки. |
| Закладки | Простое перемещение по документу с помощью закладок. |
| Дополнение скобок | Автоматически добавляет закрывающуюся скобку |
| Карта символов | Вставка специальных символов по щелчку |
| Комментирование кода | Комментирование и раскомментирование блоков кода. |
| Выбор цвета | Выбор цвета и вставка его шестнадцатиричного представления |
| Командный интерпретатор | Интерфейс командной строки для расширенного редактирования. |
| Отображение пробелов | Показать пробелы и символы табуляции. |
| Объединение/разбивка строк | Объединение или разбивка длинных строк. |
| Мульти-правка | Правка документа одновременно в нескольких местах |
| Сохранение сеансов | Сохранение и восстановление сеансов работы |
| «Умные» пробелы | Забудьте о том, что вы не пользуетесь табуляцией |
| SyncTeX | |
| Список тегов | Предоставляет простой способ вставки в документ часто используемых тегов или строк без необходимости набирать их вручную. |
| Встроенный терминал | Вставить терминал в нижнюю панель |
| Размер текста | Простое увеличение и уменьшение размеров текста |
| Дополнение слов | Дополнение слов с помощью каркаса дополнений |
Download & Install Gedit using Ubuntu Software- GUI Method:
This method is more suitable for Linux Beginners as we will use the GUI option to install the editor. But for using this method, you should be running Ubuntu Unity 16.04 or Higher. The following are the steps.
- Go to All Applications.
- Search & Locate Ubuntu Software and open it.
- On the Ubuntu Software window, you will find a Search symbol on the top. Click on that.
- Now, a search bar will drop down. Search for Gedit.
- Once you locate the application then click on that and choose Install.
- Kindly wait for the application to install.
- Once installed, then you can Launch the application from All Applications under the name of Text Editor.
Preferences
To find the preferences, select the Options > Preferences. A window appears with four tabs appears: View, Editor, Fonts and Colors, and Plugins.
- Go to the View tab to choose whether to display line numbers, a right margin, a status bar, an overview map, or a grid pattern. You can also turn word wrap on and off, split a single word over multiple lines, and control how highlighting works.
- Go to the Editor tab to set the spacing for tabs, insert spaces instead of tabs, and choose how often a file is auto-saved.
- Go to the Fonts and Colors tab to choose the theme used by gEdit as well as the default font family and size.
- Go to the Plugins tab to find the plugins available for gEdit. Some plugins are highlighted. To enable others, place a check in the box.
Настройка автоопределения кодировок
По умолчанию Ubuntu использует кодировку текстовых файлов UTF-8, однако некоторые операционные системы используют другие кодировки (например, русская версия Microsoft Windows использует CP-1251).
Для корректного отображения текстовых файлов с кодировкой CP-1251 нужно в gedit включить распознавание CP-1251.
В случае Gedit из состава Gnome 3, выполните команду в терминале:
gsettings set org.gnome.gedit.preferences.encodings auto-detected ""
Для Ubuntu 16.04:
gsettings set org.gnome.gedit.preferences.encodings candidate-encodings ""
Здесь указан лишь примерный перечень кодировок. По своему усмотрению в этот список можно включить и иные. То же самое можно сделать через , перейдя по адресу и изменив параметр .
Они устанавливаются в и включается традиционным способом в списке плагинов.
Глобальные переменные Gedit
Здесь перечислены некоторые глобальные переменные gedit которые можно использовать в сценариях для плагина Внешние инструменты.
| $GEDIT_SELECTED_TEXT | Текущий выделенный текст. |
|---|---|
| $GEDIT_CURRENT_WORD | Слово, на котором стоит курсор. |
| $GEDIT_CURRENT_LINE | Строка, на которой стоит курсор |
| $GEDIT_CURRENT_LINE_NUMBER | Номер строки, на которой стоит курсор |
| $GEDIT_CURRENT_DOCUMENT_URI | Текущий URI документа |
| $GEDIT_CURRENT_DOCUMENT_NAME | Текущее имя документа. (Основное имя документа). |
| $GEDIT_CURRENT_DOCUMENT_SCHEME | Текущее устройство URI (file/FTP/SSH). |
| $GEDIT_CURRENT_DOCUMENT_PATH | Текущий путь к документу (для локальных файлов) |
| $GEDIT_CURRENT_DOCUMENT_DIR | Текущая директория документа |
| $GEDIT_CURRENT_DOCUMENT_TYPE | Тип содержания текущего документа |
| $GEDIT_CURRENT_DOCUMENTS_URI | Список URI и всех открытых документов |
| $GEDIT_CURRENT_DOCUMENTS_PATH | Список путей ко всем открытым документам |
Общая информация
В операционных системах семейства Linux реализован принцип разграничения пользовательских привилегий, то есть у разных учетных записей разный объем прав доступа к каталогам, файлам и программам. Максимальными правами наделена встроенная учетная запись root. Вновь создаваемые пользовательские аккаунты обычно существенно ограничены в доступе к системным конфигурационным файлам, управлении сервисами, установке и удалении программных пакетов. При этом работа в операционной системе под учетной записью root настоятельно не рекомендуется, прежде всего в целях безопасности. В этом случае на помощь приходит утилита командной строки sudo.
Команда sudo позволяет запускать отдельные команды с повышением привилегий (по умолчанию с правами root) пользуясь непривилегированной учетной записью. Давайте разберемся, что же требуется для работы этой утилиты.
Problems and tips
PATH not set
A typical error using sudo to install a package might result in:
dpkg: warning: 'ldconfig' not found in PATH or not executable.
dpkg: warning: 'start-stop-daemon' not found in PATH or not executable.
dpkg: error: 2 expected programs not found in PATH or not executable.
Note: root's PATH should usually contain /usr/local/sbin, /usr/sbin and /sbin.
The packaged /etc/sudoers file contains this line:
Defaults secure_path="/usr/local/sbin:/usr/local/bin:/usr/sbin:/usr/bin:/sbin:/bin"
Previous versions did not include that line. If you had a locally modified /etc/sudoers (most would) and then upgraded and kept your locally modified version then this required line is now missing. It no longer overrides your PATH when using sudo. This most likely results in PATH not being set properly and not including the system directories. The fix is to merge your local changes into the new package /etc/sudoers file. Or to put your local changes in the new /etc/sudoers.d/ location as a uniquely named file such as /etc/sudoers.d/local-sudoers. See for details.
Sorry, user jdoe is not allowed to execute …
A typical session goes like this:
$ sudo test
We trust you have received the usual lecture from the local System
Administrator. It usually boils down to these three things:
#1) Respect the privacy of others.
#2) Think before you type.
#3) With great power comes great responsibility.
password for jdoe:
Sorry, user jdoe is not allowed to execute ‘/usr/bin/test’ as root on localhost.
This message means what it says: the user you’re running as isn’t allowed to execute the given command on the given machine. One confusing possible reason for this is that the administrator has just added user jdoe to a privileged group — but you’re still using the old login, which doesn’t have that new group information, and therefore has no new sudo-ing rights. People in this situation are usually advised to log out completely and back in again, though you can sometimes get away with just performing a «re-login on the spot» with su - $USER
The include directive
The standard /etc/sudoers in Wheezy as of 1.8.2-1 ends with a line:
#includedir /etc/sudoers.d
This makes it possible for other packages to provide snippets in /etc/sudoers.d/<packagename> which modify the configuration of sudo. It may look as if it needs to be edited to take out the leading numbersign (a.k.a. «hash» or «pound»), but no, the ‘#’ is part of the directive!
sudoers is read-only
Yes, the file /etc/sudoers is intentionally set read-only, even for root!
The explanation usually offered is that it was set up this way to ensure that admins only ever edit it via the command visudo. However, this theory doesn’t quite hold water. Being mode 0440 does nothing to impede sudo nano /etc/sudoers — most text editors will let you edit the file without complaining about the read-only bit. Besides, any time you do mangle /etc/sudoers, the fix may be as simple as su -c visudo, which is nothing compared to the kind of recovery procedure you’d have to go through if you broke something like /etc/inittab (mode 0644). So if there’s a good reason for the unorthodox permissions, it’s a mystery — contributions welcome.
Wrong HOME (and profile settings) behavior
If you are having problems when you sudo to your shell and your $HOME (and profile settings) doesn’t work as expected because your new HOME is /root, you need to know that the default sudo configuration in Squeeze resets all environmental variables. To restore the old behavior of preserving the user’s $HOME environment variable you can add this to your /etc/sudoers configuration file:
If you want to require the root password for use of sudo, rather than the user password, add the line:
If you want sudo group members to execute commands without password, add the line:
For more information read the .
Customize credentials cache timeout
As default, after asking a password, your credentials are cached by sudo and last for 15 minutes. You can change this behavior using the command visudo and customizing the timeout for a specific user:
Команда su
Su дает доступ к консоли с полными правами администратора root любому (даже если он изначально не был вписан в файл /etc/sudoers). Единственное условие — он должен иметь пароль root. Понятно, что в большинстве случаев ним будет сам root, — не станете же вы всем доверять свой пароль? Поэтому su предназначена, в первую очередь, для администратора системы, в Linux права пользователя у него не ограничены, а sudo — для остальных, им тоже иногда требуются права root (чтобы они меньше отвлекали администратора от своей работы).
Использовать su просто:
su
После этого нужно будет подтвердить права root пользователя Linux и ввести пароль, далее вы сможете работать в консоли, как обычно. Использовать su удобнее, чем sudo, потому что нет необходимости вводить su непосредственно перед каждой командой, требующей выполнения с правами root.
Чтобы закрыть сессию su нужно или ввести слово exit, или закрыть окно терминала.
С помощью su можно работать от имени любого пользователя. Ранее было показано, как мы с помощью su den смогли выполнять команды от имени пользователя den.
Популярные услуги
Linux сервер
Высокопроизводительные VPS сервера Linux на без KVM-виртуализации идеально подходят для крупных интернет-проектов. В сочетании с этой операционной системой серверные компьютеры демонстрируют хорошую производительность, а SSD хранилища данных способствуют увеличению их быстродействия. У нас вы сможете взять в аренду VPS и VDS Linux сервера.
Аренда выделенного сервера в России
Аренда сервера и СХД необходимой производительности.
Все оборудование размещаются в собственном отказоустойчивом ЦОДе с зарезервированными системами энергоснабжения, охлаждения и каналами связи.
Размещение серверов (colocation)
Дата-центр Xelent — все условия для размещения отдельных серверов и для аренды автономных ячеек под готовый к эксплуатации корпоративный ЦОД или удалённую точку присутствия оператора связи.
Install Gedit Linux on Ubuntu Unity 18.04.2 LTS/ Debian using Terminal:
- Let us get into the steps directly. The following commands can be used to install Gedit editor on your Linux Ubuntu Unity 18.04.2 LTS/18.04.1 LTS, Linux Mint, and other Debian Distributions.
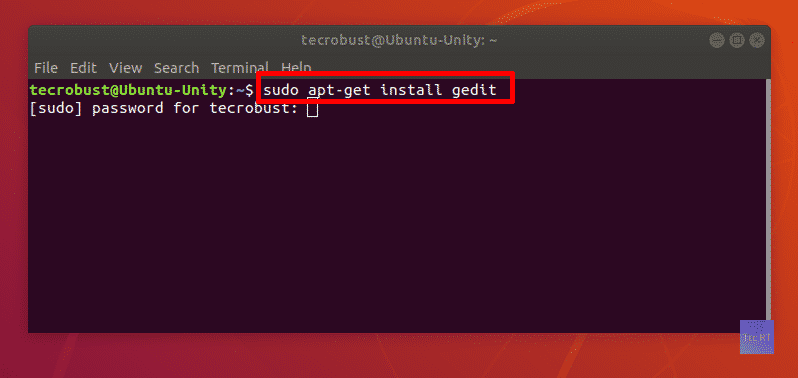
- Paste the following installation command on the terminal and execute it. Kindly enter the password to authenticate and initiate the process.
$ sudo apt-get install gedit
How to Use?: Paste the above command on the Terminal(CTRL + ALT + T) and press Enter key.
 Installation Command
- Now the installation is completed.
- Once the installation is complete, then you can launch the application from All Applications under the name of Text Editor.
The gEdit User Interface
The gEdit user interface contains a single toolbar at the top with a panel for entering the text below it.
The toolbar contains items to open and save files, add tabs, and control the window. Select Open to display a window with a search bar to search for documents, a list of recently accessed documents, and the option to access Other Documents. When you choose Other Documents, a file dialog appears where you can search the directory structure for the file you want to open.
There is a plus symbol (+) next to Open. When you select it, a new tab is added so that you can edit multiple documents at the same time.
Save displays the File dialog. Choose a location in the file system to save the file. You can also choose the character encoding and the file type.
The Options icon is denoted by three vertical lines. When selected, it opens a new menu with options to refresh the screen, save and print a document, find information in a document, change the view, and more.
The other three icons minimize, maximize, and close the editor.
Gedit в качестве Python IDE
Примечание от автора
Здесь будут описаны действия, которые превратили мой gedit в такой, как на рисунке. Я считаю, что раз вы тоже программист, то обладаете достаточным уровнем интеллекта, чтобы изменить какие-то параметры под себя, если вам что-то не понравится, а так же порыться в приведенных ссылках в поисках возможностей получения эксклюзивного кайфа от работы с gedit
Многим начинающим Python-разработчикам пригодится данная заметка. После всех преобразований ваш gedit превратится в нечто подобное:

Запуск *.py прямо из gedit
Существует замечательный модуль «Внешние инструменты». Он позволит запускать проекты на Python по нажатию сочетания клавиш.
- Сначала включите этот плагин: Правка→Параметры→Модули
- Затем откройте Сервис→Manage External Tools.
- Добавьте новый инструмент нажатием + под боковой панелью со списком инструментов.
- Появится новый инструмент с названием вроде «Новый/New tool». Назовите его удобным для вас названием, например, Python.
-
В него же добавьте код:
python $GEDIT_CURRENT_DOCUMENT_NAME
где переменная
$GEDIT_CURRENT_DOCUMENT_NAME
отвечает за имя документа.
-
Теперь укажите комбинацию клавиш под полем редактирование.
Если вы используйте Python 3, то вместо напишите во избежание конфликтов импорта, и т. п. проблем, либо добавьте еще один инструмент таким же образом для Python 3.
Изменение внешнего вида поля редактирования
- Откройте параметры Правка→Параметры
- Отметьте Показывать номера строк.
- Отметьте Показывать границу в столбце. Размер границы установите по своему усмотрению, например 120.
- Отметьте Подсвечивать текущую строку.
- Отметьте Подсвечивать парные скобки.
- Если вам удобна темная цветовая схема, то перейдите на вкладку Шрифты и цвета и выберите тему Oblivion.
Настройки сохранения
Чтобы не было неприятных сюрпризов с потерей кода (и стресса от последующего восстановления):
- Откройте Правка→Параметры.
- Перейдите на вкладку Редактор.
- Отметьте Создавать резервную копию и Автоматически сохранять каждые. Интервал сохранения выберите по своему усмотрению.
Если вы работаете с несколькими файлами сразу, вам будет удобнее сохранить сеанс целиком. Нужно в разделе Правка→Параметры→Модули включить плагин Сохранение сеансов. Теперь, когда вы будете работать множеством вкладок, они все откроются при выборе сеанса в Файл→Сохраненные сеансы→Управление сеансами.
Дополнительные удобства
Добавьте PPA с плагином:
sudo apt-add-repository ppa:gedit-bc-dev-pluginsdaily-build
Затем обновите списки пакетов и установите пакет :
sudo apt-get update
sudo apt-get install gedit-classbrowser3g
Включить интерактивную консоль Python можно там же, где и все остальные плагины.


