Установка freeradius на ubuntu linux
Содержание:
- How to install FreeRADIUS
- SQL Schema and usage
- Setting up the RADIUS database
- Configuring RouterOs for Radius & PPP* AAA
- Wireless Client
- Conclusion
- Debug
- What NOT to do
- Introduction
- Module Return Codes
- Populating SQL
- How to install daloRADIUS
- Setting Up Users In MySql
- Back-end Drivers
- 2.1 Создание production-сертификатов
- Access Point
- Also see
How to install FreeRADIUS
Now we can install the FreeRADIUS server. This is done with the following command:
sudo apt-get install freeradius freeradius-mysql freeradius-utils -y
When the installation completes, change to the root user with the command su -i and then import the database schema with the command:
mysql -u root -p radiusdb < /etc/freeradius/3.0/mods-config/sql/main/mysql/schema.sql
Exit out of the root use with the command exit.
Create a symbolic link for the sql module with the command:
sudo ln -s /etc/freeradius/3.0/mods-available/sql /etc/freeradius/3.0/mods-enabled/
Change the ownership of two sql files with the commands:
sudo chgrp -h freerad /etc/freeradius/3.0/mods-available/sql
sudo chown -R freerad:freerad /etc/freeradius/3.0/mods-enabled/sql
Restart FreeRADIUS with the command:
sudo systemctl restart freeradius
SQL Schema and usage
In general, the SQL schema mirrors the layout of the ‘users’ file. So for configuring check
items and reply items, see ‘man 5 users’, and the examples in the ‘users’ file.
The SQL module employs two sets of check and reply item tables for processing in the authorization
stage. One set of tables (radcheck and radreply) are specific to a single user. The other set of
tables (radgroupcheck and radgroupreply) is used to apply check and reply items to users that are
members of a certain SQL group. The usergroup table provides the list of groups each user is a
member of along with a priority field to control the order in which groups are processed.
When a request comes into the server and is processed by the SQL module, the flow goes something
like this:
- Search the radcheck table for any check attributes specific to the user
- If check attributes are found, and there’s a match, pull the reply items from the radreply table
- for this user and add them to the reply
-
Group processing then begins if any of the following conditions are met:
- The user IS NOT found in radcheck
- The user IS found in radcheck, but the check items don’t match
- The user IS found in radcheck, the check items DO match AND Fall-Through is set in the radreply table
- The user IS found in radcheck, the check items DO match AND the read_groups directive is set to ‘yes’
- If groups are to be processed for this user, the first thing that is done is the list of groups
this user is a member of is pulled from the usergroup table ordered by the priority field. The
priority field of the usergroup table allows us to control the order in which groups are processed,
so that we can emulate the ordering in the users file. This can be important in many cases.
For each group this user is a member of, the corresponding check items are pulled from
radgroupcheck table and compared with the request. If there is a match, the reply items for this
group are pulled from the radgroupreply table and applied. -
Processing continues to the next group IF:
- There was not a match for the last group’s check items OR
- Fall-Through was set in the last group’s reply items (The above is exactly the same as in the
users file)
- Finally, if the user has a attribute set or the Default Profile option is
set in the sql.conf, then steps 4-6 are repeated for the groups that the profile is a member of.
For any fairly complex setup, it is likely that most of the actual processing will be done in the
groups. In these cases, the user entry in radcheck will be of limited use except for things like
setting the user’s password. So, one might have the following setup:
usergroup table:
In the SQL configuration file are _alt queries, these are called when the first SQL query fails or
doesn’t alter (insert, delete, update) any rows in the Database.
Setting up the RADIUS database
First, you should create a new empty ‘radius’ database in SQL and a database user with permissions to that database. You could of course call the database and the user anything you like but you probably should stick with ‘radius’ for both to keep things simple.
Next up, you need to create the schema for your database. There is an SQL script file for each SQL type in doc/examples/ in your operating system’s doc directory (or where you untar’d FreeRADIUS). On SUSE this is under /usr/share/doc/packages/freeradius/
Create MySQL Database
 mysql -uroot -p
   CREATE DATABASE radius;
   GRANT ALL ON radius.* TO radius@localhost IDENTIFIED BY "radpass";
   exit
Note: use a more secure password than «radpass» in the above example
 cd /usr/share/doc/packages/freeradius/doc/examples/
 mysql -uroot -p radius < mysql.sql
Note: CentOS/RHEL Schema Files Location:
/etc/raddb/sql/mysql/schema.sql
Note: Ubuntu Schema Files Location:
Ubuntu schema files are not called mysql.sql, but schema.sql. The location is:
/etc/freeradius/sql/mysql/
mysql -u root -p radius < /etc/freeradius/sql/mysql/schema.sql
If you’re managing your NASses with FreeRadius, the nas table is already included in schema.sql.
Create PostgreSQL Database
 su - postgres
 createuser radius --no-superuser --no-createdb --no-createrole -P
 createdb radius --owner=radius
 exit
Note: choose a secure password when prompted for one by the createuser command.
 cd /usr/share/doc/packages/freeradius/doc/examples/
 psql -U radius radius < postgresql.sql
Configuring RouterOs for Radius & PPP* AAA
Well now the end is insight, all that’s left now is to configure RouterOs as a radius client and tell the PPPoE server to use AAA.
RouterOs Radius Client
/radius add service=ppp address=192.168.0.2 secret=somepassword accounting-port=1813 authentication-port=1812 timeout=500ms
What this does is tell RouterOs that when a PPP user tries to login it will look to the local ppp users list and then will send a access-request packet to 192.168.0.2 with a secrey of ‘somepassword’ and will wait 500ms for a reply before resending
RouterOs PPP AAA setup
/ppp aaa set accounting=yes interim-update=5m use-radius=yes
This part tells RouterOs to use radius and to use accounting also, which will be updated every 5 minutes
Whats Left To Do
Well that’s the end of this guide, all that’s left to do now is setup a PPPoE server on the router and attempt to connect a user to do. If you get stuck remember to check the user-name and user-password is correct and you can put freeradius into verbose debug mode by going
freeeradius -x
Other wise Google is your friend then the Mikrotik Forums.
Wireless Client
In this guide as a wireless client, we use MikroTik router. Assuming that wireless and other settings are already configured, we only need to configure security profile.
Security Profile
Security profile must be configured precisely — even slight changes or errors can result in unsuccessful authentication. Add a new security profile:
/interface wireless security-profiles add name=EAP_client \
    mode=dynamic-keys authentication-types=wpa2-eap eap-methods=peap \
    supplicant-identity=somestring mschapv2-username=testing \
    mschapv2-password=password tls-mode=dont-verify-certificate
- — use any name here, you will reference security profile by it when assigning to wireless interface;
- — set to use to use encryption, otherwise use , if your access point is open i.e. has no security;
- — set security protocol, most devices support which is considered more secure than . This setting must overlap with what is set on the access point;
- — set it to to use PEAP method
- — use some sting, can be the same as username, will be used in the first phase of PEAP authentication to establish a TLS-based tunnel with RADIUS server. Don’t leave empty;
- — set as the username of RADIUS user, should match with the entry in RADIUS file;
- — set as the password of RADIUS user, should match with the entry in RADIUS file;
- — define how to manage TLS certificates, PEAP usually uses server-side certificates, so set to .
Other settings should be left default.
Finally set a newly created security profile to the wireless interface:
/interface wireless set wlan1 security-profile=EAP_client
- — a name of the wireless interface you are using as an access point;
- — set to the name of security profile just created for interface to use it.
Assuming that other wireless interface settings are configured in order to establish a link with the access point and all other settings are correct, the wireless client should authenticate successfully.
Conclusion
With this guide should be enough to configure the basic RouterOS wireless client with PEAP authentication. If done correctly, authentication should be successful and you will have a basic setup. However, in real life situations with this setup often is not enough. More advanced configuration should be done to achieve other goals like accounting, limits etc. For other RADIUS configurations you might need to configure access point and/or client differently, some RADIUS configurations might not work with RouterOS devices. RouterOS clients support only MSCHAPv2 as the inner method of PEAP.
Debug
Setuping RADIUS might be challenging and not always everything works as you intend. In these cases, you can use debug logs both on RADIUS server and RouterOS side.
To see debug information while running FreeRADIUS server start it with parameter like this:
$ radiusd -X
To get more debug information just add another «x» — .
To see debug logs in RouterOS, add logging rule to access point. Use this command to see all packets sent to RADIUS:
/system logging add topics=radius prefix=~~~
- — set the topic you want to see in the log;
- — you can add a prefix to distinguish RADIUS related logs from other, this is optional;
Now information about communication with RADIUS server can be seen with .
What NOT to do
One of the fields of the SQL schema is named ‘op’ This is for the ‘operator’ used by the
attributes. e.g.:
The reason is that with the op field empty, the server does not know what you want it to do with
the attribute. Should it be added to the reply? Maybe you wanted to compare the operator to one in
the request? The server simply doesn’t know.
So put a value in the field. The value is the string form of the Operators
Authentication vs Authorization
Many people ask if they can «authenticate» users to their SQL database however the answer is «You
are asking the wrong question.»
An SQL database stores information. An SQL database is NOT an authentication server. The
only users who should be able to authenticate themselves to the database
are the people who administer it. Most administrators do NOT want every user to be able to access
the database, which means that most users will not be able to «authenticate» themselves to the
database.
Instead, the users will have their authorization information (name, password, configuration) stored
in the database. The configuration files for FreeRADIUS contain a username and password used to
authenticate FreeRADIUS to the SQL server. (See raddb/sql.conf). Once the FreeRADIUS authentication
server is connected to the SQL database server, then FreeRADIUS can pull user names and passwords
out of the database, and use that information to perform the authentication.
Introduction
This article shows how to configure FreeIPA and integrate it in FreeRADIUS to implement a RADIUS based authentication system, which uses its own software token to provide OTP authentication to other, RADIUS compatible, systems (e.g. a VPN server, etc.).
The IPA server is configured as a stand-alone system, with no integration with other directory servers or any other system.
This How To is a intended as sort of brain dump of the steps I took to configure and test RADIUS and IPA with OTP authentication, after I successfully managed to build such a system, and it owes a lot to other guides and posts found in Internet. Some of the more helpful were:
PLEASE NOTE that this set-up uses unencrypted passwords between the client and the authentication server, i.e. password will be trasmitted as CLEAR TEXT, consider this with respect to your environment.
Module Return Codes
There are a number of return codes that may be returned by the request processing callbacks.
The complete list is here, which is duplicated by the documentation for the enum.
| Return Code | Meaning |
|---|---|
| RLM_MODULE_REJECT | This request is not permitted under local policy. FreeRADIUS responds immediately with a reject response. |
| RLM_MODULE_FAIL | Processing of this request could not be completed. Something is not working properly. FreeRADIUS responds with a reject response. |
| RLM_MODULE_OK | This request is permitted or this module has processed the request successfully. The FreeRADIUS response will be determined by processing of later modules. If this is the last module then the response will be an OK. |
| RLM_MODULE_HANDLED | The module handled the request, so stop. |
| RLM_MODULE_INVALID | The module considers the request invalid. |
| RLM_MODULE_USERLOCK | Reject the request (user is locked out). |
| RLM_MODULE_NOTFOUND | User not found. |
| RLM_MODULE_NOOP | Module succeeded without doing anything. |
| RLM_MODULE_UPDATED | OK (attributes modified). |
Populating SQL
Now we create some dummy data in the database to test against.
To check whether FreeRADIUS now properly works with the SQL database, we create a user entry in radcheck.
mysql -u radius -p
>  use radius;
>  insert into radcheck (username,attribute,op,value) values("fredf", "Cleartext-Password", ":=", "wilma");
Then try authenticating as the user with radtest. If you get Accept-Accept response, you can continue with group setup if you wish.
To configure groups, we’ll have to do these steps:
- In usergroup, put entries matching a user account name to a group name.
- In radcheck, put an entry for each user account name with a ‘Cleartext-Password’ attribute with a value of their password.
- In radreply, create entries for each user-specific radius reply attribute against their username
- In radgroupreply, create attributes to be returned to all group members
Here’s a dump of some example ‘radius’ tables from a MySQL database (With PostgreSQL the formatting will look slightly different but it uses exactly the same content).
This example includes three users, one with a dynamically assigned IP by the NAS (fredf), one assigned a static IP (barney), and one representing a dial-up routed connection (dialrouter):
In this example, ‘barney’ (who is a single user dialup) only needs an attribute for IP address in radreply so he gets his static IP — he does not need any other attributes here as all the others get picked up from the ‘static’ group entries in radgroupreply.
‘fred’ needs no entries in radreply as he is dynamically assigned an IP via the NAS — so he’ll just get the ‘dynamic’ group entries from radgroupreply ONLY.
‘dialrouter’ is a dial-up router, so as well as needing a static IP it needs route and mask attributes (etc) to be returned. Hence the additional entries.
‘dialrouter’ also has an idle-timeout attribute so the router gets kicked if it’s not doing anything — you could add this for other users too if you wanted to. Of course, if you feel like or need to add any other attributes, that’s kind of up to you!
Note the operator (‘op’) values used in the various tables. The password check attribute MUST use :=. Most return attributes should have a := operator, although if you’re returning multiple attributes of the same type (e.g. multiple Cisco- AVpair’s) you should use the += operator instead otherwise only the first one will be returned. Read the docs for more details on Operators.
If you’re stripping all domain name elements from usernames via realms, remember NOT to include the domain name elements in the usernames you put in the SQL tables — they should get stripped BEFORE the database is checked, so name@domain will NEVER match if you’re realm stripping (assuming you follow point 2 above) – you should just have ‘name’ as a user in the database. Once it’s working without, and if you want more complex realm handling, go back to work out not stripping (and keeping name@domain in the db) if you really want to.
How to install daloRADIUS
Download the latest release of daloRADIUS with the command:
wget https://github.com/lirantal/daloradius/archive/master.zip
Unzip the downloaded file with the command:
unzip master.zip
Move the newly unzipped directory into the Apache document root with the command:
sudo mv daloradius-master /var/www/html/daloradius
Import the daloRAIUS mysql tables to the FreeRADIUS database with the commands:
cd /var/www/html/daloradius
sudo mysql -u root -p radiusdb < contrib/db/fr2-mysql-daloradius-and-freeradius.sql
sudo mysql -u root -p radiusdb < contrib/db/mysql-daloradius.sql
Change the permissions of the daloradius directory with the commands:
sudo chown -R www-data:www-data /var/www/html/daloradius/
sudo chmod 664 /var/www/html/daloradius/library/daloradius.conf.php
Edit the daloRADIUS configuration file with the command:
sudo nano /var/www/html/daloradius/library/daloradius.conf.php
Make sure your configuration file reflects the following changes:
Where PASSWORD is the password used for the radius database user.
$configValues = '1.1-1';
$configValues = '28 Jul 2019';
$configValues = '2';
$configValues = 'mysqli';
$configValues = 'localhost';
$configValues = '3306';
$configValues = 'radius';
$configValues = ;PASSSWORD;
$configValues = 'radiusdb';
Restart the FreeRADIUS and Apaches services with the commands:
sudo systemctl restart freeradius
sudo systemctl restart apache2
You can now access the daloRADIUS web-based GUI by pointing a browser to http://SERVER_IP/daloradius/login.php (where SERVER_IP is the IP address of the hosting server). At the login screen (Figure A), use the default credentials of administrator/radius.
Figure A
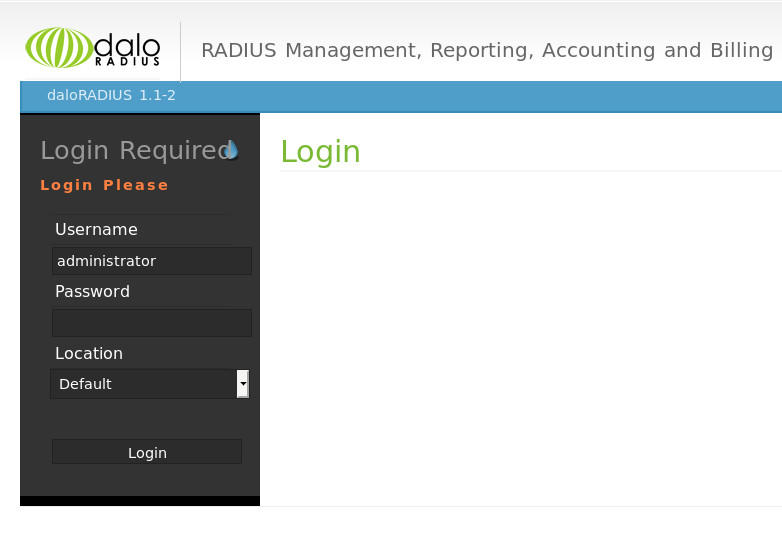
The daloRADIUS login screen.
You can now begin managing FreeRADIUS via the user-friendly daloRADIUS web-based GUI.
Open Source Weekly Newsletter
You don’t want to miss our tips, tutorials, and commentary on the Linux OS and open source applications.
Delivered Tuesdays
Sign up today
Setting Up Users In MySql
Now that you know about how freeradius does things its time to start adding users into the database, for this example i will walk you though the raw SQL commands to create and new user with a password and IP address of ‘192.168.0.100’
How you enter the sql into MySql comes down to personal taste, some will use the ‘mysql’ command in *NIX others will use a front-end like phpmyadmin — It doesn’t matter as long as the commands are entered correctly.
The first thing freeradius looks for is the user-name, then it makes sure that supplied password matches the password in MySql. We setup the sql like this
INSERT INTO radcheck ( id , UserName , Attribute , op , Value )
VALUES ( NULL , 'test-user', 'user-password', '==', 'test-pass');
NOTE: With freeradius2, user-password should be changed to Cleartext-Password.
In your case replace test-user and test-pass with your username and password. Now that freeradius will accept our user-name and user-password we should tell it some attributes to reply with, like our static IP address
INSERT INTO radreply ( id , UserName , Attribute , op , Value )
VALUES (NULL , 'test-user', 'Framed-IP-Address', '=', '192.168.0.100');
Simple as that the user is created and given a static IP address, repeat the last sql statement with as many attributes as you want
Back-end Drivers
The various different database systems are supported through the following rlm_sql «drivers»:
- rlm_sql_db2 — IBM DB2
- rlm_sql_firebird — Firebird
- rlm_sql_freetds — FreeTDS (mssql)
- rlm_sql_iodbc — iODBC
- rlm_sql_mysql — MySQL
- rlm_sql_oracle — Oracle
- rlm_sql_postgresql — PostgreSQL
- rlm_sql_sybase — Sybase (mssql)
- rlm_sql_unixodbc — unixODBC (mssql)
In order to use the database drivers, you must install the appropriate client libraries for the
desired database on the FreeRADIUS machine.
The rlm_sql_* drivers are not a complete client implementation. Instead, it is a small ‘shim’
between the FreeRADIUS rlm_sql module, and the respective client libraries.
2.1 Создание production-сертификатов
Так как большинство методов корпоративного WPA2 требуют наличия сертификата и закрытого ключа как минимум на сервере, то придется его создать. Чтобы создать самоподписанный сертификат нам нужен сертификат и закрытый ключ собственного удостоверяющего центра, которые тоже придется создать.
Инструменты для создания сертификатов нужных freeradius у Debian лежат по пути /usr/share/doc/freeradius/examples/certs. Содержимое этого каталога следует скопировать в /etc/freeradius/certs.
Необходимы файлы:
- Makefile
- ca.cnf
- server.cnf
- xpextensions,
А также можно скопировать README, в котором расписано что и зачем нужно и как этим пользоваться, поэтому дальше пойдут необходимые команды с краткими пояснениями, за более подробной инфой в README.
Для работы скриптов понадобится openssl и make.
Создаем файл с параметрами Диффи-Хеллмана, если он вдруг отсутствует в каталоге /etc/freeradius/certs:
# make dh
Результат работы: файл dh
Создаём корневой сертификат или сертификат удостоверяющего центра. Если до этого уже были какие-то сертификаты (обычно тестовые), то удаляем:
# rm -f *.pem *.der *.csr *.crt *.key *.p12 serial* index.txt*
Редактируем под себя файл
Следует обратить внимание на (лучше поставить sha1), ( возможно через год не захочется генерировать новый сертификат, тогда лучше ставить побольше), и нужно отредактировать под себя всю секцию .. Далее выполняем:
Далее выполняем:
# make ca.pem
# make ca.der
Результаты работы: , и – сертификат удостоверяющего центра, его закрытый ключ и сертификат в формате понятном для Windows соответсвенно.
Создание серверного сертификата:
Редактируем под себя файл
Следует обратить внимание на (лучше поставить sha1), ( возможно через год не захочется генерировать новый сертификат, тогда лучше ставить побольше), и нужно отредактировать под себя всю секцию
Важно чтобы значение отличалась от соответствующего сертификата удостоверяющего центра
Далее выполняем:
# make index.txt
# make serial
# make server.pem
Результат работы: помимо прочих файлы и – сертификат и закрытый ключ сервера.
В конфигурации пути к сертификатам сгенерированным в папке /etc/freeradius/certs прописаны по умолчанию.
Если был изменён пароль на закрытый ключ сервера (), то его придется указать в конфиге. А также нужно закомментировать путь к скрипту создания временных сертификатов. Это делается в файле /etc/freeradius/eap.conf в следующей секциии:
eap {
  ...
  tls {
    ...
    private_key_password=пароль
    ...
  # make_cert_command = "${certdir}/bootstrap"
    ...
  }
  ...
}
Access Point
Assuming that you have already configured access points wireless and other settings, we will need to configure security profile and RADIUS client.
Security Profile
Security profile must be configured in such way that it will use and authentication information to RADIUS server. Use the following command line interface command to create a security profile:
/interface wireless security-profiles add name=EAP_AP mode=dynamic-keys authentication-types=wpa2-eap eap-methods=passthrough
- — use any name here, you will reference security profile by it when assigning to wireless interface;
- — set to use to use encryption, otherwise use to have open access point;
- — set security protocol, most devices support which is considered more secure than ;
- — by setting to EAP authentication packets from the wireless client are forwarded to the RADIUS server. is a default value for this property.
Other settings are can be left to default values. When a security profile is created, for it to take effect it should be set to the wireless interface:
/interface wireless set wlan1 security-profile=EAP_AP
- — a name of the wireless interface you are using as a client;
- — set to the name of security profile just created for interface to use it.
Assuming that other properties of the wireless interface are already configured. Properties you might want to configure include , , , , ,, and others.
RADIUS
We must specify for the access point which RADIUS server to use for its wireless authentication. Set the following RADIUS setting:
/radius add address=192.168.88.2 secret=password1234 service=wireless
- — IP address of RADIUS server;
- — password for RADIUS client to access RADIUS services, use the same which is set on RADIUS in file;
- — set to service which to use particular RADIUS server for, the same server can be used for multiple services if needed.
Also see
- How to become a software engineer: A cheat sheet (TechRepublic)
- Choosing your Windows 7 exit strategy: Four options (TechRepublic Premium)
- How to install Jenkins on Ubuntu Server 18.04 (TechRepublic)
- How to deploy a Kubernetes cluster on Ubuntu server (TechRepublic)
- How to perform security audits on Ubuntu server with OpenSCAP (TechRepublic)
- How to install OpenShift Origin on Ubuntu 18.04 (TechRepublic)
- Kabbage acquires SMB data platform Radius Intelligence (ZDNet)
- The 10 most important iPhone apps of all time (Download.com)
- It takes work to keep your data private online. These apps can help (CNET)
- Must-read coverage: Programming languages and developer career resources (TechRepublic on Flipboard)


