Filebeat — отправка syslog сообщений на elasticsearch
Содержание:
- How can I tune Elasticsearch configuration?
- Filebeat Modules
- Установка Filebeat в Unix/Linux
- Shipping data into the Dockerized ELK Stack
- How can I tune Elasticsearch configuration?
- HTML верстка и анализ содержания сайта
- Extensibility
- Testing the Installation
- JVM tuning
- Verifying the installation
- Анализ поисковых запросов сайта
- JVM tuning
- Extensibility
- Shipping Docker Logs into ELK
- Storage
- Installing Filebeat
- Процедура 6 : удалять Filebit.pro Из редактора реестра
- What is Filebeat?
How can I tune Elasticsearch configuration?
The Elasticsearch container is using the shipped configuration and it is not exposed by default.
If you want to override the default configuration, create a file and add your configuration in it.
Then, you’ll need to map your configuration file inside the container in the . Update the elasticsearch container declaration to:
elasticsearch:
  build: elasticsearch/
  command: elasticsearch -Des.network.host=_non_loopback_
  ports:
    - "9200:9200"
  volumes:
    - ./elasticsearch/config/elasticsearch.yml:/usr/share/elasticsearch/config/elasticsearch.yml
You can also specify the options you want to override directly in the command field:
elasticsearch:
  build: elasticsearch/
  command: elasticsearch -Des.network.host=_non_loopback_ -Des.cluster.name: my-cluster
  ports:
    - "9200:9200"
Filebeat Modules
Filebeat modules are ready-made configurations for common log types, such as Apache, nginx and MySQL logs. You can use them to simplify the process of configuring Filebeat, parsing the data and analyzing it in Kibana with ready-made dashboards. They contain standard filesets, such as access logs or error logs.
A list of the different configurations per module can be found in the /etc/filebeat/module.d (on Linux or Mac) folder. You need to enable modules as they are in disabled mode by default . There are various ways of enabling modules, one way being from your Filebeat configuration file:
filebeat.modules:
- module: apache
Filebeat modules are currently a bit difficult to use since they require using Elasticsearch Ingest Node and some specific modules have additional dependencies that need installation and configuration.
There are a number of other natively supported options in Filebeat (including but not limited to haproxy, auditd, MongoDB, mySQL, rabbitMQ, and Redis).
Установка Filebeat в Unix/Linux
Прежде чем начать устанавливать файлбит, я бы рекомендовал прочитать установку ELK:
Т.к данная утилита бессмысленна без этого стека.
Установка Filebeat в CentOS/Fedora/RHEL
-===СПОСОБ 1 — использовать репозиторий ===-
Загружаем и устанавливаем публичный ключ подписи:
# rpm --import https://artifacts.elastic.co/GPG-KEY-elasticsearch
Открываем (создаем) файл:
# vim /etc/yum.repos.d/filebeat.repo
И прописываем:
name=Elastic repository for 5.x packages
baseurl=https://artifacts.elastic.co/packages/5.x/yum
gpgcheck=1
gpgkey=https://artifacts.elastic.co/GPG-KEY-elasticsearch
enabled=1
autorefresh=1
type=rpm-md
Вы можете установить его с помощью команды:
# yum install filebeat -y
-===СПОСОБ 2 — использовать RPM пакет ===-
# cd /usr/local/src && curl -L -O https://artifacts.elastic.co/downloads/beats/filebeat/filebeat-5.4.1-x86_64.rpm
# rpm -vi filebeat-5.4.1-x86_64.rpm
-===СПОСОБ 3 — использовать готовый архив ===-
Настройка и запуск утилиты будет немного ниже.
Установка Filebeat в Debian/Ubuntu
-===СПОСОБ 1 — использовать репозиторий ===-
Загружаем и устанавливаем публичный ключ подписи:
# wget -qO - https://artifacts.elastic.co/GPG-KEY-elasticsearch | apt-key add -
Возможно, вам придется установить пакет apt-transport-https на Debian перед установкой утилиты:
# apt-get install apt-transport-https -y
Добавляем репозиторий:
# echo "deb https://artifacts.elastic.co/packages/5.x/apt stable main" | tee -a /etc/apt/sources.list.d/elastic-5.x.list
Вы можете установить его с помощью команды:
# apt-get update && sudo apt-get install filebeat
-===СПОСОБ 2 — использовать DEB пакет ===-
# cd /usr/local/src && curl -L -O https://artifacts.elastic.co/downloads/beats/filebeat/filebeat-5.4.1-amd64.deb
# dpkg -i filebeat-5.4.1-amd64.deb
-===СПОСОБ 3 — использовать готовый архив ===-
Настройка и запуск утилиты будет немного ниже.
Установка Filebeat в Mac OS X
Для начала, устанавливаем HOMEBREW — Установка HOMEBREW на Mac OS X после чего, выполняем поиск пакета:
$ brew search filebeat
Для установки:
$ brew install filebeat
-=== СПОСОБ 2 — использовать готовый архив==-
# curl -L -O https://artifacts.elastic.co/downloads/beats/filebeat/filebeat-5.4.1-darwin-x86_64.tar.gz
# tar xzvf filebeat-5.4.1-darwin-x86_64.tar.gz
Настройка и запуск утилиты будет немного ниже.
Установка Filebeat на другие Unix/Linux ОС
-=== СПОСОБ 1 — использовать docker==-
Не было нужды использовать logstesh в докере. Как появиться, так сразу же обновлю данную статью.
-===СПОСОБ 2 — использовать готовый архив ===-
Shipping data into the Dockerized ELK Stack
Our next step is to forward some data into the stack. By default, the stack will be running Logstash with the default Logstash configuration file. You can configure that file to suit your purposes and ship any type of data into your Dockerized ELK and then restart the container.
Alternatively, you could install Filebeat — either on your host machine or as a container and have Filebeat forward logs into the stack. I highly recommend reading up on using Filebeat on the .
I am going to install Metricbeat and have it ship data directly to our Dockerized Elasticsearch container (the instructions below show the process for Mac).
First, I will download and install Metricbeat:
curl -L -O
https://artifacts.elastic.co/downloads/beats/metricbeat/metricbeat-6.1
.2-darwin-x86_64.tar.gz

tar xzvf metricbeat-6.1.2-darwin-x86_64.tar.gz
Next, I’m going to configure the metricbeat.yml file to collect metrics on my operating system and ship them to the Elasticsearch container:
cd metricbeat-6.1.2-darwin-x86_64
sudo vim metricbeat.yml
The configurations:
metricbeat.modules:
- module: system
  metricsets:
    - cpu
    - filesystem
    - memory
    - network
    - process
  enabled: true
  period: 10s
  processes:
  cpu_ticks: false

fields:
  env: dev

output.elasticsearch:
  # Array of hosts to connect to.
  hosts:
Last but not least, to start Metricbeat (again, on Mac only):
sudo chown root metricbeat.yml
sudo chown root modules.d/system.yml
sudo ./metricbeat -e -c metricbeat.yml -d "publish"
After a second or two, you will see a Metricbeat index created in Elasticsearch, and it’s pattern identified in Kibana.
curl -XGET 'localhost:9200/_cat/indices?v&pretty'

health status index                       uuid                   pri rep docs.count docs.deleted store.size pri.store.size
yellow open   .kibana                     XPHh2YDCSKKyz7PtmHyrMw   1   1          2            1       67kb           67kb
yellow open   metricbeat-6.1.2-2018.01.25 T_8jrMFoRYqL3IpZk1zU4Q   1   1      15865            0      3.4mb          3.4mb

Define the index pattern, and on the next step select the @timestamp field as your Time Filter.

Creating the index pattern, you will now be able to analyze your data on the Kibana Discover page.

How can I tune Elasticsearch configuration?
The Elasticsearch container is using the shipped configuration and it is not exposed by default.
If you want to override the default configuration, create a file and add your configuration in it.
Then, you’ll need to map your configuration file inside the container in the . Update the elasticsearch container declaration to:
elasticsearch:
  build: elasticsearch/
  command: elasticsearch -Des.network.host=_non_loopback_
  ports:
    - "9200:9200"
  volumes:
    - ./elasticsearch/config/elasticsearch.yml:/usr/share/elasticsearch/config/elasticsearch.yml
You can also specify the options you want to override directly in the command field:
elasticsearch:
  build: elasticsearch/
  command: elasticsearch -Des.network.host=_non_loopback_ -Des.cluster.name: my-cluster
  ports:
    - "9200:9200"
HTML верстка и анализ содержания сайта
Размещённая в данном блоке информация используется оптимизаторами для контроля наполнения контентом главной страницы сайта, количества ссылок, фреймов, графических элементов, объёма теста, определения «тошноты» страницы.
Отчёт содержит анализ использования Flash-элементов, позволяет контролировать использование на сайте разметки (микроформатов и Doctype).
IFrame – это плавающие фреймы, которые находится внутри обычного документа, они позволяет загружать в область заданных размеров любые другие независимые документы.
Flash — это мультимедийная платформа компании для создания веб-приложений или мультимедийных презентаций. Широко используется для создания рекламных баннеров, анимации, игр, а также воспроизведения на веб-страницах видео- и аудиозаписей.
Микроформат — это способ семантической разметки сведений о разнообразных сущностях (событиях, организациях, людях, товарах и так далее) на веб-страницах с использованием стандартных элементов языка HTML (или XHTML).
Extensibility
How can I add plugins?
To add plugins to any ELK component you have to:
- Add a statement to the corresponding (eg. )
- Add the associated plugin code configuration to the service configuration (eg. Logstash input/output)
- Rebuild the images using the command
How can I enable the provided extensions?
A few extensions are available inside the directory. These extensions provide features which
are not part of the standard Elastic stack, but can be used to enrich it with extra integrations.
The documentation for these extensions is provided inside each individual subdirectory, on a per-extension basis. Some
of them require manual changes to the default ELK configuration.
Testing the Installation
To make sure all is working as expected, perform the following actions.
First, curl Elasticsearch with:
curl localhost:9200
You should see the following output:
{
 "name" : "W3NuLnv",
 "cluster_name" : "docker-cluster",
 "cluster_uuid" : "fauVIbHoSE2SlN_nDzxxdA",
 "version" : {
   "number" : "5.2.1",
   "build_hash" : "db0d481",
   "build_date" : "2017-02-09T22:05:32.386Z",
   "build_snapshot" : false,
   "lucene_version" : "6.4.1"
 },
 "tagline" : "You Know, for Search"
}
Open Kibana at HTTP://:5601:

As you will notice, you are now required to enter an index pattern, which is only possible once you have indexed some logs. We will get to this later.
JVM tuning
How can I specify the amount of memory used by a service?
The startup scripts for Elasticsearch and Logstash can append extra JVM options from the value of an environment
variable, allowing the user to adjust the amount of memory that can be used by each component:
| Service | Environment variable |
|---|---|
| Elasticsearch | ES_JAVA_OPTS |
| Logstash | LS_JAVA_OPTS |
To accomodate environments where memory is scarce (Docker for Mac has only 2 GB available by default), the Heap Size
allocation is capped by default to 256MB per service in the file. If you want to override the
default JVM configuration, edit the matching environment variable(s) in the file.
For example, to increase the maximum JVM Heap Size for Logstash:
logstash:

  environment:
    LS_JAVA_OPTS: "-Xmx1g -Xms1g"
How can I enable a remote JMX connection to a service?
As for the Java Heap memory (see above), you can specify JVM options to enable JMX and map the JMX port on the docker
host.
Update the environment variable with the following content (I’ve mapped the JMX service on the port
18080, you can change that). Do not forget to update the option with the IP address of your
Docker host (replace DOCKER_HOST_IP):
logstash:

  environment:
    LS_JAVA_OPTS: "-Dcom.sun.management.jmxremote -Dcom.sun.management.jmxremote.ssl=false -Dcom.sun.management.jmxremote.authenticate=false -Dcom.sun.management.jmxremote.port=18080 -Dcom.sun.management.jmxremote.rmi.port=18080 -Djava.rmi.server.hostname=DOCKER_HOST_IP -Dcom.sun.management.jmxremote.local.only=false"
Verifying the installation
It might take a while before the entire stack is pulled, built and initialized. After a few minutes, you can begin to verify that everything is running as expected.
Start with listing your containers:
docker ps

CONTAINER ID        IMAGE                             COMMAND                  CREATED             STATUS              PORTS                                            NAMES
a1a00714081a        dockerelk_kibana                  "/bin/bash /usr/loca…"   54 seconds ago      Up 53 seconds       0.0.0.0:5601->5601/tcp                           dockerelk_kibana_1
91ca160f606f        dockerelk_logstash                "/usr/local/bin/dock…"   54 seconds ago      Up 53 seconds       5044/tcp, 0.0.0.0:5000->5000/tcp, 9600/tcp       dockerelk_logstash_1
de7e3368aa0c        dockerelk_elasticsearch           "/usr/local/bin/dock…"   55 seconds ago      Up 54 seconds       0.0.0.0:9200->9200/tcp, 0.0.0.0:9300->9300/tcp   dockerelk_elasticsearch_1
You’ll notice that ports on my localhost have been mapped to the default ports used by Elasticsearch (9200/9300), Kibana (5601) and Logstash (5000/5044).
Everything is already pre-configured with a privileged username and password:
- user: elastic
- password: changeme
You can now query Elasticsearch using:
curl http://localhost:9200/_security/_authenticate
{
  "name" : "VO32TCU",
  "cluster_name" : "docker-cluster",
  "cluster_uuid" : "pFgIXMErShCm1R1cd3JgTg",
  "version" : {
    "number" : "6.1.0",
    "build_hash" : "c0c1ba0",
    "build_date" : "2017-12-12T12:32:54.550Z",
    "build_snapshot" : false,
    "lucene_version" : "7.1.0",
    "minimum_wire_compatibility_version" : "5.6.0",
    "minimum_index_compatibility_version" : "5.0.0"
  },
  "tagline" : "You Know, for Search"
}
And finally, access Kibana by entering: http://localhost:5601 in your browser.

Анализ поисковых запросов сайта
Приведённый выше отчёт по частотности использования поисковых запросов, может быть использован оптимизаторами сайта при составлении его семантического ядра и подготовке контента т.н. «посадочных страниц». Статистика поисковых запросов — обобщённая сгруппированная информация по «обращениям» пользователей к поисковой системе по ключевым запросам (фразам).
В большинстве случаев, наш сервис показывает уже сгруппированную информацию, содержащую не только подборку самых популярных слов (фраз), но и словосочетания + синонимы. Собранная в данном разделе статистика показывает по каким «ключевым словам» (поисковым запросам) пользователи переходят на сайт filebit.pl.
Поисковый запрос – это слово или словосочетание, которое пользователь вводит в форму поиска на сайте поисковой системы, с учётом автоподбора и автоматического исправления в поиске ошибочного набора.
JVM tuning
How can I specify the amount of memory used by a service?
The startup scripts for Elasticsearch and Logstash can append extra JVM options from the value of an environment
variable, allowing the user to adjust the amount of memory that can be used by each component:
| Service | Environment variable |
|---|---|
| Elasticsearch | ES_JAVA_OPTS |
| Logstash | LS_JAVA_OPTS |
To accomodate environments where memory is scarce (Docker for Mac has only 2 GB available by default), the Heap Size
allocation is capped by default to 256MB per service in the file. If you want to override the
default JVM configuration, edit the matching environment variable(s) in the file.
For example, to increase the maximum JVM Heap Size for Logstash:
logstash:

  environment:
    LS_JAVA_OPTS: "-Xmx1g -Xms1g"
How can I enable a remote JMX connection to a service?
As for the Java Heap memory (see above), you can specify JVM options to enable JMX and map the JMX port on the Docker
host.
Update the environment variable with the following content (I’ve mapped the JMX service on the port
18080, you can change that). Do not forget to update the option with the IP address of your
Docker host (replace DOCKER_HOST_IP):
logstash:

  environment:
    LS_JAVA_OPTS: "-Dcom.sun.management.jmxremote -Dcom.sun.management.jmxremote.ssl=false -Dcom.sun.management.jmxremote.authenticate=false -Dcom.sun.management.jmxremote.port=18080 -Dcom.sun.management.jmxremote.rmi.port=18080 -Djava.rmi.server.hostname=DOCKER_HOST_IP -Dcom.sun.management.jmxremote.local.only=false"
Extensibility
How can I add plugins?
To add plugins to any ELK component you have to:
- Add a statement to the corresponding (eg. )
- Add the associated plugin code configuration to the service configuration (eg. Logstash input/output)
- Rebuild the images using the command
How can I enable the provided extensions?
A few extensions are available inside the directory. These extensions provide features which
are not part of the standard Elastic stack, but can be used to enrich it with extra integrations.
The documentation for these extensions is provided inside each individual subdirectory, on a per-extension basis. Some
of them require manual changes to the default ELK configuration.
Shipping Docker Logs into ELK
Installing the stack is the easy part. To ship your Docker logs into ELK is a bit more complicated, and the method you use greatly depends on how you are outputting your logs.
If not specified otherwise, the stdout and stderr outputs for a specific container, otherwise called “docker logs,” are outputted to a JSON file. So, if you have a smallish Docker environment set up, using Filebeat to collect the logs is the way to go. If you are using a different logging driver, however, you may want to consider a different method.
Below are three different methods to get your logs into ELK, but keep in mind that this list is by no means comprehensive. In fact, if you’re using a different method, feel free to share in the comments below.
Using Filebeat
Filebeat belongs to the Beats family of log shippers by Elastic. Written in Go, Filebeat is a lightweight shipper that traces specific files, supports encryption, and can be configured to export to either your Logstash container or directly to Elasticsearch.
As mentioned above, if you’re using the default JSON-file logging driver, Filebeat is a relatively easy way to ship into ELK. Filebeat can be deployed either on your host, or you can, of course, run it as a container alongside your ELK containers (in which case you will need to add linkage to the ELK containers). There are also various Filebeat Docker images available, and some include configurations for running Filebeat and connecting it to Logstash.
At the very least, your Filebeat configuration will need to specify the path to the JSON log file (located in: /var/lib/docker/containers/…) and the details of the destination (usually the Logstash container).
An example configuration:
prospectors:
 - paths:
   - /var/lib/docker/containers/*/*.log
   document_type: syslog
output:
 logstash:
  enabled: true
  hosts:
      - elk:5044
Using a Logging Driver
were introduced by Docker in version 1.12 and allow you to run a container while specifying a third-party logging layer to which to route the Docker logs. You can forward logs to AWS CloudWatch, Fluentd, GELF, or a NAT server.
Using logging drivers relatively simple. But remember: They need to be specified per container, and they will require additional configuration on the receiving ends of the logs.
In the context of shipping logs into ELK, using the syslog logging driver is probably the easiest way to go.
Example:
docker run \
 --log-driver=syslog \
 --log-opt syslog-address=tcp://:5000
 \ --log-opt syslog-facility=daemon
 \ alpine ash
You will need to run this per container, and the result is a pipeline of Docker container logs being outputted into your syslog instance. These, in turn, will be forwarded to the Logstash container for parsing and data enhancement, and from there into Elasticsearch.
Using Logspout
Logspout is a popular and lightweight (15.2MB) log router for Docker that will attach itself to all the containers within a host and output the streams of Docker logs to a syslog server (unless you define a different output destination).
sudo docker run -d --name="logspout" --volume=/var/run/docker.sock:/var/run/docker.sock gliderlabs/logspout syslog+tls://:5000
You can use a Logstash module to route directly to your Logstash container, but this requires additional configurations and compilation work on your part.
The Logz.io Logging Collector
In this blog post, I described the log collector developed by Logz.io. Like Logspout, it attaches itself to all containers in a Docker host but its uniqueness lies in the fact that it ships not only Docker logs but also Docker stats and Docker daemon events.
docker run -d --restart=always -v /var/run/docker.sock:/var/run/docker.sock logzio/logzio-docker -t
It is currently designed for users of the Logz.io ELK Stack, but we are working to open source the project. Feel free to give it a try yourself and hack it to ship to your Logstash instance. Also check out this tutorial for shipping Docker metrics to Logz.io.
Storage
How can I persist Elasticsearch data?
The data stored in Elasticsearch will be persisted after container reboot but not after container removal.
In order to persist Elasticsearch data even after removing the Elasticsearch container, you’ll have to mount a volume on
your Docker host. Update the service declaration to:
elasticsearch:

  volumes:
    - /path/to/storage:/usr/share/elasticsearch/data
This will store Elasticsearch data inside .
NOTE: beware of these OS-specific considerations:
-
Linux: the is used within the Elasticsearch image, therefore the
mounted data directory must be owned by the uid .
Installing Filebeat
You can download and install Filebeat using various methods and on a variety of platforms. It only requires that you have a running ELK Stack to be able to ship the data that Filebeat collects. I will outline two methods, using Apt and Docker, but you can refer to the official docs for more options.
Install Filebeat using Apt
For an easier way of updating to a newer version, and depending on your Linux distro, you can use Apt or Yum to install Filebeat from Elastic’s repositories:
First, you need to add Elastic’s signing key so that the downloaded package can be verified (skip this step if you’ve already installed packages from Elastic):
wget -qO - https://artifacts.elastic.co/GPG-KEY-elasticsearch | sudo apt-key add -
The next step is to add the repository definition to your system:
echo "deb https://artifacts.elastic.co/packages/7.x/apt stable main" | sudo
tee -a /etc/apt/sources.list.d/elastic-7.x.list
All that’s left to do is to update your repositories and install Filebeat:
sudo apt-get update && sudo apt-get install filebeat
Install Filebeat on Docker
If you’re running Docker, you can install Filebeat as a container on your host and configure it to collect container logs or log files from your host.
Pull Elastic’s Filebeat image with:
docker pull docker.elastic.co/beats/filebeat7.4.2
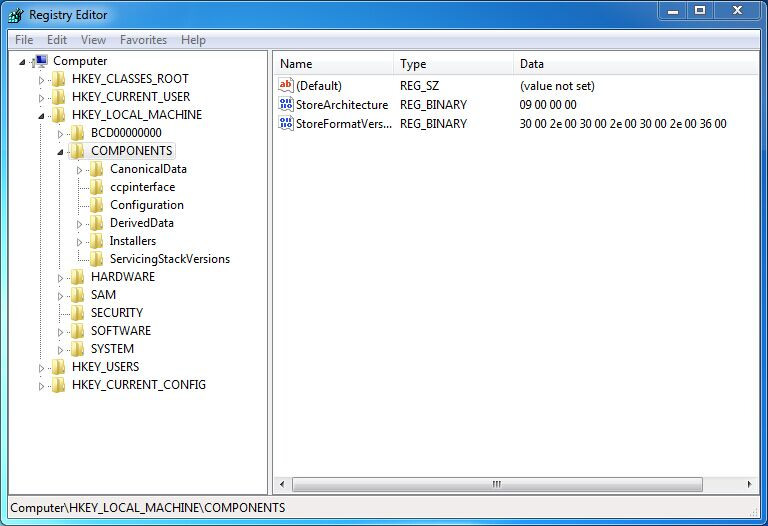
Процедура 6 : удалять Filebit.pro Из редактора реестра

Найти записи реестра, связанные с Filebit.pro а также удалять их вручную.
HKEY_CURRENT_USER\Software\Microsoft\Windows\CurrentVersion\Run “random.exe”
HKEY_CLASSES_ROOT\CLSID\ Filebit.pro
HKEY_CURRENT_USER\Software\AppDataLow\Software\ Filebit.pro
HKEY_CURRENT_USER\Software\ Filebit.pro character
HKEY_LOCAL_MACHINE\SOFTWARE\Microsoft\Windows\CurrentVersion\Uninstall\ Filebit.pro
HKEY_LOCAL_MACHINE\SOFTWARE\Microsoft\Windows\CurrentVersion\Explorer\BrowserHelperObjects\random numbers

VN:F
please wait…
Rating: 0.0/10 (0 votes cast)
VN:F
Rating: (from 0 votes)
What is Filebeat?
Filebeat is a log shipper belonging to the Beats family — a group of lightweight shippers installed on hosts for shipping different kinds of data into the ELK Stack for analysis. Each beat is dedicated to shipping different types of information — Winlogbeat, for example, ships Windows event logs, Metricbeat ships host metrics, and so forth. Filebeat, as the name implies, ships log files.
In an ELK-based logging pipeline, Filebeat plays the role of the logging agent—installed on the machine generating the log files, tailing them, and forwarding the data to either Logstash for more advanced processing or directly into Elasticsearch for indexing. Filebeat is, therefore, not a replacement for Logstash, but can and should in most cases, be used in tandem. You can read more about the story behind the development of Beats and Filebeat in this article.
Written in Go and based on the Lumberjack protocol, Filebeat was designed to have a low memory footprint, handle large bulks of data, support encryption, and deal efficiently with back pressure. For example, Filebeat records the last successful line indexed in the registry, so in case of network issues or interruptions in transmissions, Filebeat will remember where it left off when re-establishing a connection. If there is an ingestion issue with the output, Logstash or Elasticsearch, Filebeat will slow down the reading of files.


