Deluge
Содержание:
- Headless setup
- Script Examples
- Логи
- Enable HTTPS
- Create SSH Tunnel
- Daemon
- Возможности программы для Windows
- Шаг 3: Создайте сценарий инициализации для Deluge
- POST /streaming/stream
- Set Up Nginx Reverse Proxy for Deluge WebUI
- Настройка iptables
- Client Setup
- The Pros and the Cons.
- Install Deluge BitTorrent on Ubuntu 18.04 Server
- Configure Deluge Daemon for ThinClient use
- Accessing Deluge WebUI
- Daemon
Headless setup
Deluge is quite useful on a headless system, often referred to as a seed box, because of its client/server model. To set up deluge on a headless system, set up the daemon as shown above.
Create a user
To allow interaction with the server remotely, create a user in . For example:
$ echo "delugeuser:p422WoRd:10" >> $HOME/.config/deluge/auth
Note:
- The user/password created does not have to match any system users, and to maintain good security practices it should not!
- The user/password in this file are not hashed or salted like in the web client config.
- The user/password must match the user/password found in /srv/deluge/.config/deluge/auth otherwise the authentication fails.
The number 10 corresponds to a level of Admin. Refer to the following table for additional values:
| Level Name | Level Value |
|---|---|
| None | |
| Read Only | 1 |
| Normal | 5 |
| Admin | 10 |
Note: In Deluge 1.35, these values have no effect, but multiuser options are under development.
Allow remote
The default settings disallow remote connections. Change the «allow_remote» setting in :
"allow_remote": true
Note:
1. is automatically created at the first configuration change, if it does not exist, set the value via :
config --set allow_remote true
2. Changes made while the service is running won’t be read into the daemon, therefore, stop the service before making changes to this file.
Firewall
Open the port for remote access. The following example uses the default daemon port (58846):
# iptables -A INPUT -p tcp --dport 58846 -j ACCEPT
See iptables for more information on firewall rules.
Users behind a NAT router/firewall must forward the port to access the daemon from outside the network if this behavior is desired.
Connect
In the console client:
connect <host> <user> <password>
In the GTK client, Edit > Connection Manager > Add.
In the Web client, Connection Manager > Add.
SSH Tunnel
An SSH tunnel can be created to use an encrypted connection on any client. This requires an extra loopback address to be added, but this can be automated at boot. Without this step, the connection would be considered local. The actual command to establish an SSH tunnel cannot be automated as it requires user input. There are a few possible ways to go about doing that.
/etc/systemd/system/extra_lo_addr.service
Description=extra loopback address
Wants=network.target


Type=oneshot
RemainAfterExit=yes
ExecStart=/sbin/ip addr add 127.0.0.2/8 dev lo
ExecStop=/sbin/ip addr del 127.0.0.2/8 dev lo


WantedBy=multi-user.target
$ ssh -fNL 127.0.0.2:58846:localhost:58846 <ssh host>
The port 58846 should be replaced with the port the deluge server is running on and <ssh host> should be replaced with the server hosting both deluge and the SSH server.
Script Examples
The following scripts can be used for testing purposes.
Bash
#!/bin/bash
torrentid=$1
torrentname=$2
torrentpath=$3
echo "Torrent Details: " "$torrentname" "$torrentpath" "$torrentid"  >> /tmp/execute_script.log
The variables will show up in the log file: /tmp/execute_script.log
Windows Batch
Save this with .bat extension such as execute_example.bat:
@echo off
set torrentid=%1
set torrentname=%2
set torrentpath=%3
@echo Torrent Details:  %torrentname% %torrentpath% %torrentid%  >> "%userprofile%\Desktop\execute_script.log"
The variables will show up in the log file on the user Desktop.
Perl
#!/usr/bin/perl
$torrentid = $ARGV];
$torrentname = $ARGV1];
$torrentpath = $ARGV2];
open(my $fh, '>>', '/tmp/execute_perl.log');
print $fh "Torrent Details: $torrentname $torrentpath $torrentid\n"
The variables will show up in the log file: /tmp/execute_perl.log
Python
#!/usr/bin/env python
from sys import argv
from syslog import syslog
syslog('deluge test: the script started running')
for arg in argv1:]:
    syslog(arg)
The variables should show up in your syslog.
tail /var/log/syslog
Sendemail script
sudo apt-get install sendemail
sendemail -s smtp.myisp.com -t myemail@domain.com -f fromemail@domain.com -u "subject" -m "message"
The script should be named torrent_added and contain the following:
#!/bin/bash
torrentid=$1
torrentname=$2
torrentpath=$3

subject="Started download new torrent!"
message="$torrentname to $torrentpath"

echo -e `date`"::Started download torrent:$2 in: $3" with id:$torrentid >> ~/scripts.log
echo -e `sendemail -s smtp.myisp.com -t myemail@domain.com -f fromemail@domain.com -u "Started downloading $torrentname!" -m "Downloading $torrentname to: $torrentpath"` >> ~/scripts.log
You can also achieve the same outcome with a python script:
#!/usr/bin/env python
import sys
import smtplib

torrent_id = sys.argv1
torrent_name = sys.argv2
save_path = sys.argv3

#You can change these
from_addr = "fromemail@domain.com"
to_addr = "myemail@domain.com"
smtp_srv = "smtp.myisp.com"

subject = "Some subject"
message = """Put your message here

It can span multiple lines and can also contain information by specifying
%(torrent_id)s or %(torrent_name)s""" % {
    'torrent_id' torrent_id,
    'torrent_name' torrent_name,
    'save_path' save_path
}

msg = "To:%s\nFrom:%s\nSubject: %s\n\n%s" % (to_addr, from_addr, subject, message)

smtp = smtplib.SMTP(smtp_srv)
smtp.sendmail(from_addr, to_addr, msg)
smtp.quit()
Extract archives script
This script will search for archives in downloaded content and extract them. Actions are logged as entries in syslog.
It can be easily extended to support more compression and archive formats.
#!/bin/bash
formats=(zip rar)
commands=(="unzip -u" rar]="unrar -o- e")
extraction_subdir='extracted'

torrentid=$1
torrentname=$2
torrentpath=$3

log()
{
    logger -t deluge-extractarchives "$@"
}

log "Torrent complete: $@"
cd "${torrentpath}"
for format in "${formats}"; do
    while read file; do
        log "Extracting \"$file\""
        cd "$(dirname "$file")"
        file=$(basename "$file")
        # if extraction_subdir is not empty, extract to subdirectory
        if ] ; then
            mkdir "$extraction_subdir"
            cd "$extraction_subdir"
            file="../$file"
        fi
        ${commands$format} "$file"
    done < <(find "$torrentpath/$torrentname" -iname "*.${format}" )
done
Логи
Сразу после установки демон готов к запуску. Но та конфигурация, которую предлагают поставщики дистрибутива — она не совсем удачна. В ней отсутсвует логирование происходящего.
Для этого нам надо поставить logrotate.
$ sudo dnf install logrotate
Сконфигурировать его для поддержки новых правил ротации. Для этого создадим файл /etc/logrotate.d/delugeпримерно следующего содержания
/var/log/deluge/*.log {
        rotate 4
        weekly
        missingok
        notifempty
        compress
        delaycompress
        sharedscripts
        postrotate
                initctl restart deluged >/dev/null 2>&1 || true
                initctl restart deluge-web >/dev/null 2>&1 || true
        endscript
}
А так же папку для хранения логов. И дадим ей нужные права.
$ sudo mkdir /var/log/deluge/
$ sudo chown deluge:deluge /var/log/deluge
Теперь осталось включить поддержку логов для демона.
Создаем новое описание демона для systemd в /etc/systemd/system/deluged.service
Description=Deluge Bittorrent Client Daemon
After=network.target


Type=simple
User=deluge
Group=deluge
UMask=007

ExecStart=/usr/bin/deluged -d -l /var/log/deluge/daemon.log -L warning

Restart=always
TimeoutStopSec=300


WantedBy=multi-user.target
Отлично. Осталось настроить iptables и сам deluge.
Enable HTTPS
To secure the Web UI, you can install a free Let’s Encrypt certificate. First you need to install the Let’s Encrypt client (certbot) on Ubuntu 18.04 server.
Python3-certbot-nginx is the Certbot Nginx plugin. After they are installed, run the following command to automatically obtain and install Let’s Encrypt certificate.
Once that’s done, refresh deluge Web UI. It will be automatically redirected to HTTPS connection.
I hope this tutorial helped you install Deluge on Ubuntu 18.04 desktop or server. As always, if you found this post useful, then subscribe to our free newsletter to get more tips and tricks. Take care.
Create SSH Tunnel
From Deluge 1.2 onward, all communication between the GTK UI and daemon is encrypted using a automatically generated self-signed certificate so SSH tunneling is not a requirement if you are on a trusted local network. If you access the daemon over the internet, you should still use a SSH tunnel.
In a Terminal, enter the following, replacing <server> with the public IP of your server.
ssh -fNL 127.0.0.2:58846:localhost:58846 <server>
Note: We use 127.0.0.2 instead of localhost so that Deluge client knows that we are connecting to a remote daemon. Otherwise you will encounter problems with file browsing as it will assume to be on local client machine rather than remote server.
If you get the error ‘bind: Can't assign requested address‘, you need to add 127.0.0.2 as an alias for the loopback device:
sudo ifconfig lo0 add 127.0.0.2
Daemon
deluged
pkill deluged
Note: Deluge accepts the SIGTERM signal and cleanly shuts down.
See:
Using the --do-not-daemonize (-d) option you can also log to console:
deluged -d
I can’t connect to the daemon from another machine
See ThinClient for more information but the summary steps are:
- Configure the daemon to allow remote connections
- Configure Authentication
- Restart the daemon.
How do I make Deluge connect to a different daemon?
By default, Deluge (GTK UI) is in classic mode, the daemon and GTK UI are linked together.
To disable classic mode:
- Preferences -> Interface
- Disable (untick) Classic Mode
- Restart Deluge and it will now start in thin-client mode
- Use the Connection Manager to enter the other daemon details
See ThinClient for more information on remote GTK UI
See above.
Возможности программы для Windows
Изначальный функционал торрент-клиента предельно прост и позволяет лишь:
- скачать понравившийся файл из интернета;
- раздавать хранящиеся на компьютере файлы другим людям;
- регулировать скорость загрузки.
Чтобы получить доступ к другим функциям, нужно установить дополнительные официальные плагины, которые подготовили разработчики сервиса. Они способны заметно расширить возможности софта и добавить программе новые функции.
Для Ubuntu (Debian/Linux)
Версия торрент-клиента Deluge для Линукс не отличается от того, что предлагается пользователям Windows. Здесь также изначально установлен минимальный функционал и используется предельно лаконичный интерфейс. При этом каждый желающий способен добавить в программу нужный плагин, открыв соответствующий список и выбрав из него подходящие дополнения. То есть, разработчики предлагают людям, которые скачают их софт, самостоятельно выбрать настройки сервиса.
Шаг 3: Создайте сценарий инициализации для Deluge
Создайте файл (сценарий инициализации для Deluge) и введите в него следующее содержимое:
Замените на имя пользователя, которого вы хотите запустить Deluge, как и на группу пользователя. Мне нравится запускать Deluge под своим именем пользователя и группой, так что у меня есть полный доступ к файлам, загруженным через Deluge, а также к файлам журналов. Если вы не знаете свою группу, обратитесь к этому сообщению в разделе «Запись текущего состояния». Или вы можете просто создать временный файл с помощью команды «touch temp», а затем проверить имя пользователя и группу, связанную с файлом «temp», с помощью команды . Ниже приведено объяснение того, как вы можете управлять доступом и разрешением файлов, загружаемых через Deluge (параметр umask):
- 007 предоставляет полный доступ пользователю и членам группы Deluge работает как (в данном случае Deluge) и запрещает доступ со всех других учетных записей.
- 022 предоставляет полный доступ пользователю Deluge работает как и только для чтения доступ к другим учетным записям.
- 000 предоставляет полный доступ ко всем аккаунтам.
POST /streaming/stream
POST body must be the raw torrent you want to stream. No form formatting or anything can be used.
List of URL GET Arguments
- path: Path inside the torrent file to either a folder or a file you want to stream. The plugin will try to guess the best one. Optional. Default: » (i.e. find the best file in the whole torrent)
- infohash: Infohash of the torrent you want to stream, can make it a bit faster as it can avoid reading POST body. Optional.
- label: If label plugin is enabled and the torrent is actually added then give the torrent this label. Optional. Default: »
- wait_for_end_pieces: Wait for the first and last piece in the streamed file to be fully downloaded. Can be necessary for some video players. It also enforces that the torrent can be actually downloaded. If the key exist with any (even empty) value, the feature is enabled. Optional. Default: false
Set Up Nginx Reverse Proxy for Deluge WebUI
A reverse proxy is a proxy for another server, in this case the Deluge WebUI. First install Nginx on Ubuntu 18.04.
Then create a Nginx server block file for Deluge WebUI.
Copy and paste the following texts into the file. Replace the red-colored text with your own domain name. You should also set the A record for your domain name.
Save and close the file. Then test Nginx configuration.
If the test is successful, reload Nginx
Now you can access Deluge WebUI via your domain name ( torrent.yourdomain.com ). Now you may want the deluge-web process to listen only on localhost (127.0.0.1) , so that it’s not exposed to the Internet. To achieve that, we need to edit the systemd service file.
Save and close the file. Then reload systemd daemon.
And restart deluge-web service.
You can check the listening status with:
Настройка iptables
В ряде случаем достаточно просто открыть нужные порты
$ sudo iptables -A INPUT -p tcp --dport 56881:56889 -j ACCEPT
$ sudo iptables -A INPUT -p udp --dport 56881:56889 -j ACCEPT
Но в некоторых конфигурациях могут наблюдаться проблемы с механизмом conntrack, который помечает ряд пакетов как invalid (особенно это касается dht трафика).
Поэтому стоит отключить conntrack для всех соединения deluge.
$ sudo iptables -t raw -I PREROUTING -p udp --dport 56881:57200 -j NOTRACK
$ sudo iptables -t raw -I OUTPUT -p udp --sport 56881:57200 -j NOTRACK
$ sudo iptables -t raw -I PREROUTING -p tcp --dport 56881:57200 -j NOTRACK
$ sudo iptables -t raw -I OUTPUT -p tcp --sport 56881:57200 -j NOTRACK
$ sudo iptables -I INPUT -p icmp --icmp-type 3 -j ACCEPT
$ sudo iptables -I INPUT -p icmp --icmp-type 4 -j ACCEPT
$ sudo iptables -I INPUT -p icmp --icmp-type 11 -j ACCEPT
$ sudo iptables -I INPUT -p icmp --icmp-type 12 -j ACCEPT
В любом случае тепень надо сохранить конфигарцию iptables.
$ sudo /usr/libexec/iptables/iptables.init save
Client Setup
Accessing deluged service with local UI Client
When attempting to access a daemon deluged on the same machine but running as a different user e.g. your login user is user and deluged is running as deluge, you may be unable access to deluged. This is due to the client automatically authorising using the localhost line in the auth file, which is assumed to be at the same config location as deluged.
The workaround is to replace the localclient line in your user config auth file (~/.config/deluge/auth) with the localclient line from the deluged config auth file e.g. /var/lib/deluge/auth.
GTK UI
The Deluge GTK UI setup require switching the GTK UI from Classic mode to Thin-client mode, then adding and connecting to the remote daemon on the server.
- In Preferences -> Interface and disable (untick) Classic Mode
- Restart deluge and you should see the Connection Manager.
- If it is not needed you can remove the localhost daemon.
- If SSH Tunnelling, before continuing , and for Hostname, below, 127.0.0.2 must be used.
- Create a new entry with Add button:
- Hostname is your server’s IP.
- Port should be default 58846.
- Username and Password are those added to the deluged config auth file.
If this was successful a green tick should now appear as the status for the daemon you just added.
Click on Connect and the Connection Manager should disappear.
Optional step: Expand Options and select ‘Automatically connect to selected host on startup‘ and ‘Do not show this dialog on start-up‘.
Congratulations! You can now access the Deluge daemon, deluged, on the server via the GTK UI.
Console
If accessing a local deluged daemon run the following and it will connect automatically:
deluge-console
To connect to a remote daemon use the connect command in deluge-console:
connect <host> <user> <password>
or from the terminal:
deluge-console "connect <host> <user> <password>"
For adding torrents directly to the daemon through automatic methods such as with autodl-irssi:
deluge-console "connect <host> <user> <password> ; add $(TorrentPathName) ; exit"
Web UI
The Web UI is slightly different as the client is a web server daemon deluge-web that connects to a running deluged.
-
Install deluge-web and run it:
deluge-web
Note: To run it in the background as a daemon, use --fork option. You may also want to set it up as a service.
In your web browser, enter the url below where <server> is the IP address of the server:
http://<server>:8112
Default password is: deluge
Congratulations! You can now access deluge on the server via the Web UI.
The Pros and the Cons.
Still trying to make up your mind?
Most of the basic characteristics that define a real torrent client are not considered an advantage, but a necessity. Deluge is one of those real torrent clients with all basic features.
The PROs;
- It does not come with embedded advertisements.
- Its functionality can be improved with the help of plugins.
- Deluge is open source and free.
- It is super light (always under 15MB).
- It can encrypt BitTorrent traffic through the use of MSE/PE or Message Stream. Encryption/Protocol Encryption.
- It is highly portable. It can be installed on a USB and ran directly from it.
- Deluge comes with all the torrent basic features, such as DHT, PEX, prioritization, Magnet Links, etc.
- It has a graphical web and command line interface (with daemon).
- It allows automatic port mapping with UPnP, NAT-PMP, NAT for automatic router configuration.
The CONs;
Deluge is almost perfect, but serious torrent users have been able to find a couple of disadvantages that make the program not so perfect…
- Not able to override queuing settings or “Force start” downloads.
- There is no built-in search engine.
- It is unable, by default, to stream media files while a download is in progress. But there is a workaround that will enable you to stream videos, the plugin is called Deluge Streaming.
- Limited magnet URI functionality. There is no way to get information about torrent content in a magnet link until the download has started.
- No super-seeding setting enabled by default. But you can apply this plug-in to get around this issue.
- It does not allow tracker exchange functionality.
- Lack of web seeding support
- Not able to share files with an embedded tracker.
- The demon consumes large CPU resources as compared with other clients.
Install Deluge BitTorrent on Ubuntu 18.04 Server
You can install Deluge BitTorrent daemon on a server and manage the program via the Deluge web interface (You control it in a web browser). Use the following command to install Deluge daemon and Deluge Web interface on Ubuntu 18.04 server.
Then create the deluge user and group so that deluge can run as an unprivileged user, which will increase your server’s security.
The —system flag means we are creating a system user instead of normal user. A system user doesn’t have password and can’t login, which is what you would want for Deluge. A home directory /home/deluge/ will be created for this user. You may want to add your user account to the deluge group with the following command so that the user account has access to the files downloaded by Deluge BitTorrent. Files are downloaded to /home/deluge/Downloads by default. Note that you need to re-login for the groups change to take effect.
Once that’s done, create a systemd service file for deluge with your favourite text editor such as nano.
Copy and paste the following lines into the file.
To save a file in Nano text editor, press Ctrl+O , then press Enter to confirm. Now start deluge deamon with the following command. Since we want Deluge to run as the deluge user, there’s no need to add sudo to the command, but you will be asked to enter your password.

You may also want to enable auto start when Ubuntu 18.04 is booting up.
You can see that deluged is running and autostart is enabled. If it’s exited or isn’t running, you may need to restart it with systemctl restart deluged .

Configure Deluge Daemon for ThinClient use
Install Deluge daemon following our guide Install Deluge on Ubuntu Server 14.04 LTS or Install and Configure Deluge VPN Split Tunneling Ubuntu 14.x. Once you have a working Deluge daemon that you can access over Deluge Web UI you can proceed with the ThinClient setup. First we need to create a username and password for the client that will access the daemon. We need to edit the authentication file of the daemon.
If you are using an Ubuntu Server version up to 14.04 LTS (that use upstart script), then stop Deluge with
If you are running a version of Ubuntu Server equal or higher then 15.04 (that use systemd), then stop Deluge with
The auth file consists of a line with a username, a password, and the authentication level associated with the client. The authentication level is a work in progress feature in Deluge 1.3.3 and it doesn’t do anything yet, but it will be activated in an upcoming version. We will set it to level 10, admin, which will give the client user full control over Deluge daemon.
- If you installed Deluge Daemon as deluge user, then proceed to Option 1.
- If you have installed Deluge Daemon with VPN Split Tunneling, then proceed to Option 2.
Option 1. Deluge Daemon Installed as deluge User
If you installed Deluge following our guide then you are running Deluge with user deluge.
Choose a and you will use to access Deluge daemon from the client, replace accordingly
Next step is to enable and allow remote connection for the Deluge daemon, open the core.conf file for editing
Find the line
and change it to
Hit Ctrl + X, Y to save and exit.
Now start the Deluge daemon service, on Ubuntu Server up to 14.04 LTS with
on Ubuntu Server starting from version 15.04 with
Option 2. Deluge Daemon Installed as vpn User for Split Tunneling
If you installed Deluge daemon with VPN Split Tunnel by following our guide, then you are running Deluge daemon as vpn user.
Choose a and you will use to access Deluge daemon from the client, replace accordingly
Next step is to enable and allow remote connection for the Deluge daemon
Find the line
and change it to
Hit Ctrl + X, Y to save and exit.
Now start the Deluge daemon service, on Ubuntu Server up to 14.04 LTS with
On Ubuntu Server starting from version 15.04 with
Accessing Deluge WebUI
To be able to access the deluge WebUI, we also need to create a systemd service file for deluge web.
Copy and paste the following texts into the file.
Save and close the file. Then start and enable deluge-web, check its status. Again, there’ no need to add sudo to the commands.
Once the deluge-web service is running, it listens on TCP port 8112. Now in your Web browser address bar, type
You will be asked to enter a password, which by default is deluge , to access the Web UI. (Your firewall might be preventing access to port 8112, so check your firewall setting if you can’t access the web UI).

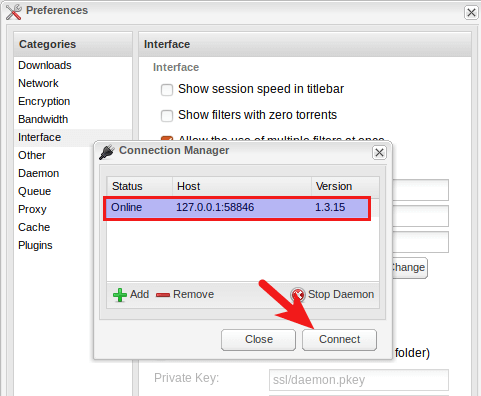
It’s recommended to change the default password. After you choose to change password, the connection manager window will pop up asking you to connect to Deluge daemon which is listening on 127.0.0.1:58846 . Select the connection and click Connect button.
Then you will be able to change the WebUI password. Note that you need to click the Change button to apply this change.

And now you can use Deluge BitTorrent on your Ubuntu 18.04 server from the web interface.

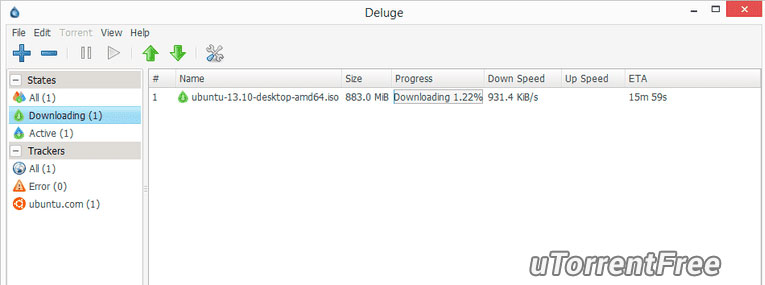
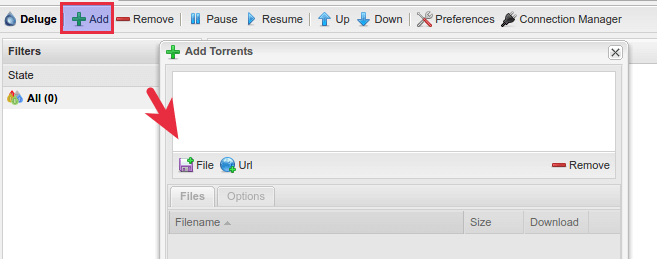
To add new torrents, click the add button on the upper left corner. You can add a torrent file from your local computer or add magnet link. By default, files are downloaded to /home/deluge/Downloads directory.
Daemon
Deluge works with a client/server model. The server is referred to as the daemon and runs in the background waiting for a client (console, gtk, or web-based) to connect. The client can disconnect but the daemon continues to run transferring the torrent files in the queue.
Upon installation, pacman will create a non-privileged deluge user. This user is meant to run the provided daemon, . Users are able to start the daemon several ways:
- Systemd system service (runs as the deluge user).
- Systemd user service (runs as another user).
- Running it directly (runs as another user).
Tip: For the highest level of security, running via the systemd system service () is recommended since the deluge user has no shell access (limited account) or other group affiliation on the host system. In addition to the security benefits of running as the non-privileged deluge user, the system service can also run at boot without the need to start Xorg or a client.
User service
Warning: If multiple users are running a daemon, the default port (58846) will need to be changed for each user.
A user service will allow to run when is started. This is accomplished by creating a user service file:
/etc/systemd/user/deluged.service
Description=Deluge Daemon
After=network.target


ExecStart=/usr/bin/deluged -d -P %h/.config/deluge/deluge.pid


WantedBy=default.target
The deluge user service can now be started and enabled by the user.
The user service can also be placed in . See systemd/User for more information on user services.


