Blackarch linux
Содержание:
- Шаг 3: Установка базового программного обеспечения
- Speed Up Update
- Шаг 4: Настройка рабочего стола Cinnamon
- Близкие статьи
- Pre-installation
- Как настроить John the Ripper
- Близкие статьи
- Подключение локального веб-сервера к сети Tor в качестве скрытого сервиса Tor
- Близкие статьи
- System Setup
- Internet connection
- Базовое использование Blackman
- Близкие статьи
Шаг 3: Установка базового программного обеспечения
16. На данный момент в системе имеется минимум установленного программного обеспечения которое мало поможет в повседневном использовании настольного компьютера или ноутбука. Запустите следующую большую команду, чтобы установить базовое программное обеспечение.
sudo pacman -S gedit gnome-terminal pulseaudio pulseaudio-alsa pavucontrol firefox vlc eog eog-plugins chromium unzip unrar p7zip pidgin toxcore deluge smplayer audacious qmmp gimp xfburn thunderbird gnome-system-monitor doublecmd-gtk2 gnome-calculator pinta recoll deadbeef veracrypt bleachbit gnome-screenshot evince mlocate antiword catdoc unrtf djvulibre id3lib mutagen python2-pychm perl-image-exiftool aspell-en aspell-sv git calibre ttf-freefont ttf-linux-libertine
Ещё вам могут пригодиться:
sudo pacman -S openshot avidemux-gtk wine playonlinux netbeans
17. Также установите кодеки, которые требуются для мультимедийных приложений для кодирования и декодирования аудио или видео потоков, это можно сделать следующей командой.
sudo pacman -S a52dec faac faad2 flac jasper lame libdca libdv libmad libmpeg2 libtheora libvorbis libxv wavpack x264 xvidcore gst-libav
18. Если вам нужны офисные инструменты вроде Writer, Calc, Impress, Draw, Math и Base, то установите пакет LibreOffice следующей командой.
sudo pacman -S libreoffice-fresh libreoffice-fresh-ru
Словари для проверки орфографии и стиля в LibreOffice:
Если вам нужны другие программы или утилиты, посетите страницу Пакетов Arch Linux по адресу для поиска ваших пакетов и их установки через Pacman.
Для удаления пакетов используйте переключатель -R с командой pacman.
sudo pacman -R пакет-для-удаления
19. Для установки поддерживаемого сообществом программного обеспечения, установите Yaourt Package Manager Tool (начинающим пользователям не рекомендуется использовать yaourt).
sudo pacman -S yaourt
Speed Up Update
The pacman package manager has a text file with a large list of mirrors, from where it downloads updates. It selects the first mirror from the list and starts the download. If the speed is too small or the mirror is not available, the next mirror is selected and so on. There are mirrors for the whole world, but if you have a fast Internet connection, you may notice that with some of them the download speed is low.
You can choose fast mirror packets and thereby significantly speed up the speed of system updates during the download phase.
To do this, open the file /etc/pacman.d/mirrorlist:
sudo gedit /etc/pacman.d/mirrorlist
And comment out or delete mirrors that you do not want to use. Or just move to the top the nearest and fastest mirrors to you.

Шаг 4: Настройка рабочего стола Cinnamon

20. Настройки системы Cinnamon обеспечивают интерфейс посредством которого вы можете подстроить и уникализировать окружение рабочего стола Arch и Cinnamon с любыми наборами настроек, которые вам только могут понадобиться. Последующий настройки покажут вам, как вы можете изменить общий вид и ощущение от вашей системы (тема и иконки). Для начала, установите Faenza Icon Theme и Numix Theme.
sudo pacman -S faenza-icon-theme numix-themes
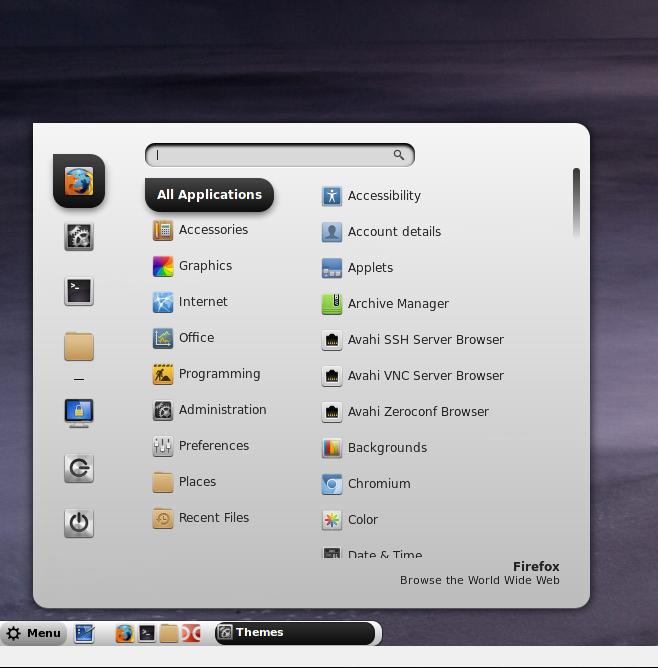
21. Затем откройте System settings -> Themes
Здесь вы можете поменять иконки, вид окон.

22
Установите новые темы (обратите на это внимание – тем много и все они очень красивые)
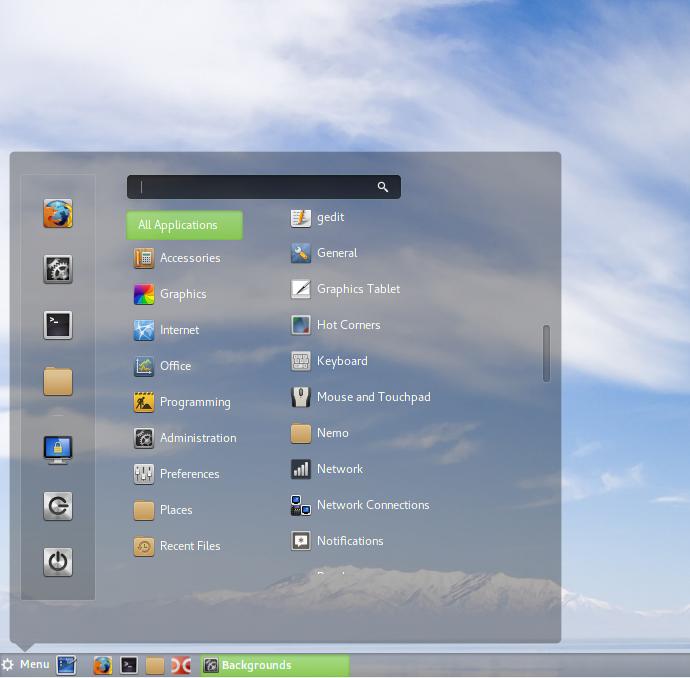
Вот и всё теперь ваша система выглядит стильно и современно.

23. Наконец настройте экран, добавьте симпатичный инструмент графического мониторинга в системной панели инструментов. Для начала установите следующие пакеты.
sudo pacman -S libgtop networkmanager
Затем откройте System Settings -> Applets -> Get more online, найдите Multi-Core System Monitor и установите его, затем переключитесь на вкладку Installed, кликните правой кнопкой и выберите Add to panel.
Теперь у вас завершённый и хорошо выглядящий Arch Linux Desktop с программами, которые нужны для таких базовых задач как Интернет сёрфинг, просмотр фильмов, прослушивание музыки или создание офисных документов.
Полный список программы вы найдёте на этой странице:
Естественно Arch Linux в своих официальных репозиториях имеет и другие окружения рабочего стола Linux: KDE, GNOME, Mate, LXDE, XFCE, Enlightenment. Выбор Cinnamon или другого окружения рабочего стола – это личное дело каждого. Но на мой взгляд, Cinnamon имеет лучшую гибкость (темы, апплеты, десклеты и расширения), а также дополнительные современные возможности (горячие углы экрана), которые повышают производительность труда.
Близкие статьи
- Варианты установки BlackArch (100%)
- Создание загрузочной флешки BlackArch / Arch Linux (100%)
- Установка BlackArch, часть первая: Установка BlackArch в VirtualBox (100%)
- Установка BlackArch, часть вторая: Установка Arch (100%)
- Установка Дополнений гостевой ОС VirtualBox для BlackArch (Arch) (100%)
- Настройка SSH в BlackArch (RANDOM — 69.1%)
Pre-installation
Verify signature
$ gpg --keyserver-options auto-key-retrieve --verify archlinux-version-x86_64.iso.sig
Alternatively, from an existing Arch Linux installation run:
$ pacman-key -v archlinux-version-x86_64.iso.sig
Note:
Prepare an installation medium
The installation image can be supplied to the target machine via a USB flash drive, an or a network with PXE: follow the appropriate article to prepare yourself an installation medium from the chosen image.
Boot the live environment
- Point the current boot device to the one which has the Arch Linux installation medium. Typically it is achieved by pressing a key during the POST phase, as indicated on the splash screen. Refer to your motherboard’s manual for details.
- When the installation medium’s boot loader menu appears, select Arch Linux install medium and press to enter the installation environment.
- You will be logged in on the first virtual console as the root user, and presented with a Zsh shell prompt.
Set the keyboard layout
The default console keymap is US. Available layouts can be listed with:
# ls /usr/share/kbd/keymaps/**/*.map.gz
To modify the layout, append a corresponding file name to , omitting path and file extension. For example, to set a German keyboard layout:
# loadkeys de-latin1
Console fonts are located in and can likewise be set with .
Verify the boot mode
To verify the boot mode, list the efivars directory:
# ls /sys/firmware/efi/efivars
If the command shows the directory without error, then the system is booted in UEFI mode. If the directory does not exist, the system may be booted in BIOS (or CSM) mode. If the system did not boot in the mode you desired, refer to your motherboard’s manual.
Connect to the internet
To set up a network connection, go through the following steps:
- Ensure your network interface is listed and enabled, for example with :
# ip link
- For wireless, make sure the wireless card is not blocked with rfkill.
- Connect to the network:
- Ethernet—plug in the cable.
- Wi-Fi—authenticate to the wireless network using iwctl.
- Configure your network connection:
- Static IP address: follow .
- The connection may be verified with ping:
# ping archlinux.org
Note: The installation image has , and enabled by default. That will not be the case for the installed system.
Use to ensure the system clock is accurate:
# timedatectl set-ntp true
To check the service status, use .
Partition the disks
When recognized by the live system, disks are assigned to a block device such as , or . To identify these devices, use lsblk or fdisk.
# fdisk -l
Results ending in , or may be ignored.
The following partitions are required for a chosen device:
- One partition for the root directory .
- For booting in UEFI mode: an EFI system partition.
If you want to create any stacked block devices for LVM, system encryption or RAID, do it now.
Example layouts
| Mount point | Partition | Partition type | Suggested size |
|---|---|---|---|
| Linux swap | More than 512 MiB | ||
| Linux | Remainder of the device |
| Mount point | Partition | Suggested size | |
|---|---|---|---|
| or | EFI system partition | At least 260 MiB | |
| Linux swap | More than 512 MiB | ||
| Linux x86-64 root (/) | Remainder of the device |
See also .
Note:
- Use fdisk or parted to modify partition tables, for example .
- Swap space can be set on a swap file for file systems supporting it.
- If the disk from which you want to boot , do not create another one, but use the existing partition instead.
Format the partitions
Once the partitions have been created, each newly created partition must be formatted with an appropriate file system. For example, to create an Ext4 file system on , run:
# mkfs.ext4 /dev/root_partition
If you created a partition for swap, initialize it with :
# mkswap /dev/swap_partition
# swapon /dev/swap_partition
See for details.
Note: For stacked block devices replace with the appropriate block device path.
Mount the file systems
Mount the root volume to . For example, if the root volume is :
# mount /dev/root_partition /mnt
Create any remaining mount points (such as ) using and mount their corresponding volumes.
will later detect mounted file systems and swap space.
Как настроить John the Ripper
У John the Ripper есть файл настроек с большим количеством опцией. Этот файл называется john.conf и находится в той же папке, что и исполнимый файл john.
Обеспечьте хорошее охлаждение; следите за температурой. Если среда выполнения OpenCL поддерживает это, температура графического процессора будет отслеживаться и отображаться в строках состояния, а в john.conf есть изменяемый пользователем предел, который завершит работу при 95 °C.
Эта настройка устанавливается директивой:
AbortTemperature = 95
Температура указывается в градусах Цельсия — °C.
Вместо прерывания, можно остановить программу на это количество секунд, чтобы охладить GPU, когда температура достигнет значения AbortTemperature, затем программа повторно проверит температуру и либо продолжит работу, либо останется на паузе. Установите значение чтобы просто завершить работу.
Если указано SleepOnTemperature = 1 (одна секунда), то не будут выводиться сообщения о паузе/возобновлении работы, поскольку такое короткое значение интерпретируется как желание держать температуру видеокарты около крайнего значения. Значение директивы по умолчанию:
SleepOnTemperature = 1
Близкие статьи
- Как установить Wine и PlayOnLinux в Arch Linux / BlackArch (100%)
- Решение проблемы с ошибкой «0009:err:winediag:gnutls_initialize failed to load libgnutls, no support for encryption» (100%)
- Решение проблемы «0034:err:module:load_builtin_dll failed to load .so lib for builtin L»l3codeca.acm»: libmpg123.so.0: невозможно открыть разделяемый объектный файл: Нет такого файла или каталога» (71.5%)
- Pacman: работа с пакетами в BlackArch (перевод справки и мануала) (50%)
- Работа с дисками в BlackArch (монтирование, решение проблем) (50%)
- Ошибка error: failed to update core (unable to lock database) (РЕШЕНО) (RANDOM — 50%)
Подключение локального веб-сервера к сети Tor в качестве скрытого сервиса Tor
Нам нужно начать с установки Tor:
sudo pacman -S tor
Откройте файл
sudo vim /etc/tor/torrc
Найдите там строки:
#HiddenServiceDir /var/lib/tor/hidden_service/
#HiddenServicePort 80 127.0.0.1:80
Первая строка означает, где будет храниться сканированное доменное имя и частный ключ. Её достаточно просто раскоментировать, чтобы получилось:
HiddenServiceDir /var/lib/tor/hidden_service/
Вторую строку тоже надо раскоментировать. Первая цифра – это порт, на котором будет размещён ваш скрытый сервис – лучше не меняйте, чтобы пользователя не пришлось вручную указывать нестандартный порт. Следующая строка – это локальный адрес вашего виртуального хоста на веб-сервере. IP должно остаться прежним, а порт в случае необходимости поменяйте на тот, который вы назначили виртуальному хосту веб-сервера. В моём случае я меняю на 9475:
HiddenServicePort 80 127.0.0.1:9475
Запустите (или перезапустите, если она была установлена ранее) службу Tor:
sudo systemctl start tor
Проверьте её статус:
sudo systemctl status tor
Добавьте службу в автозагрузку:
sudo systemctl enable tor
Чтобы узнать своё доменное имя наберите:
sudo cat /var/lib/tor/hidden_service/hostname
Теперь это доменное имя сообщайте клиентам вашего скрытого сервиса Tor. Эти сайты можно открыть только через сеть Tor. В обычном Интернете они недоступны.
Если вам нужно несколько скрытых сервисов Tor, то создайте необходимое количество виртуальных хостов веб-сервера и используйте строки
#HiddenServiceDir /var/lib/tor/hidden_service/
#HiddenServicePort 80 127.0.0.1:80
Столько раз, сколько вам нужно. Для каждого сервиса нужно указать свою директорию, в которой размещено доменное имя и приватный ключ.
Мой скрытый сервис Tor:
Близкие статьи
- LEMP (Nginx, PHP, MariaDB/MySQL и phpMyAdmin) в Arch Linux: установка, создание виртуальных хостов, защита паролем папок, включение SSL (100%)
- Настройка SSH в BlackArch (58.4%)
- Установка MongoDB в Arch / BlackArch (58.4%)
- Установка LAMP (Linux, Apache, MySQL/MariaDB, PHP7 и phpMyAdmin) в Arch Linux / BlackArch (58.4%)
- Настройка статического IP адреса в Arch Linux / BlackArch (58.4%)
- Установка intel-opencl, intel-opencl-runtime и intel-opencl-sdk в Arch Linux / BlackArch (RANDOM — 50%)
System Setup
Run the following command:
arch-chroot /mnt
Install Vim:
pacman -Sy
pacman -S vim
If you prefer to the console text editor nano, then install it.
Now in the locale.gen file we need to uncomment the two lines, for this
vim /etc/locale.gen
We search there and uncomment the lines:
en_US.UTF-8 UTF-8
ru_RU.UTF-8 UTF-8
Instead of ru_RU.UTF-8 UTF-8, select your native language. If you a English native speaker, so the only one line en_US.UTF-8 UTF-8 is enough for you.
Quite briefly about vim — it has two modes: edit mode and command mode. Editing mode is enabled when you press the Insert button, the Esc button switches on the command mode. In editing mode as in a normal text editor — press the letter, get the letter on the screen. In the command mode, the keys has other meanings. For example, to search for a line, press (slash) and start typing a line. Press n to go to the next occurrence of the search string.
To save and exit the document, go to the command mode (press Esc), then press :wq and Enter (that is, a colon, w, q and Enter).
After that we perform:
locale-gen
Create locale.conf and export the locale:
echo LANG=en_US.UTF-8 > /etc/locale.conf
export LANG=en_US.UTF-8
We specifically chose the English locale for the installation time, because if errors occur, then in the non-English locale, messages will be displayed as squares and it will be difficult to understand what the cause of the problem is.
Set the Time Zone by associating the time zone information with localtime. To see all time zones:
ls /usr/share/zoneinfo
To see subcategories
ls /usr/share/zoneinfo/Europe
Now that you have chosen the city, make a link (replace Europe/Moscow to your city):
ln -s /usr/share/zoneinfo/Europe/Moscow /etc/localtime
Install the hardware clock on UTC:
hwclock --systohc --utc
Set the hostname (you can select any):
echo HackWare > /etc/hostname
We configure the network. If you have a wired connection, then configure your system to get IP address automatically:
systemctl enable dhcpcd.service
If you have a Wi-Fi connection, you will need to configure it manually the first time you reboot.
Attention to those who have a Wi-Fi connection: be sure to install the packages:
pacman -S wpa_supplicant dhclient iw
We set the root password:
passwd
Create a new user with sudo (replace <username> with real name):
useradd -m -g users -G wheel,video -s /bin/bash <имя пользователя>
Installing sudo:
pacman -S sudo
In the /etc/sudoers file, find and uncomment the %wheel ALL=(ALL) line:
vim /etc/sudoers
Set the password for the created user:
passwd <username>
Bootloader installation
bootctl install
Edit the contents of the file:
vim /boot/loader/loader.conf
Delete what is there and write there:
default arch
Create a configuration file to add the Arch Linux item to the systemd-boot manager:
vim /boot/loader/entries/arch.conf
The contents of the file should be as follows:
title  BlackArch
linux  /vmlinuz-linux
initrd  /initramfs-linux.img
options  root=/dev/nvme0n1p2 rw
Pay attention to /dev/nvme0n1p2 — this is the path to my disk with the system, replace it with your own.
Leave the chroot, unmount the mounted partitions and reboot:
exit
umount -R /mnt/boot
umount -R /mnt
reboot
You can remove the installation disc.
Internet connection
It is necessary to configure the Internet, because everything else is meaningless, if there is no internet connection.
If your computer has a wired internet connection, then everything is simple enough — Arch itself will try to configure the Internet connection and get an IP address if the router supports DHCP.
In either case, check the network connection by ping:
ping ya.ru
If this service is disabled on the router, then you need manually to configure your network interface. An example of how to do this:
Configuring Static IP for Arch Linux Installation
First we find out the name of the network interface:
ip a

After that, the assignment of the static IP is done by the following command (itself IP, subnet mask and the name of the network interface, replace with your own):
ip a add 192.168.1.101/255.255.255.0 dev ens3
You can shorten it a little:
ip a add 192.168.1.101/24 dev ens3
Nevertheless, at this stage you will not have an Internet connection yet. We need to register the default gateway (replace the gateway address with your own gateway):
ip route add default via 192.168.1.254
And … still at this stage there will be no Internet. It is necessary to set a DNS server.
To do this, open the file
vim /etc/resolv.conf
and add the line:
nameserver 8.8.8.8
Configuring wireless conntcion for Arch Linux Installation
Let’s say I do not have a wired connection, so I’ll show you how to connect to Wi-Fi on the command line.
We begin by looking at the name of the wireless network interface:
ip a
You can also use the command:
iw dev

It’s seen that the name of my wireless interface is wlo1. Before connecting to any Wi-Fi network, we need to find out which access points are available in the range. To do this, we will scan the Wi-Fi network at the command line.
Since no NetworkManager yet, you need to start by activating the network interface:
ip link set wlo1 up
Instead of wlo1 here and in all subsequent commands, insert the name of your wireless adapter.
Scan networks:
iw dev wlo1 scan | grep SSID

As a result of this command, the names of the wireless networks will be displayed. I have two networks with the same name MiAl because the router operates on two frequencies (2.4 and 5 GHz) and both networks are called the same.
We need to generate a configuration file. This is done by the command:
wpa_passphrase AP_name password > configuration_file
For example, for AP MiAl password wifi_password_here and the configuration file I want to call wpa_MiAl.conf, then the command looks like this:
wpa_passphrase MiAl wifi_password_here > wpa_MiAl.conf
We connect to the access point:
wpa_supplicant -B -i wlo1 -c wpa_MiAl.conf
In the previous command, specify your wireless interface (wlo1) and your configuration file (instead of wpa_MiAl.conf).
To obtain automatic DHCP settings (assigned IP address, gateway IP address and DNS server IP addresses) run the command:
dhclient wlo1
Базовое использование Blackman
Blackman очень прост в использовании, хотя аргументы отличаются о тех, которые вы ожидает от pacman и подобных. Основы использования набросаны ниже.
Загрузить, скомпилировать и установить пакеты:
sudo blackman -i пакет
Загрузить, скомпилировать и установить всю категорию:
sudo blackman -g группа
Загрузить, скомпилировать и установить все инструменты BlackArch:
sudo blackman -a
Показать список категорий blackarch:
blackman -l
Показать список инструментов категории:
blackman -p категория
Близкие статьи
- Установка и запуск IVRE в BlackArch (88.3%)
- Варианты установки BlackArch (68.9%)
- Создание загрузочной флешки BlackArch / Arch Linux (68.9%)
- Установка BlackArch, часть первая: Установка BlackArch в VirtualBox (68.9%)
- Установка BlackArch, часть вторая: Установка Arch (68.9%)
- Установка Java (JDK) в Arch Linux (RANDOM — 50%)


