Как устранить ошибку permission denied (publickey) при использовании git?
Содержание:
Set up SSH with Sourcetree on macOS
Whether you use Git or Mercurial, use this section to generate an SSH key using Sourcetree.
Step 1. Install Sourcetree and add your Bitbucket account
- If you don’t connect your account during set up, you can add it from the Accounts tab by selecting Preferences from the Sourcetree menu.
Step 2. Create an SSH key
Follow these steps if you don’t already have an SSH key for an account. If you do have an SSH key and you want to generate another key, you’ll have to use the terminal because you can’t use Sourcetree to create a second key.
Creating an SSH key looks something like this:
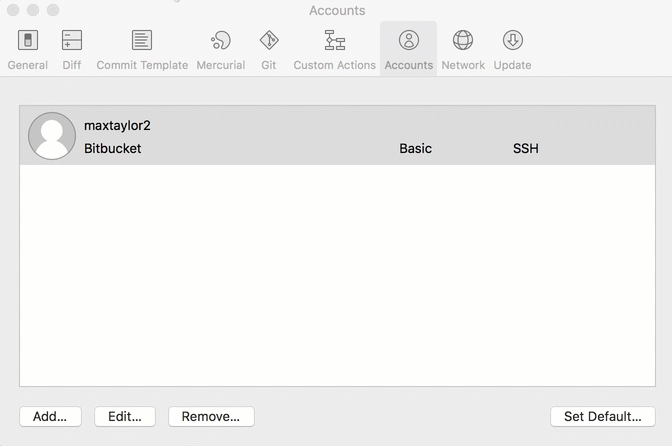
- From the Sourcetree menu, select Preferences.
- Click the Accounts tab, select the account where you want to add the SSH key and click Edit.
- Change the Protocol to SSH if it’s not already selected.
-
Hold down the key on your keyboard to see the Generate Key button.
If you’ve already generated an SSH key for this account from Sourcetree, the OPTION key won’t do anything. Use your existing key or generate another key from the terminal.
- ClickGenerate Key.
- PassphraseConfirm Passphrase
- Click Create.
Step 3. (Mercurial only) Enable SSH compression
Enabling SSH compression is recommended but not required. You’ll need to clone and open a Mercurial repository to complete these steps.
By default, Git automatically performs compression when sending or retrieving data, but Mercurial doesn’t. Enabling SSH compression can speed up sending and retrieving data, drastically in some cases.
To enable SSH compression:
- Click Settings in the top right of the repository window.The repository settings may open to the Remotes tab. If not, click the Remotes tab.
- Click Edit Config File to open the Mercurial global configuration file ().
-
Add line to the UI section:
When you’re done the file should look similar to this:
-
Save and close the file.
Step 4. Add the public key to your Account settings
- From Bitbucket, choose Personal settings from your avatar in the lower left.The Account settings page opens.
- Click SSH keys.If you’ve already added keys, you’ll see them on this page.
-
Select your account from your Accounts tab in Sourcetree.
- Click the Copy to Clipboard button to copy your public SSH key.
-
From Bitbucket, click Add key.
-
Enter a Label for your new key, for example, .
- Paste the copied public key into the SSH Key field.
-
Edit an SSH key
After you add a key, you can edit the key’s Label but not the key itself.
Now that you’ve got an SSH key set up, use the SSH URL the next time you clone a repository. If you already have a repository that you cloned over HTTPS, change the remote URL for your repository to its SSH URL.
7 ответов
Это работает для меня:
ответ дан Wouter Schoofs 19 November 2018 в 09:57
В моем случае я переустановил Ubuntu, и имя пользователя изменилось с предыдущего. В этом случае сгенерированный ключ ssh также отличается от предыдущего.
Проблема решена путем простого копирования текущего открытого ключа ssh в хранилище. Ключ будет доступен у вашего пользователя
ответ дан Sonu 19 November 2018 в 09:57
Да, если вы используете git, просто следуйте документации. Theres чертовски много Документации, написанной на этом. Вы не можете пойти не так, если вы будете следовать этому. Просто начните сначала, если вам нужно. Ссылка:
ответ дан Mbuso Mkhize 19 November 2018 в 09:57
Я только что столкнулся с этой проблемой при настройке моего текущего проекта, и ни одно из вышеуказанных решений не работает поэтому я попытался посмотреть, что на самом деле происходит в списке отладки, используя команду ssh -vT git@github.com. Я заметил, что моего закрытого ключа с именем файла нет в списке. поэтому переименовав имя файла с закрытым ключом в id_rsa, сделайте свою работу. надеюсь, это поможет.
ответ дан Rhey M. 19 November 2018 в 09:57
Получено то же сообщение об ошибке.
Исправлено использование HTTP вместо. Так как я не хочу устанавливать «ключи SSH» для тестового ПК.
Измените URL-адрес на HTTP при клонировании:
Моя проблема немного отличается : у меня установлен URL-адрес при добавлении существующего локального репо на удаленный компьютер с помощью:
Чтобы исправить это, сбросьте URL-адрес на HTTP:
Кстати, вы можете проверить свой URL-адрес с помощью команды:
Надеюсь, это поможет некоторым такой как я : D
ответ дан Robina Li 19 November 2018 в 09:57
Это довольно прямо. Введите следующую команду
Сгенерируйте ключ SSH. Откройте файл и скопируйте содержимое. Перейдите на страницу настроек GitHub и нажмите на ключ SSH. Нажмите Добавить новый ключ SSH и вставьте содержимое здесь. Вот и все 🙂 Вы не должны видеть проблему снова.
ответ дан karthik339 19 November 2018 в 09:57
Эта ошибка может возникать, когда вы обращаетесь к URL-адресу SSH (чтение / запись) вместо URL-адреса Git только для чтения, но у вас нет прав на запись в этот репозиторий.
Иногда вы просто хотите клонировать свое собственное репо, например, развернуть на сервере. В этом случае вам нужен только доступ только для чтения. Но поскольку это ваше собственное репо , GitHub может отображать URL SSH, если вы предпочитаете это. В этой ситуации, если открытый ключ вашего удаленного хоста отсутствует в ваших SSH-ключах GitHub, вашему доступу будет отказано, , что ожидается .
Эквивалентным случаем является случай, когда вы пытаетесь клонировать чужое хранилище, к которому у вас нет прав записи с помощью SSH URL.
Одним словом, , если вы хотите клонировать репо, используйте HTTPS URL () вместо SSH URL (), что позволяет избежать (ненужной) проверки открытого ключа .
Обновление: GitHub теперь отображает HTTPS в качестве протокола по умолчанию, и этот шаг, вероятно, может уменьшить возможное неправильное использование URL-адресов SSH.
ответ дан kavinyao 19 November 2018 в 09:57
Другие вопросы по тегам:
Set up SSH on macOS/Linux
Whether you use Git or Mercurial, use this section to create a default identity and SSH key when on macOS or Linux. By default, the system adds keys to the directory on macOS and on Linux.
Step 1. Set up your default identity
-
From the terminal, enter at the command line.The command prompts you for a file to save the key in:
-
Press the Enter or Return key to accept the default location.
We recommend you keep the default key name unless you have a reason to change it.
To create a key with a name or path other than the default, specify the full path to the key. For example, to create a key called , enter a path like the one shown at the prompt:
-
Enter and re-enter a passphrase when prompted.The command creates your default identity with its public and private keys. The whole interaction will look similar to the following:
-
List the contents of to view the key files.
The command displays two files, one for the public key (for example ) and one for the private key (for example, ).
Step 2. Add the key to the ssh-agent
If you don’t want to type your password each time you use the key, you’ll need to add it to the ssh-agent.
-
To start the agent, run the following:
-
Enter followed by the path to the private key file:
-
(macOS only) So that your computer remembers your password each time it restarts, open (or create) the file and add these lines to the file:
Step 3. (Mercurial only) Enable SSH compression
Enabling SSH compression is recommended but not required.
By default, Git automatically performs compression when sending or retrieving data, but Mercurial doesn’t. Enabling SSH compression can speed up sending and retrieving data, drastically in some cases.
To enable SSH compression:
- Open the Mercurial global configuration file ().
-
Add line to the UI section:
When you are done the file should look similar to this:
- Save and close the file.
Step 4. Add the public key to your Account settings
- From Bitbucket, choose Personal settings from your avatar in the lower left.The Account settings page opens.
- Click SSH keys.If you’ve already added keys, you’ll see them on this page.
-
In your terminal window, copy the contents of your public key file. If you renamed the key, replace with the public key file name.
Linux, you can the contents:
On macOS, the following command copies the output to the clipboard:
-
Select and copy the key output in the clipboard.If you have problems with copy and paste, you can open the file directly with Notepad. Select the contents of the file (just avoid selecting the end-of-file characters).
-
From Bitbucket, click Add key.
-
Enter a Label for your new key, for example, .
- Paste the copied public key into the SSH Key field.You may see an email address on the last line when you paste. It doesn’t matter whether or not you include the email address in the Key.
-
Edit an SSH key
After you add a key, you can edit the key’s Label but not the key itself. To change the key’s contents, you need to delete and re-add the key.
-
Return to the terminal window and verify your configuration and username by entering the following command:
The command message tells you which of your Bitbucket accounts can log in with that key.
If you get an error message with , check the Troubleshoot SSH issues page for help.
Now that you’ve got an SSH key set up, use the SSH URL the next time you clone a repository. If you already have a repository that you cloned over HTTPS, change the remote URL for your repository SSH URL.
Убедитесь, что у вас есть ключ, который используется
Команда ssh-add должна вывести длинную строку из цифр и букв. Если ничего не будет выведено на экран, вы должны сгенерировать новый SSH-ключ и связать его с GitLab.
| Замечание. В большинстве систем приватные ключи по умолчанию (, и ) автоматически добавляются к агенту аутентификации SSH. Вы не должны запускать , иначе вы перезапишите имя файла при генерации ключа. |
Получение детализации
|
ssh -vT ‘-p 25000’ … |
В этом примере у нас нет ключей для использования SSH. Значение «-1» в конце строки «identity file» означает, что SSH не может найти файла для использования. Ниже, строка «Trying private key» также показывает, что файл не найден. Если бы файл был найден, значение в этих строках было бы «1», и «Offering public key» соответственно.
|
ssh -vT ‘-p 25000’ … |
Set up SSH for Git on Windows
Use this section to create a default identity and SSH key when you’re using Git on Windows. By default, the system adds keys for all identities to the directory.
Step 1. Set up your default identity
-
From the , enter .
For Windows 7 or earlier
You can only enter into the Git Bash window. It won’t work in the Command prompt.
The command prompts you for a file to save the key in:
-
Press enter to accept the default key and path, .
We recommend you keep the default key name unless you have a reason to change it.
To create a key with a name or path other than the default, specify the full path to the key. For example, to create a key called , you would enter the Windows path, shown here:
-
Enter and re-enter a passphrase when prompted.
The command creates your default identity with its public and private keys. The whole interaction looks similar to :
-
List the contents of to view the key files.
You should see something like the following:
The command displays two files, one for the public key (for example ) and one for the private key (for example, ).
Step 2. Add the key to the ssh-agent
If you don’t want to type your password each time you use the key, you’ll need to add it to the ssh-agent.
-
To start the agent, run the following:
-
Enter followed by the path to the private key file:
Step 3. the public key to your Account settings
- From Bitbucket, choose Personal settings from your avatar in the lower left.The Account settings page opens.
- Click SSH keys.If you’ve already added keys, you’ll see them on this page.
-
From Bitbucket, click Add key.
-
Enter a Label for your new key, for example, .
- Paste the copied public key into the SSH Key field.
-
Edit an SSH key
After you add a key, you can edit the key’s Label but not the key itself.
-
Return to the and verify your configuration and username by entering the following command:
The command message tells you which of your Bitbucket accounts can log in with that
If you get an error message with , check the Troubleshoot SSH issues page for .
Now that you’ve got an SSH key set up, use the SSH URL the next time you clone a repository. If you already have a repository that you cloned over HTTPS, change the remote URL for your repository to its SSH URL.
Set up SSH with Sourcetree on Windows
Whether you use Git or Mercurial, use this section to generate an SSH key using Sourcetree.
Step 1. Install Sourcetree and add your Bitbucket account
-
-
You may see the Load SSH Key? dialog after installation. Click No if you don’t have one and want to use Sourcetree to create one.
-
You may see the Sourcetree: Mercurial not found dialog after installation. Choose an appropriate option or select Download an embedded version of Mercurial for Sourcetree along to use.
-
- SSHPreferred Protocol If you don’t connect your account during set up, click Remote to the Remote repositories page and click Add an account.
Step 2. Create an SSH key
- From Tools, select Create or Import SSH Keys.
- From the PuTTY Key Generator dialog, click the Generate button.
- When SSH key generation is complete, you see the public key and a few other fields.
- Enter a passphrase for your SSH key in the Key passphrase and Confirm passphrase fields.
- Save public key. From the save dialog, choose where to save your public key, name the file with the file extension, and click Save.
- Click Save private key. From the save dialog, choose where to save your private key, name the file, and click Save.
- Close the PuTTY Key Generator dialog.
. (Mercurial only) Enable SSH compression
Enabling SSH compression is recommended but not required. You’ll need to clone and open a Mercurial repository to complete these steps.
By default, Git automatically performs compression when sending or retrieving data, but Mercurial doesn’t. Enabling SSH compression can speed up sending and retrieving data, drastically in some cases.
To enable SSH compression:
- Click Settings in the top right of the repository window.The repository settings may open to the Remotes tab. If not, click the Remotes tab.
- Click Edit Config File to open the Mercurial global configuration file ().
-
Add line to the UI section:
When you’re done the file should look similar to this:
-
Save and close the file.
Step 4. Install your private key on Pageant
Sourcetree comes with an SSH authentication agent called Pageant. Load your private key into Pageant to automatically authenticate so that you don’t need to enter your passphrase.
- in your system tray to open the Key List dialog.
- Add Key to openSelect Private Key File
- Navigate to the private key file you saved in Step 1 and click Open.
- Enter the passphrase for your SSH key and click OK.Pageant shows your key in the running list.
- Close
Step 5. Add the public key to your Account settings
- From Sourcetree, open the PuTTY Key Generator dialog by going to Tools > Create or Import SSH Keys.
- Click Load, navigate to your SSH folder, and click the private key. Make sure you’re looking at All files if you don’t see your private key.
- Enter your passphrase for the SSH key and click OK.
- Copy the public key in the first field.
- From Bitbucket, choose Personal settings from your avatar in the lower left.The Account settings page opens.
- Click SSH keys.If you’ve already added keys, you’ll see them on this page.
- Click Add key.
-
Enter a Label for your new key, for example, .
- Paste the copied public key into the SSH Key field.
-
Edit an SSH key
After you add a key, you can edit the key’s Label but not the key itself. T
Now that you’ve got an SSH key set up, use the SSH URL the next time you clone a repository. If you already have a repository that you cloned over HTTPS, change the remote URL for your repository to its SSH URL.
Устранение неполадок
Проверка доступных методов аутентификации
Если вы используете подробный вывод или следите за логами SSH-клиента, убедитесь, что в сообщении, описывающем методы аутентификации, указаны password и/или publickey.
Если вы не нашли в списке метод аутентификации, который хотите использовать, откройте файл /etc/ssh/sshd_config. В нём часто допускается ошибка: PasswordAuthentication имеет значение yes, а PermitRootLogin – no или without-password для пользователя root.
Исправьте эту ошибку, перезапустите сервис.
Настройка прав доступа и собственности
Сервер и клиент OpenSSH имеют строгие требования к привилегиям и правам собственности на файлы ключей.
Сервер и клиент OpenSSH должны иметь следующие права:
- ~./ssh – 700.
- ~./ssh должен принадлежать текущему аккаунту.
- ~/.ssh/authorized_keys – 600.
- ~/.ssh/authorized_keys должен принадлежать текущему аккаунту.
Кроме того, клиент должен также иметь такие права:
- ~ / .ssh / config – 600.
- ~ / .ssh / id_ * — 600.
Эти изменения можно внести с помощью консоли.
Проверка открытого и закрытого ключа
Если вы забыли, какой закрытый ключ соответствует тому или иному открытому ключу, инструменты OpenSSH и PuTTY помогут вам сгенерировать открытый ключ на основе зарытого ключа. Полученный результат вы можете сравнить с файлом ~/.ssh/authorized_keys.
Чтобы восстановить открытый ключ на основе закрытого ключа в среде OpenSSH, используйте ssh-keygen и укажите путь к закрытому ключу.
В среде PuTTY команда PuTTYgen.exe загружает интерфейс, в котором можно использовать опцию Load и импортировать закрытый ключ. PuTTY хранит такие файлы в формате .ppk (нужно знать место хранения файла).
Импортировав ключ, вы увидите окно с разделом Public key for pasting into OpenSSH authorized_keys file. В нём и будет искомый открытый ключ. Выделите текст и вставьте его в файл. Он сгенерирует открытый ключ.
Можно проигнорировать комментарий после открытого ключа (imported-openssh-key).
В любом случае этот открытый ключ нужно добавить в файл ~/.ssh/authorized_keys.
OpenSSH 7 и устаревшие ключевые алгоритмы
В системах с OpenSSH 7 (FreeBSD и CoreOS по умолчанию) старые ключи DSA не поддерживаются.
Ключи ssh-dss считаются слабыми, вместо них рекомендуют использовать более надёжные современные алгоритмы.
Следовательно, в данном случае лучшим решением будет создать новые ключи и добавить их на хосты.
Однако в качестве обходного пути вы можете установить в PubkeyAcceptedKeyTypes значение +ssh-dss в файле /etc/ssh/sshd_config.
Заключение
Если у вас не получается самостоятельно настроить аутентификацию SSH, вы можете обратиться за помощью к службе поддержки своего хостинг-провайдера.
OpenSSHPuTTYSSH


