Установка программ в manjaro
Содержание:
- Rofi as dmenu replacement
- Arch Linux-based chroot
- The Aura Philosophy
- History
- Installing and upgrading packages
- Историческая справка
- Conseils / Astuces pour avoir un gâteau aux pommes ultra moelleux :
- Gateau au yaourt aux pommes extra moelleux, recette facile
- Feedback
- Recette yaourt grec fait maison
- Bienfaits du yaourt grec
If called as dmenu (via a symlink), rofi acts like dmenu. You may want to install AUR, which symlinks dmenu to rofi. Then programs that call dmenu from a script (like passmenu from pass) will use rofi instead of dmenu.
If you prefer the look of dmenu, this approximates it:
rofi -show run -modi run -location 1 -width 100 \
		 -lines 2 -line-margin 0 -line-padding 1 \
		 -separator-style none -font "mono 10" -columns 9 -bw 0 \
		 -disable-history \
		 -hide-scrollbar \
		 -color-window "#222222, #222222, #b1b4b3" \
		 -color-normal "#222222, #b1b4b3, #222222, #005577, #b1b4b3" \
		 -color-active "#222222, #b1b4b3, #222222, #007763, #b1b4b3" \
		 -color-urgent "#222222, #b1b4b3, #222222, #77003d, #b1b4b3" \
		 -kb-row-select "Tab" -kb-row-tab ""
Arch Linux-based chroot
Идея состоит в том, чтобы как бы запустить Arch Linux внутри уже имеющейся системы.
Настоящая установка, которая будет содержаться внутри chroot, будет затем запущена из этой Arch системы.
Есть два способа настроить и войти в chroot, они представлены ниже.
Примечание: Хост-система должна использовать Linux 2.6.32 или новее.
Примечание: Используйте только один из двух способов, и не забудьте дочитать эту статью до конца, чтобы закончить установку.
Создаём chroot
Способ 1: Использование Bootstrap образа (рекомендуется)
Образ i686:
Распаковываем его:
 # cd /tmp
 # tar xzf <путь-к-каталогу-где-образ>/archlinux-bootstrap-2016.04.01-*.tar.gz
Выбираем подходящий для вашего интернета сервер, откуда будут загружаться основные репозитории:
# nano /tmp/root.*/etc/pacman.d/mirrorlist
Примечание: Если ваша хост-система — x86_64, а образ boostrap — i686, то также подправьте , ясно указав , чтобы pacman качал пакеты под архитектуру i686.
Войдём в chroot
Если установлен bash 4 или новее, то:
# /tmp/root.*/bin/arch-chroot /tmp/root.*/
Иначе:
  # cd /tmp/root.*
  # cp /etc/resolv.conf etc
  # mount --rbind /proc proc
  # mount --rbind /sys sys
  # mount --rbind /dev dev
  # mount --rbind /run run
    (при условии, что /run существует)
  # chroot /tmp/root.* /bin/bash
Способ 2: Используя образ LiveCD
Можно смонтировать корневой образ последнего установочного диска Arch Linux и затем заchroot’ить туда. Плюс этого способа в том, что у вас будет сразу рабочий Arch Linux installation прямо внутри хост-системы без надобности в его настройки.
# unsquashfs -d /squashfs-root root-image.fs.sfs
Теперь смонтируем его с помощью опции loop
# mkdir /arch
# mount -o loop /squashfs-root/root-image.fs /arch
Перед тем как chrooting to it, нужно смонтировать некоторые виртуальные системные разделы, а затем скопировать resolv.conf для интернета.
# mount -t proc none /arch/proc
# mount -t sysfs none /arch/sys
# mount -o bind /dev /arch/dev
# mount -o bind /dev/pts /arch/dev/pts # важно для pacman (для проверки подписей)
# cp -L /etc/resolv.conf /arch/etc # а это, чтобы мог работать интернет в chroot
Теперь всё готово, чтобы to chroot в только что установленное окружение Arch
# chroot /arch bash
Используем наше chroot окружение
Начальная настройка хранилища ключей pacman
Перед установкой, ключи pacman должны быть настроены. Перед тем как вводить следующие две команды, можете почитать , чтобы узнать entropy requirements:
# pacman-key --init
# pacman-key --populate archlinux
Установка
Следуйте и .
Хост Debian
На хостах Debian выводит следующую ошибку:
# pacstrap /mnt base
# ==> Creating install root at /mnt
# mount: mount point /mnt/dev/shm is a symbolic link to nowhere
# ==> ERROR: failed to setup API filesystems in new root
Это потому, что в Debian ссылается на , который в Arch-based chroot не существует, поэтому ссылка не рабочая. Чтобы исправить это, просто создайте каталог :
# mkdir /run/shm
Хост Fedora
На хостах Fedora и Live USB, если у вас не получается сгенерировать ваш с помощью , то удалите из fstab одинаковые записи и везде опции (это опция специфична для Fedora и поэтому не даст вам загрузиться).
С этого момента просто следуйте согласно разделам начиная с «» из руководства по установке Arch Linux.
The Aura Philosophy
Aura is Pacman
Aura doesn’t just mimic ; it is . All operations and
their sub-options are allowed. Some even hold special meaning in Aura as well.
Arch is Arch — AUR is AUR
yields pacman packages and only pacman packages. This agrees with the
above. In Aura, the operation is introduced for obtaining AUR packages.
comes with sub-options you’re used to (, , , etc.).
Secure Package Building
PKGBUILDs from the AUR can contain anything. It’s a user’s responsibility to
verify the contents of a PKGBUILD before building, but people can make mistakes
and overlook details. Aura scans PKGBUILDs before building to detect bash misuse
and other exploits. The command is also provided for scanning your own
PKGBUILDs.
Also, while pre-build PKGBUILD editing is not default behaviour, this can be
achieved with .
Downgradibility
Aura allows you to downgrade individual packages to previous versions with .
It also handles snapshots of your entire system, so that you can roll back whole
sets of packages when problems arise. The option will save a package state,
and will restore a state you select. and also invoke a save
automatically.
Arch Linux for Everyone
English is the dominant language of computing and the internet. That said, it’s
natural that some people are going to be more comfortable working in their
native language. From the beginning, Aura has been built with multiple-language
support in mind, making it very easy to add new ones.
Haskell
Aura is written in Haskell, which means easy development and beautiful code.
Please feel free to use it as a Haskell reference. Aura code demonstrates:
- Parser combinators ()
- CLI flag handling ()
- Concurrency ()
- Shell interaction ()
- Pretty printing ()
- Logging ()
- Modern Haskell project architecture (config, CI, distribution)
History
In the beginning, there was , and people contributed by simply uploading the PKGBUILD, the needed supplementary files, and the built package itself to the server. The package and associated files remained there until a Package Maintainer saw the program and adopted it.
Then the Trusted User Repositories were born. Certain individuals in the community were allowed to host their own repositories for anyone to use. The AUR expanded on this basis, with the aim of making it both more flexible and more usable. In fact, the AUR maintainers are still referred to as TUs (Trusted Users).
Between 2015-06-08 and 2015-08-08 the AUR transitioned from version 3.5.1 to 4.0.0, introducing the use of Git repositories for publishing the s.
Existing packages were dropped unless manually migrated to the new infrastructure by their maintainers.
Installing and upgrading packages
Installing packages from the AUR is a relatively simple process. Essentially:
- Acquire the build files, including the PKGBUILD and possibly other required files, like systemd units and patches (often not the actual code).
- Verify that the and accompanying files are not malicious or untrustworthy.
- Run in the directory where the files are saved. This will download the code, resolve the dependencies with pacman, compile it, package it, and install the package.
Note: The AUR is unsupported, so any packages you install are your responsibility to update, not pacman’s. If packages in the official repositories are updated, you will need to rebuild any AUR packages that depend on those libraries.
Prerequisites
First ensure that the necessary tools are installed by installing the group in full which includes and other tools needed for compiling from source.
Tip: Use the flag when installing the group to skip packages you already have instead of reinstalling them.
Note: Packages in the AUR assume that the group is installed, i.e. they do not list the group’s members as build dependencies explicitly.
Next choose an appropriate build directory. A build directory is simply a directory where the package will be made or «built» and can be any directory. The examples in the following sections will use as the build directory.
Acquire build files
There are several methods for acquiring the build files for a package:
Clone its git repository, labeled «Git Clone URL» in the «Package Details» on its AUR page. This is the preferred method, an advantage of which is that you can easily get updates to the package via git pull.
$ git clone https://aur.archlinux.org/package_name.git
Download a snapshot, either by clicking the «Download snapshot» link under «Package Actions» on the right hand side of its AUR page, or in a terminal:
$ curl -L -O https://aur.archlinux.org/cgit/aur.git/snapshot/package_name.tar.gz
Note: The snapshot file is compressed, and must be extracted (preferably in a directory set aside for AUR builds):
Acquire a PGP public key if needed
Check if a signature file in the form of .sig or .asc is part of the PKGBUILD source array, if that is the case, then acquire one of the public keys listed in the PKGBUILD array. Refer to for more information.
Build and install the package
Change directories to the directory containing the package’s PKGBUILD.
$ cd package_name
View the contents of all provided files. For example, to use the pager less to view do:
$ less PKGBUILD
Tip: If you are updating a package, you may want to look at the changes since the last commit.
- To view changes since the last git commit you can use .
- To view changes since the last commit using vimdiff, do . The advantage of vimdiff is that you view the entire contents of each file along with indicators on what has changed.
Make the package. After manually confirming the contents of the files, run makepkg as a normal user:
$ makepkg -si
- / automatically resolves and installs any dependencies with pacman before building. If the package depends on other AUR packages, you will need to manually install them first.
- / installs the package if it is built successfully. Alternatively the built package can be installed with .
Other useful flags are
- / removes build-time dependencies after the build, as they are no longer needed. However these dependencies may need to be reinstalled the next time the package is updated.
- / cleans up temporary build files after the build, as they are no longer needed. These files are usually needed only when debugging the build process.
Note: The above example is only a brief summary of the build process. It is highly recommended to read the makepkg and ABS articles for more details.
Upgrading packages
In the directory containing the package’s PKGBUILD you must first update the files and changes by using the command
$ git pull
then run
$ makepkg -si
to update the package.
Историческая справка
Разделение репозиториев появилось по историческим причинам. Когда дистрибутивом не пользовалось много людей, был только один репозиторий, известный как official (нынешний core). В то время official содержал в основном приложения, которые предпочитал Джадд Винет (Judd Vinet — основатель Arch Linux). Репозиторий был устроен таким образом, чтобы содержать «всего по одному»: одно окружение рабочего стола, один основной браузер и т.д.
Конечно, были пользователи, которым не нравился выбор Джадда, и, когда появилась удобная система сборки пакетов, они начали создавать собственные пакеты. Эти пакеты вошли в репозиторий unofficial и поддерживали их другие разработчики, а не Джадд. В конце концов, разработчиками было принято решение поддерживать оба репозитория, и названия official и unofficial перестали отображать их истинный смысл. Примерно в районе версии 0.5 названия были изменены на current и extra.
Вскоре после выхода версии 2007.8.1, current был переименован в core, чтобы не было неоднозначностей в трактовке того, что, собственно, должен содержать репозиторий. Сейчас репозитории практически равны в глазах разработчиков и сообщества, но core имеет некоторые отличия. Самое главное из них — то, что только пакеты из core включаются в установочные CD и релизы. Этот репозиторий все ещё содержит полноценную систему Linux, однако, скорее всего, это не та система, которую вы хотели бы использовать.
Conseils / Astuces pour avoir un gâteau aux pommes ultra moelleux :
Voici les astuces que j’ai appris pour réussir la plupart des gâteaux et cakes :
- D’abord, n’oubliez pas de préchauffer votre four avant de commencer à préparer la pâte.
- Utilisez des ingrédients à température ambiante. Il faut sortir le yaourt et les oeufs du réfrigérateur à l’avance (environ 1 heure). Une astuce pour ramener des oeufs à température ambiante plus rapidement : plonger les oeufs dans un bol d’eau tiède pendant une dizaine de minutes. Attention pas d’eau chaude.
- Ne diminuez pas trop les quantités de sucre et d’huile : elles contribuent au moelleux du gâteau.
- Concernant oeufs : il y en a qui séparent les blancs des jaunes d’oeufs. Incorporent les blancs montés en neige en dernier, juste avant les pommes. Mais je ne trouve pas cela nécessaire si on fouette bien les oeufs au début. Alors c’est à vous de voir, si vous pouvez, testez les deux versions.
- LA FARINE : On la mélange d’abord avec la levure. Et si on a un tamis, on tamise les deux ensemble. Cela va donner une mie légère et assurer une bonne répartition de la levure dans le gâteau. Plus important encore : on incorpore la farine dans la pâte sans trop travailler. Cela, pour ne pas trop activer le gluten qui donnerait un gâteau sec et dur.
- LA CUISSON : ne faites pas trop cuire. Une cuisson trop longue est l’une des raisons qui donnent un gâteau sec et dur. Il n’existe pas de temps de cuisson exact, parce qu’il varie d’un four à l’autre, d’un moule à l’autre (matière, taille et même la forme). Il ne faut donc pas vous fier au temps de cuisson donné dans les recettes. Surveillez vers la fin (un peu avant le temps indiqué dans la recette). Testez avec un cure-dent ou la pointe d’un couteau insérée au milieu du gâteau. Elle doit ressortir propre.
- Démoulage et refroidissement : Laissez refroidir sur une grille 5 à 10 minutes. Puis démoulez et laissez refroidir sur la grille. Une fois tiède, enveloppez votre gâteau dans un film alimentaire ou papier aluminium pour lui garder son moelleux
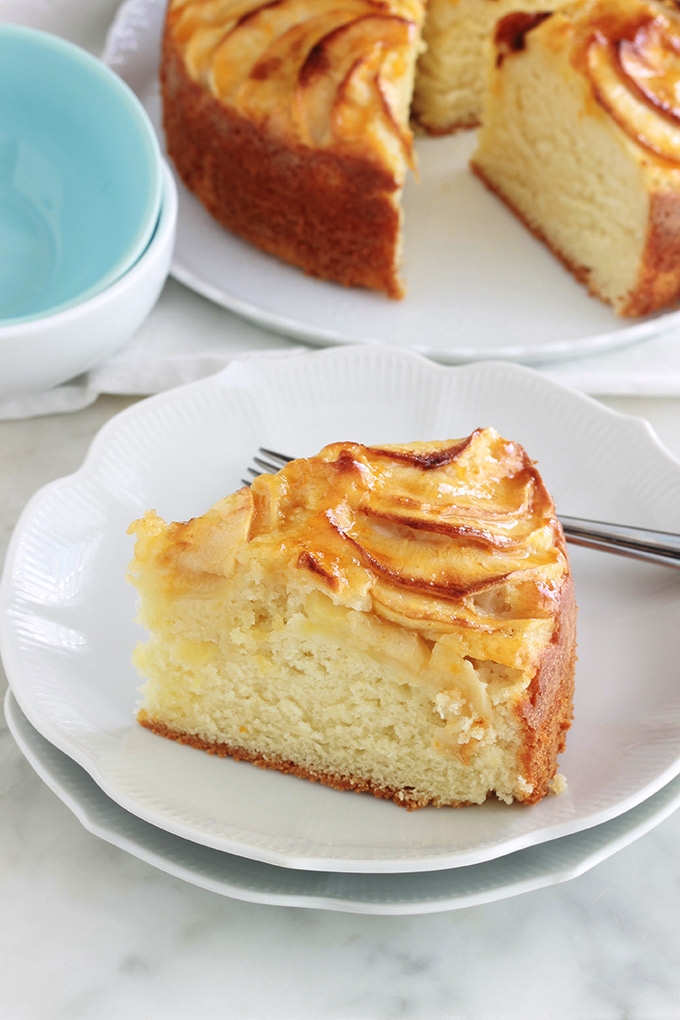
Gateau au yaourt aux pommes extra moelleux, recette facile
Au début du mois, j’ai décidé de participer à un défi culinaire sous le thème des légumes d’Authomne. On peut soumettre 3 recettes maximum. Et comme je m’y prends souvent à la dernière minutes, allez savoir pourquoi ! Il fallait que je choisisse des recettes simples et inratables. Pour ne pas stresser
C’est comme ça que j’ai pensé à deux variantes du gâteau au yaourt (une avec des pommes et l’autre avec des pommes et des amandes) + une tarte aux pommes et crème pâtissière.
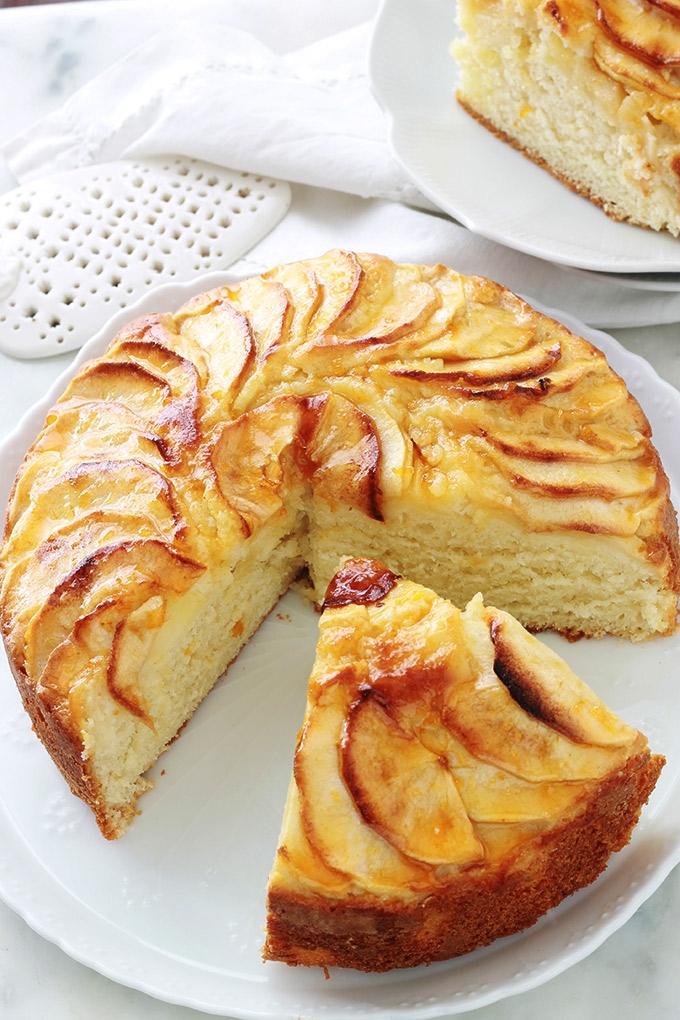
Le gâteau au yaourt de base est l’un des gâteaux les plus simples à faire. C’est un gâteau ancien indémodable et apprécié de tous.
Il est économique : un des gâteaux que je faisais souvent quand j’étais étudiante. Pas besoin de balance, puisqu’on utilise le pot de yaourt pour mesurer les ingrédients principaux.
Il est hyper moelleux. Le yaourt, et autres produits laitiers, ajoutent toujours du moelleux aux gâteaux.
Et surtout, il est déclinable à l’infini. Je ne peux même pas énumérer les variantes que l’on peut faire avec. La liste est longue!
Une des variantes que j’apprécie beaucoup est l’ajout d’un ou plusieurs fruits à la pâte de base.
Et un de mes fruits préférés avec le gâteau au yaourt est la pomme (la poire aussi ! Seule ou mélangée avec la pomme )
Feedback
Commenting on packages
Note:
- Commit hashes to the Git repository of the package and references to Flyspray tickets are converted to links automatically.
- Long comments are collapsed and can be expanded on demand.
Voting for packages
One of the easiest activities for all Arch users is to browse the AUR and vote for their favourite packages using the online interface. All packages are eligible for adoption by a TU for inclusion in the community repository, and the vote count is one of the considerations in that process; it is in everyone’s interest to vote!
Alternatively, if you have set up , you can directly vote from the command line using your ssh key. This means that you will not need to save or type in your AUR password.
$ ssh aur@aur.archlinux.org vote package_name
Flagging packages out-of-date
First, you should flag the package out-of-date indicating details on why the package is outdated, preferably including links to the release announcement or the new release .
Note: VCS packages are not considered out of date when the changes, do not flag them as the maintainer will merely unflag the package and ignore you. AUR maintainers should not commit mere bumps.
Recette yaourt grec fait maison
Si vous souhaitez vous lancer dans la fabrication de yaourts grecs maison, voici deux recettes à réaliser : une à préparer avec une yaourtière et une au thermomix(c).
Recette yaourt grec maison avec yaourtière
Cette recette est à préparer pour 8 personnes. Les ingrédients nécessaires sont :
- Un litre de lait écrémé.
- Un yaourt nature grec.
- Une cuillère à café d’édulcorant liquide.
- Un pot de yaourt de lait écrémé en poudre.
Les étapes de préparation sont les suivantes : mettez à bouillir le lait et laissez tiédir. Dans un blender, versez le lait en poudre, l’édulcorant et le yaourt avant d’ajouter le lait et de lancer votre appareil.
Dans vos pots de yaourt, incorporez le parfum désiré :
- Cacao et sirops : une cuillère à café.
- Jus de fruits : deux cuillères à café.
- Extraits : 15 gouttes.
Une fois ajoutés, versez votre préparation à base de lait et lancez votre yaourtière (pour le temps, référez-vous aux instructions données avec votre appareil). Mettez ensuite au frais et dégustez vos yaourts le lendemain.
Recette yaourt grec avec thermomix(c)
Voici une recette très simple nécessitant seulement un litre de lait entier et un yaourt.
Dans le bol de votre thermomix, ajoutez ces deux ingrédients et lancez votre appareil (vitesse 2, 37°C pendant 3 minutes). Versez ensuite votre préparation dans des pots de yaourt.
Si vous avez une yaourtière, mettez vos yaourts 8 heures à l’intérieur. Si vous n’en avez pas, enveloppez tout de suite vos yaourts d’un linge pour les garder au chaud. Laissez-les ensuite 8 heures de côté.
Dès le temps écoulé, prenez une passoire, placez deux filtres à café dedans et versez vos yaourts pour les laisser égoutter 4 heures au réfrigérateur.
Bienfaits du yaourt grec
Quels sont les bienfaits du yaourt grec pour la santé ? Il contient une grande quantité de nutriments, de protéines et a une plus faible teneur en sucres, ainsi qu’un taux de sodium plus faible que le yogourt traditionnel.
D’un point de vue nutritionnel, il se distingue donc peu de la version améliorée proposée par l’industrie alimentaire.
Yaourt grec protéine
Le yaourt grec est plus riche en protéines qu’un yaourt classique (il en contient deux fois plus environ). Du fait de sa forte teneur en protéines, le yaourt grec a un effet rassasiant intéressant.
Yaourt grec calorie
100 grammes de yaourt à la grec contiennent 120 kcal.
Le yaourt grec au lait de vache est moins calorique que celui fabriqué avec du lait de brebis.

Tous les secrets du yaourt grec !


