Anaconda — среда разработки python
Содержание:
- Anaconda (pkgs/main channel)
- Recovering your Anaconda installation
- Available packages
- Установка
- MRO — Microsoft R Open (pkgs/mro channel)
- Как возникла Anaconda?
- Простая установка
- Using 32- and 64-bit libraries and CONDA_FORCE_32BIT
- Indexes of commercial packages (pkgs/pro channel)
- Anaconda (pkgs/free channel)
- Upload to Anaconda Cloud
- Install NLTK
- Your first Python program: Hello, Anaconda!
- JupyterLab
- App entry in meta.yaml
- Navigator ignores the “Ok, and don’t show again” option on the help Anaconda improve pop up
- Using conda packages
- Archive channel (pkgs/archive channel)
- Software requirements
- App entry in meta.yaml
Anaconda (pkgs/main channel)
Added Sept 26, 2017 with the release of Anaconda 5.0 and conda 4.3.27, and includes packages built by Anaconda, Inc. with the new compiler stack. The majority of all new Anaconda, Inc. package builds are hosted here. Included in conda’s defaults channel as the top priority channel.
Of interest: https://www.anaconda.com/blog/developer-blog/utilizing-the-new-compilers-in-anaconda-distribution-5/
-
Linux x86_64 (64-bit)
main/linux-64
(major support) -
Linux x86 (32-bit)
main/linux-32 -
Linux ppc64le (64-bit)
main/linux-ppc64le
(major support) -
MacOSX x86_64 (64-bit)
main/osx-64
(major support) -
Windows x86_64 (64-bit)
main/win-64
(major support) -
Windows x86 (32-bit)
main/win-32
(major support) -
platform agnostic (noarch)
main/noarch
Recovering your Anaconda installation
If your Anaconda installation is in a state where normal conda commands
are not functioning, use the following steps to repair Anaconda and
preserve your installed packages and environments.
Step 1
Download a new installer, then follow
the instructions for your system Windows, macOS, or Linux.
Note
Use the actual path, filename, and directory name for your installation.
Windows
Change your original installer’s name so you do not overwrite it:
Run the Anaconda.exe installer as usual and use robocopy to sync the
directories:
robocopy Anaconda_old Anaconda S
rd s Anaconda_old
macOS
Change your original installer’s name so you do not overwrite it:
Install to same directory as your original installer:
bash Anaconda3-4.0.-MacOSX-x86_64.sh
rsync -a anaconda_orig anaconda
rm -rf anaconda_orig
Linux
Change your original installer’s name so you do not overwrite it:
Install to same directory as your original installer:
bash Anaconda3-4.0.-Linux-x86_64.sh
rsync -a anaconda_orig anaconda
Available packages
TensorFlow
TensorFlow is a general machine learning library, but most popular for deep
learning applications. There are three supported variants of the
package in Anaconda, one of which is the NVIDIA GPU version. This is selected by
installing the meta-package :
conda install tensorflow-gpu
Other packages such as Keras depend on the generic package name
and will use whatever version of TensorFlow is installed. This makes it easy to
switch between variants in an environment.
PyTorch
PyTorch is another machine learning library with a deep learning focus. PyTorch
detects GPU availability at run-time, so the user does not need to install a
different package for GPU support.
conda install pytorch
Caffe was one of the first popular deep learning libraries.
conda install caffe-gpu
Chainer/CuPy (Linux only)
Chainer is a deep learning library that uses NumPy or CuPy for computations.
conda install chainer
Chainer’s companion project CuPy is a GPU-accelerated clone of the NumPy API
that can be used as a drop-in replacement for NumPy with a few changes to user
code. When CuPy is installed, Chainer is GPU-accelerated. CuPy can also be used
on its own for general array computation.
conda install cupy
XGBoost
XGBoost is a machine learning library that implements gradient-boosted decision
trees. Training several forms of trees is GPU-accelerated.
conda install py-xgboost-gpu
MXNet
MXNet is a machine learning library supported by various industry partners, most
notably Amazon. Like TensorFlow, it comes in three variants, with the GPU
variant selected by the meta-package.
conda install mxnet-gpu
Установка
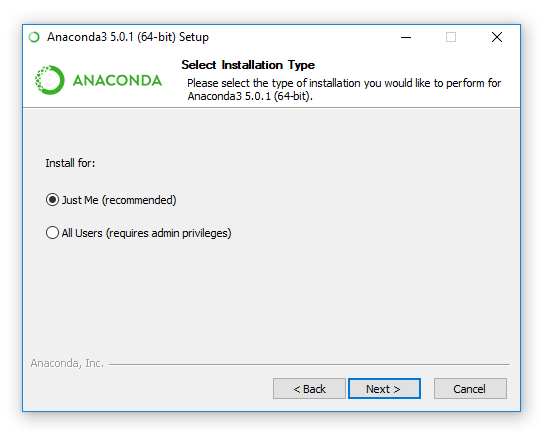
Запустите скачанный файл. Откроется окно установщика. На первых двух страницах сразу кликайте «Next». Далее можно выбрать, установить Anaconda только для текущего пользователя компьютера, или для всех.
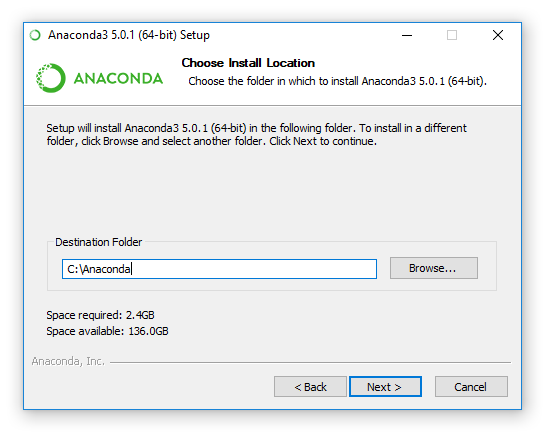
Важно! В следующем окне нужно указать путь, по которому будет установлена Anaconda. Выбирайте путь, который не содержит папок с пробелами в названии (например, ) и не содержит не английских символов юникода (например, русских букв)!. Игнорирование этих правил может привести к проблемам при работе с разными модулями!
Игнорирование этих правил может привести к проблемам при работе с разными модулями!
Лично я создал папку Anaconda прямо в корне диска C и указал следующий путь:
На последнем окне будут две галочки. Оставьте все, как есть.
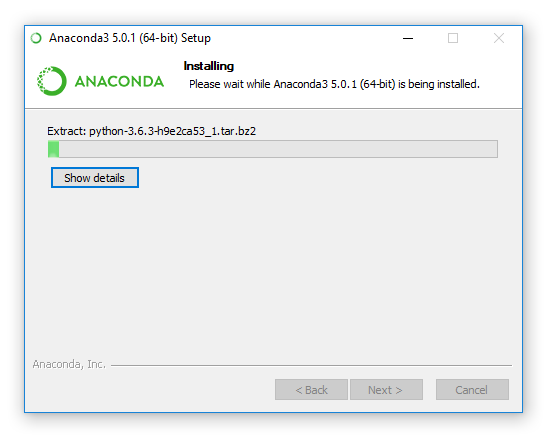
Наконец, начнется установка. Она может занять ~10 минут. Можете спокойно выпить чаю
MRO — Microsoft R Open (pkgs/mro channel)
As of Dec. 19, 2017, this is an empty channel. Packages in this channel have been moved to pkgs/mro-archive. New MRO packages are in the pkgs/r channel.
-
Linux x86_64 (64-bit)
mro/linux-64
(major support) -
Linux x86 (32-bit)
mro/linux-32 -
Linux armv6l (32-bit)
mro/linux-armv6l -
Linux armv7l (32-bit)
mro/linux-armv7l -
Linux ppc64le (64-bit)
mro/linux-ppc64le
(major support) -
MacOSX x86_64 (64-bit)
mro/osx-64
(major support) -
MacOSX x86 (32-bit)
mro/osx-32 -
Windows x86_64 (64-bit)
mro/win-64
(major support) -
Windows x86 (32-bit)
mro/win-32
(major support) -
platform agnostic (noarch)
mro/noarch
Как возникла Anaconda?
Conda написан на чистом Python, что облегчает его использование в виртуальных средах Python. Кроме того, Conda подходит для библиотек С, пакетов R, Java и т.д.
Он устанавливает двоичные системы. Инструмент создает пакеты из исходного кода, а выполняет установку из пакетов сборки Conda.
Conda является менеджером пакетов для Anaconda — дистрибутива Python, предоставляемого Continuum Analytics. Емкое описание Anaconda следующее:
Anaconda — это набор бинарных систем, включающий в себя Scipy, Numpy, Pandas и их зависимости.
Scipy — это пакет статистического анализа.
Numpy — это пакет числовых вычислений.
Pandas — уровень абстракции данных для объединения и преобразования данных.
Anaconda полезна тем, что объединяет все это в единую систему.
Двоичная система Anaconda — это установщик, который собирает все пакеты с зависимостями внутри вашей системы.
Простая установка
Установка файлов иногда превращается в сущий ад. Но Anaconda куда проще, чем кажется. Я предпочитаю Ubuntu, поскольку здесь установка зависит от выполнения пары команд и хорошего сетевого подключения. Поэтому все становится еще проще. Вот дальнейшие шаги для установки Anaconda.
(Данный процесс подойдет только для 64-битных компьютеров).
Using 32- and 64-bit libraries and CONDA_FORCE_32BIT
To work with both 32- and 64-bit libraries, we recommend that you have
two separate installs: Anaconda32 and Anaconda64 or Miniconda32 and Miniconda64.
When working with both versions, add the path to your installer files to the PATH.
Note
Always specify which version you want to work with because mixing 32- and 64-bit
packages can cause problems in your environment.
To get the information about conda including your PATH, run:
Using is not recommended because it forces 32-bit packages to
be installed in the environment, but does not force 32-bit libraries to load at
runtime.
should be used only when running conda-build to build 32-bit
packages on a 64-bit system.
Indexes of commercial packages (pkgs/pro channel)
Now deprecated—though still included in conda’s defaults channel. Last package updated Feb. 2017. Includes Anaconda, Inc.’s individual commercial packages, all of which are now open source. (MKL Optimizations, IOPro, Accelerate)
-
Linux x86_64 (64-bit)
pro/linux-64
(major support) -
Linux x86 (32-bit)
pro/linux-32 -
Linux armv6l (32-bit)
pro/linux-armv6l -
Linux armv7l (32-bit)
pro/linux-armv7l -
Linux ppc64le (64-bit)
pro/linux-ppc64le
(major support) -
MacOSX x86_64 (64-bit)
pro/osx-64
(major support) -
MacOSX x86 (32-bit)
pro/osx-32 -
Windows x86_64 (64-bit)
pro/win-64
(major support) -
Windows x86 (32-bit)
pro/win-32
(major support) -
platform agnostic (noarch)
pro/noarch
Anaconda (pkgs/free channel)
Packages built without the new compiler stack. Includes packages built as far back as Fall 2012. The majority of these packages are compatible with the packages in pkgs/main. Included in conda’s defaults channel.
-
Linux x86_64 (64-bit)
free/linux-64
(major support) -
Linux x86 (32-bit)
free/linux-32 -
Linux armv6l (32-bit)
free/linux-armv6l -
Linux armv7l (32-bit)
free/linux-armv7l -
Linux ppc64le (64-bit)
free/linux-ppc64le
(major support) -
MacOSX x86_64 (64-bit)
free/osx-64
(major support) -
MacOSX x86 (32-bit)
free/osx-32 -
Windows x86_64 (64-bit)
free/win-64
(major support) -
Windows x86 (32-bit)
free/win-32
(major support) -
platform agnostic (noarch)
free/noarch
Upload to Anaconda Cloud
Now you can upload the new local packages to Anaconda Cloud.
First, log in to Anaconda Cloud from your terminal:
You will be asked for your Anaconda Cloud account name and password.
If the login was successful you will see output like the following:
Note
This step must be done in the root conda environment.
Now that you are logged into your channel, you can upload the JupyterLab conda
package as follows:
Windows users:
Linux and macOS users:
Note
Change your username, path, and filename to the exact username, path, and filename you saved in Step 2.
These will vary depending on your installation and operating system.
Install NLTK
If you have permission to install packages with you can install NLTK as a conda package.
acluster conda install nltk
You should see output similar to this from each node, which indicates that the package was successfully installed across the cluster:
Node "ip-10-140-235-89.ec2.internal":
    Successful actions: 1/1
Node "ip-10-154-10-144.ec2.internal":
    Successful actions: 1/1
Node "ip-10-31-96-152.ec2.internal":
    Successful actions: 1/1
In order to use the full NLTK library, you will need to download the data for the NLTK project.
You can download the data on all cluster nodes by using the command.
acluster cmd 'sudo /opt/anaconda/bin/python -m nltk.downloader -d /usr/share/nltk_data all'
After a few minutes you should see output similar to this.
Your first Python program: Hello, Anaconda!
Use Anaconda Navigator to launch an application. Then, create and run
a simple Python program with Spyder and Jupyter Notebook.
Choose the instructions for your operating system.
- .
- .
- .
Windows
From the Start menu, click the Anaconda Navigator desktop app.
macOS
Open Launchpad, then click the Anaconda Navigator icon.
Linux
Open a terminal window and type .
Run Python in Spyder IDE (integrated development environment)
Tip
Navigator’s Home screen displays several applications for you to
choose from. For more information, see links at the bottom of this page.
-
On Navigator’s Home tab, in the Applications pane on the right, scroll
to the Spyder tile and click the Install button to install Spyder.Note
If you already have Spyder installed, you can jump right to the
Launch step. -
Launch Spyder by clicking Spyder’s Launch button.
-
In the new file on the left, delete any placeholder text, then type or
copy/paste . -
In the top menu, click File — Save As and name your new program
. -
Run your new program by clicking the triangle Run button.
-
You can see your program’s output in the bottom right Console pane.
Run Python in a Jupyter Notebook
-
On Navigator’s Home tab, in the Applications pane on the right, scroll
to the Jupyter Notebook tile and click the Install button to install Jupyter
Notebook.Note
If you already have Jupyter Notebook installed, you can jump right to
the Launch step. -
Launch Jupyter Notebook by clicking Jupyter Notebook’s Launch button.
This will launch a new browser window (or a new tab) showing the
. -
On the top of the right hand side, there is a dropdown menu labeled “New”.
Create a new Notebook with the Python version you installed. -
Rename your Notebook. Either click on the current name and edit it or
find rename under File in the top menu bar.
You can name it to whatever you’d like, but for this example we’ll use
MyFirstAnacondaNotebook. -
In the first line of the Notebook, type or copy/paste
. -
Save your Notebook by either clicking the save and checkpoint
icon or select File — Save and Checkpoint in the top menu. -
Run your new program by clicking the Run button or selecting
Cell — Run All from the top menu.
Close Jupyter Notebook
- From Jupyter Notebooks top menu bar, select File — Close and Halt.
- Click the Quit button at the upper right of the Notebook Dashboard
and close the window or tab.
JupyterLab
В разделе навигатора «Home» запустите (кнопка «Launch») программу «jupyterlab» (самая первая в списке).
У вас должен открыться браузер по умолчанию со средой JupyterLab в отдельной вкладке.

Слева отображается содержимое папки .
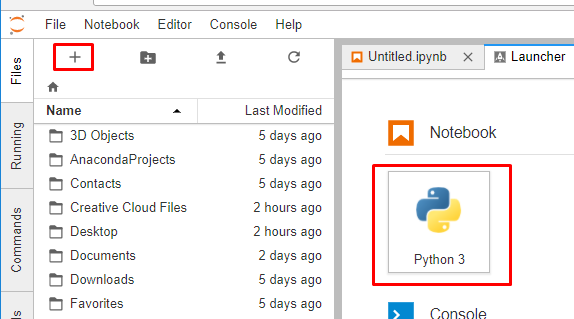
Справа открыт файл блокнота «untitled.ipynb». Если справа ничего нет, то вы можете создать новый пустой блокнот, нажав на «+» в левом верхнем углу и выбрав «Notebook Python 3»:
Блокнот
Самое время разобраться с тем, что из себя представляют блокноты.
Обычно мы пишем Python код в файлах с расширением , а затем интерпретатор Python их выполняет и выводит данные в консоль. Для удобной работы с такими файлами часто используют среды программирования (IDE). К их числу относится и PyCharm, о котором я рассказывал в статье Установка Python и PyCharm.
Но есть и другой подход. Он заключается в создании блокнотов (notebook) с расширением . Блокноты состоят из большого количества блоков. Есть блоки с простым текстом, а есть блоки с кодом на Python.
Попробуйте ввести в первый блок в блокноте какой-нибудь Python код. Например, я создаю переменную, равную сумме чисел 3 и 2:

На следующей строке мы просто пишем название этой переменной. Зачем? Сейчас увидите.
Теперь нужно выполнить этот блок. Для этого нажмите на значок треугольника в панели инструментов над блокнотом или комбинацию клавиш Ctrl + Enter:

Под блоком с Python кодом появился еще один блок, который содержит вывод результатов выполнения предыдущего блока. Сейчас вывод содержит число 5. Это число выводит как раз вторая строчка написанного нами блока.
В обычных средах программирования для достижения такого эффекта нам пришлось бы писать , а тут вызов этой функции можно опустить и просто написать название переменной, которую мы хотим вывести.
Но выводить значения (числа и текст) переменных (пусть и через функцию) можно и в других средах программирования.
Попробуем сделать что-нибудь посложнее. Например, вывести какую-нибудь картинку.
Создайте новый блок с помощью кнопки в панели инструментов над блокнотом.
В это блоке мы закачиваем логотип Anaconda из сайта Wikimedia и выводим его:
from PIL import Image
import requests

image_url = "https://upload.wikimedia.org/wikipedia/en/c/cd/Anaconda_Logo.png"

im = Image.open(requests.get(image_url, stream=True).raw)
im
Результат будет выглядеть так:
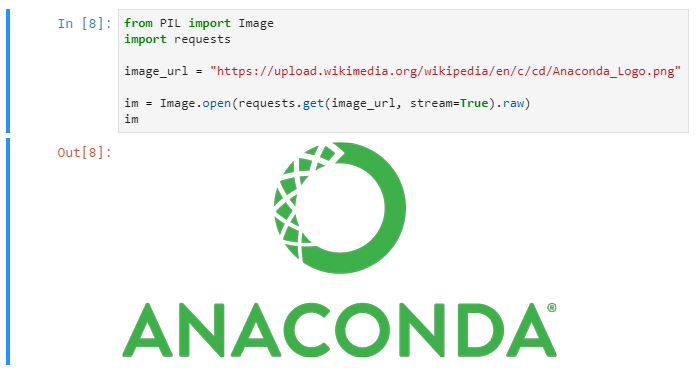
Вот на такое обычные среды разработки не способны. А в JupyterLab — запросто!
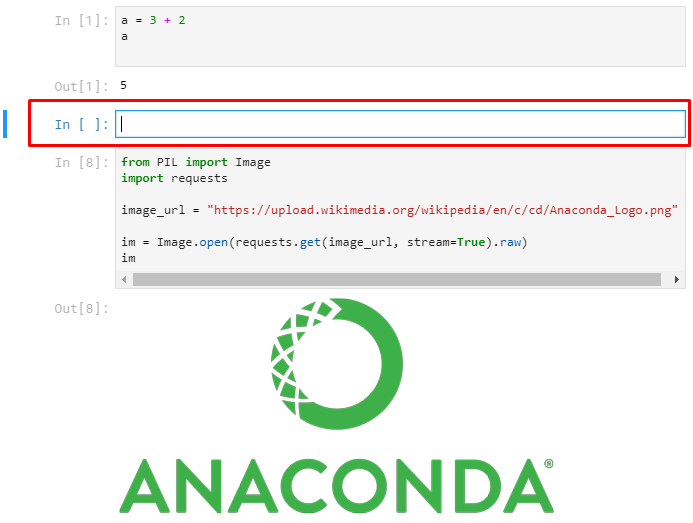
Теперь давайте попробуем добавить блок с обычным текстом между двумя уже созданными блоками с Python кодом. Для этого щелчком выделите первый блок и добавьте новый блок через кнопку в панели инструментов. Новый блок будет вставлен сразу за первым блоком.
Если вы все сделали правильно, то результат будет выглядеть так:
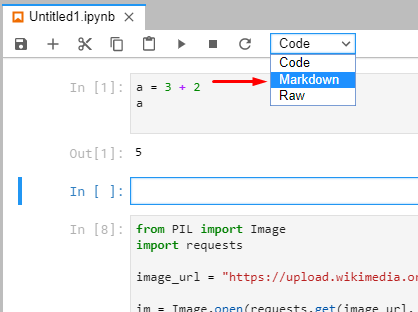
По умолчанию блоки в JupyterLab предназначены для кода на Python. Для того, чтобы превратить их в текстовые блоки, нужно сменить их тип через панель инструментов. В самом конце панели откройте список и выберите пункт «Markdown»:
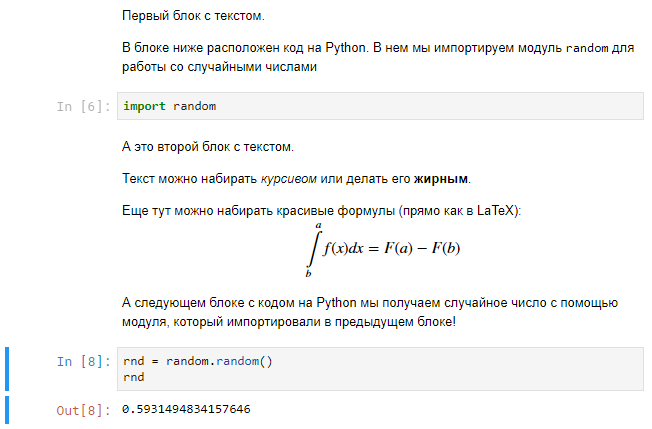
Выделенный блок превратится в блок текста. Набранный текст можно оформить курсивом или сделать его жирным. Больше информации по Markdown (средства оформления текста) вы найдете справочной странице.
Вот так можно оформлять текстовые блоки блокнота:
Экспорт
Иногда нужно поделиться блокнотом с другими людьми. Есть несколько способов сделать это.
В JupyterLab можно экспортировать блокнот в самые разные форматы. Для этого в самом верху среды выберите вкладку «Notebook». В открывшемся меню выберите пункт «Export to…» и выберите формат (например, PDF), в который вы хотите преобразовать ваш блокнот.

Еще вы можете загрузить ваш блокнот в Github Gists и поделиться ссылкой на созданный gist. Github умеет красиво отображать и выполнять код в блокнотах, так что это один из самых простых способов делиться ими.
Вот ссылка на gist с блокнотом из этой статьи.

App entry in meta.yaml
To declare a conda package as an app, the app parameter must be added to
to the meta.yaml file. The app section will contain three keys: entry,
summary, and type. In the case of the JupyterLab recipe, replace the
app section in the meta.yaml with the values below.
In the app section, the entry tag defines how the package is to be
launched by Anaconda Navigator. For JupyterLab, separate entry tags
are required for Windows, macOS, and Linux operating systems.
In your text editor, open the meta.yaml file and add the following lines.
On Windows and Linux the entry tag is:
app
 entry jupyterlab .                                 win

 entry jupyterlab .                                 linux
Launch script
For macOS, a launch script must also be provided. In a text editor, create
a new file in the conda-build recipe directory called jupyterlab_mac.command. The contents of this file are:
DIR=$(dirname $0)
$DIR/jupyter-lab ${HOME}
Build.sh script
To make sure that the file gets installed, create a new file in the same directory
as the meta.yaml. Title it build.sh and add these lines to the build.sh script:
$PYTHON  -m pip install . --no-deps --ignore-installed -vv
if

then
    cp $RECIPE_DIR/jupyterlab_mac.command $PREFIX/bin

fi
Remove the script key under the build section in the meta.yaml.
Build.bat
Create a new file called build.bat. Include the following:
%PYTHON% -m pip install . --no-deps --ignore-installed -vv
After starting Navigator, a pop up appears asking if you’d like to provide anonymized usage information
to Anaconda. If you select “Okay, and don’t show again” and the pop up appears again the next
time you start Navigator, it may be due to a privilege conflict.
Specifically, this can occur when Navigator was installed by a user with Administrator
privileges, but you are using it as a regular user without the Administrator privileges.
The pop up continues to appear because you do not have permission to change the pop
up box setting.
To resolve this, switch to using an account with Administrator privileges and
select the “Ok, and don’t show again” option in the pop up box. This will apply
to all user accounts.
Using conda packages
How can I configure or opt out of the Intel Math Kernel Library (MKL)?
For information on configuring and uninstalling MKL, see the
Anaconda MKL documentation.
How can I use TKinter?
Make sure the conda package is installed:
conda list tk
If it is not installed, run:
conda install tk
Python programs can use TKinter with on Python 2 or
on Python 3.
How can I use Cython on macOS?
Cython needs a C compiler, so you need to install Xcode.
How can I use Theano?
Theano requires gcc for acceleration.
To install Theano with acceleration:
- On Windows, run .
- On Linux and macOS run .
Note
Theano is available from the default Anaconda channels for Windows,
macOS, and Linux with the command .
How can I use GPUs with Anaconda?
Archive channel (pkgs/archive channel)
Sometimes a package that is released onto one of the other channels has an issue that forces Anaconda, Inc. to remove it from the channel. In these cases, the package is archived to this channel for anyone who still needs it.
-
Linux x86_64 (64-bit)
archive/linux-64
(major support) -
Linux x86 (32-bit)
archive/linux-32 -
Linux armv6l (32-bit)
archive/linux-armv6l -
Linux armv7l (32-bit)
archive/linux-armv7l -
Linux ppc64le (64-bit)
archive/linux-ppc64le
(major support) -
MacOSX x86_64 (64-bit)
archive/osx-64
(major support) -
MacOSX x86 (32-bit)
archive/osx-32 -
Windows x86_64 (64-bit)
archive/win-64
(major support) -
Windows x86 (32-bit)
archive/win-32
(major support) -
platform agnostic (noarch)
archive/noarch
Software requirements
The best performance and user experience for CUDA is on Linux systems.
Windows is also supported. No Apple computers have been released with an NVIDIA
GPU since 2014, so they generally lack the memory for machine learning
applications and only have support for Numba on the GPU.
Anaconda requires that the user has installed a recent NVIDIA driver that meets
the version requirements in the table below. Anaconda does not require the
installation of the CUDA SDK.
Ubuntu and some other Linux distributions ship with a third party open-source
driver for NVIDIA GPUs called Nouveau. CUDA requires replacing the Nouveau
driver with the official closed source NVIDIA driver.
All other CUDA libraries are supplied as conda packages.
GPU-enabled packages are built against a specific version of CUDA. Currently
supported versions include CUDA 8, 9.0 and 9.2. The NVIDIA drivers are designed
to be backward compatible to older CUDA versions, so a system with NVIDIA driver
version 384.81 can support CUDA 9.0 packages and earlier. As a result, if a user
is not using the latest NVIDIA driver, they may need to manually pick a
particular CUDA version by selecting the version of the conda
package in their environment. To select a version, add a
selector such as to the version specification.
Required NVIDIA driver versions, excerpted from the NVIDIA CUDA Toolkit Release
Notes:
| CUDA Version | Linux x86_64 Driver Version | Windows x86_64 Driver Version |
|---|---|---|
| CUDA 8.0 (8.0.61 GA2) | >= 375.26 | >= 376.51 |
| CUDA 9.0 (9.0.76) | >= 384.81 | >= 385.54 |
| CUDA 9.2 (9.2.88) | >= 396.26 | >= 397.44 |
| CUDA 9.2 (9.2.148 Update 1) | >= 396.37 | >= 398.26 |
App entry in meta.yaml
To declare a conda package as an app, the app parameter must be added to
to the meta.yaml file. The app section will contain three keys: entry,
summary, and type. In the case of the JupyterLab recipe, replace the
app section in the meta.yaml with the values below.
In the app section, the entry tag defines how the package is to be
launched by Anaconda Navigator. For JupyterLab, separate entry tags
are required for Windows, macOS, and Linux operating systems.
In your text editor, open the meta.yaml file and add the following lines.
On Windows and Linux the entry tag is:
app
 entry jupyterlab .                                 win

 entry jupyterlab .                                 linux
Launch script
For macOS, a launch script must also be provided. In a text editor, create
a new file in the conda-build recipe directory called jupyterlab_mac.command. The contents of this file are:
DIR=$(dirname $0)
$DIR/jupyter-lab ${HOME}
Build.sh script
To make sure that the file gets installed, create a new file in the same directory
as the meta.yaml. Title it build.sh and add these lines to the build.sh script:
$PYTHON  -m pip install . --no-deps --ignore-installed -vv
if

then
    cp $RECIPE_DIR/jupyterlab_mac.command $PREFIX/bin

fi
Remove the script key under the build section in the meta.yaml.
Build.bat
Create a new file called build.bat. Include the following:
%PYTHON% -m pip install . --no-deps --ignore-installed -vv


